
Assembling a Computerized Telescope Mount: Step-by-Step Guide
Category: Astrophotography
Mastering the Art of Assembling Your Computerized Telescope Mount
For astronomy enthusiasts, amateur astronomers, and space engineering hobbyists, assembling a computerized telescope mount is a rewarding yet challenging endeavor. If you’ve landed on this guide, it’s likely because you’re eager to elevate your stargazing or astrophotography experience but feel overwhelmed by the technical intricacies and want clear, practical guidance. Perhaps you’ve struggled with complex assembly instructions, calibration frustrations, or uncertain component compatibility. This comprehensive post is designed with your expertise in mind — whether you’re a seasoned hobbyist or a learner stepping up your astrophotography game. We’ll walk you through each critical step: from understanding mount types and essential tools to assembling mechanical parts, wiring electronics, integrating firmware, and performing precise calibration. Unlike scattered online tips or overly technical manuals, this article offers a clear, structured roadmap, focusing on practical insights and troubleshooting tips that save time and reduce guesswork. By the end, you’ll be equipped to confidently build and optimize a computerized telescope mount that enables smooth automated tracking and superior celestial imaging. Read on to transform your telescope mount assembly from a daunting task into an enjoyable, empowering project.
- Mastering the Art of Assembling Your Computerized Telescope Mount
- Understanding Computerized Telescope Mounts: Types, Components, and Benefits
- Essential Tools and Materials Needed for Assembly
- Step-by-Step Mechanical Assembly of the Mount Structure
- Wiring and Electronics Integration
- Installing and Configuring the Control Software and Firmware
- Calibration and Polar Alignment Procedures for Accuracy
- Testing Mount Functionality and Troubleshooting Common Issues
- Advanced Tips for Optimizing Tracking and Astrophotography Results
- Maintenance and Upgrading Your Telescope Mount
- Resources and Communities for Support and Further Learning
Understanding Computerized Telescope Mounts: Types, Components, and Benefits
Before diving into the assembly process, it’s crucial to understand the types of computerized telescope mounts and their core components, as well as how these elements enhance your observing and astrophotography experience. The two primary types of mounts used in computerized telescope setups are equatorial mounts and alt-azimuth mounts.
-
Equatorial Mounts: Designed to align with the Earth's rotation axis, equatorial mounts allow the telescope to track celestial objects using a single axis of motion. This precise tracking is essential for long-exposure astrophotography and observing objects that move slowly across the night sky. Computerized equatorial mounts often feature stepper motors or servo motors, coupled with high-resolution encoders that provide accurate position feedback to the control system.
-
Alt-Azimuth (Alt-Az) Mounts: These mounts move along two perpendicular axes—altitude (up and down) and azimuth (left and right). They are mechanically simpler and easier to set up, making them popular for visual astronomy and beginner setups. When computerized, alt-az mounts use similar motor and encoder systems but typically require software algorithms to compensate for field rotation during astrophotography.
Core Components of a Computerized Telescope Mount
To build a functional computerized mount, understanding its essential components is vital:
- Motors: Responsible for smooth and accurate movement along the mount’s axes. Common types include stepper motors and brushless DC motors, each providing precise incremental control for tracking and slewing.
- Encoders: Devices that detect the angular position of the telescope’s moving parts and send feedback to the control board. They improve tracking accuracy by correcting for mechanical backlash and alignment errors.
- Control Boards: The "brain" of the mount, these electronics process input from encoders and user commands to drive motors accordingly. Advanced control boards also integrate GPS modules, databases of celestial objects, and support various autoguiding protocols to automate tracking.
- Power Supply: Stable and reliable power sources ensure uninterrupted operation during long imaging sessions.
Why Choose a Computerized Mount?
The integration of computerized control elevates telescope performance beyond manual setups by offering several benefits critical for astronomy and astrophotography:
- Enhanced Tracking Accuracy: Computerized mounts can track objects continuously with high precision, compensating for Earth’s rotation and mechanical imperfections.
- Automated Object Alignment and GoTo Capability: Quickly locate and center thousands of celestial objects with minimal user input, maximizing observing time.
- Improved Astrophotography Results: Accurate tracking reduces star trailing in long exposures, enabling crisp images of planets, nebulae, and distant galaxies.
- Ease of Use and Repeatability: Once calibrated, computerized mounts retain alignment settings and can resume tracking the same objects night after night, appealing to both beginners and advanced users.
By grasping these essential types, components, and advantages, you’ll be prepared to assemble a mount that not only functions well mechanically but also harnesses the power of automation to unlock the full potential of your telescope system.

Image courtesy of Jeremy Müller
Essential Tools and Materials Needed for Assembly
Before you begin assembling your computerized telescope mount, it’s crucial to prepare all the necessary tools and materials to ensure a smooth and efficient build process. Having the right equipment at hand not only saves time but also helps maintain precision and prevents damage to delicate components. Below is a detailed checklist of essentials that every astronomy enthusiast and telescope builder should gather in advance.
Must-Have Tools for Assembly
- Precision Screwdrivers: A set of both flathead and Phillips screwdrivers in various small sizes is indispensable for fastening screws in motor mounts, control boards, and structural parts.
- Allen Wrenches (Hex Keys): Many mounts use hex screws, so having metric and imperial sizes will accommodate different hardware.
- Soldering Kit: For wiring motors, encoders, and connectors, a quality soldering iron with fine tips, solder wire, and desoldering tools are vital to achieve secure, reliable electrical connections.
- Wire Strippers and Cutters: Efficient stripping and cutting tools ensure clean cable ends and help maintain signal integrity.
- Multimeter: To verify electrical continuity, check voltages, and troubleshoot wiring issues, a digital multimeter is essential.
- Calibration Equipment: Devices such as digital inclinometers or precision levels help accurately align the mount axes during setup, maximizing tracking accuracy.
- Tweezers and Small Pliers: Useful for handling tiny screws, connectors, and wires in tight spaces.
- Thread Locker (e.g., Loctite): To prevent screws from loosening due to vibration during telescope movement.
Essential Materials and Components
- High-Quality Cables and Connectors: Use shielded cables for motor and encoder wiring to minimize electromagnetic interference that can affect tracking performance. Connectors should be secure yet easy to disconnect for maintenance.
- Mounting Hardware: This includes screws, bolts, washers, spacers, and brackets necessary to assemble mechanical parts rigidly and align components precisely.
- Thermal and Electrical Insulation Materials: Heat shrink tubing and electrical tape protect wiring joints and prevent shorts.
- Power Supply and Battery Packs: Reliable DC power sources with appropriate voltage and current ratings to safely drive motors and electronics.
- Control Board and Firmware Packages: Ensure you have the correct control electronics that support your mount type along with updated firmware for smooth operation.
By gathering these essential tools and materials before starting your computerized telescope mount assembly, you set the stage for a hassle-free build experience. Well-prepared setups reduce the risk of errors, improve component longevity, and contribute to the high precision needed for excellent astronomical tracking and astrophotography results. Always refer to your specific mount’s manual to verify compatibility and any additional items required for your particular model.
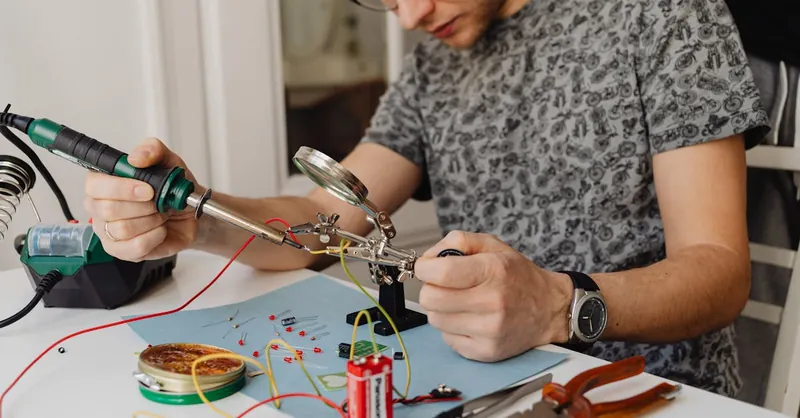
Image courtesy of Photo By: Kaboompics.com
Step-by-Step Mechanical Assembly of the Mount Structure
Assembling the mechanical framework of your computerized telescope mount is a critical phase that lays the foundation for precise tracking and stable astrophotography. This process involves carefully constructing the mount’s physical frame, securely housing the motors, and integrating balancing mechanisms to ensure smooth, vibration-free operation. Adhering to precision and stability best practices during assembly not only enhances the mount’s durability but also maximizes overall telescope performance.
Building the Mount’s Physical Frame
-
Start with the Base Plate and Tripod Attachment
The base plate serves as the foundation of your mount, anchoring the entire assembly. Secure the base plate firmly to your tripod or pier using heavy-duty bolts, ensuring a level surface to prevent tilt-induced tracking errors. Utilize a precision level to confirm the setup before proceeding. -
Assemble the Declination and Right Ascension Axes (Equatorial Mounts)
For equatorial mounts, connect the declination (DEC) and right ascension (RA) axes, aligning their bearings and shafts meticulously to minimize mechanical play. Use appropriate spacers and washers to reduce lateral movement, enabling smoother rotation essential for accurate celestial tracking. -
Mount Motor Housings to Each Axis
Position the motor housings onto the DEC and RA axes, ensuring the motor shafts align perfectly with the worm gears or drive wheels. Tighten mounting screws uniformly to prevent misalignment that could cause backlash or stalling during tracking.
Integrating Balancing Mechanisms
Proper balancing is paramount to reducing strain on motors and achieving smooth, jitter-free movement:
-
Install the Counterweights on the RA Axis Shaft
Attach counterweights incrementally, adjusting their position to counterbalance the telescope’s weight effectively. A well-balanced mount prevents motor overload and improves tracking precision. -
Secure the Telescope Mounting Plate
Fix the mounting plate onto the DEC axis with precise alignment so the telescope’s optical tube assembly (OTA) sits centered and balanced. Use adjustable brackets if available to fine-tune balance after the OTA is installed.
Tips for Precision and Stability During Assembly
- Use Thread Locker on Critical Fasteners: Apply a medium-strength thread locker on screws and bolts subjected to continuous motion or vibration to prevent loosening.
- Check Bearing Tightness and Lubrication: Bearings should rotate smoothly without excessive play. Apply appropriate lubricant designed for precision instrument bearings to extend lifespan and reduce noise.
- Ensure Orthogonality of Axes: Confirm that the RA and DEC axes are perpendicular to avoid tracking errors caused by angular misalignment.
- Test Movement Smoothness Manually: After assembly, rotate each axis by hand to check for friction, stiffness, or uneven resistance. Address any issues immediately before installing electronics.
By focusing on these detailed mechanical assembly steps, you create a rock-solid foundation that significantly enhances your computerized telescope mount's accuracy and longevity. Building a mount structure with attention to alignment and balance directly contributes to flawless automated tracking and breathtaking astrophotography outcomes.
Image courtesy of Pixabay
Wiring and Electronics Integration
Integrating the wiring and electronics into your computerized telescope mount is a crucial step that directly impacts the mount’s tracking accuracy and overall system reliability. Proper cabling of motors, encoders, power supplies, and control boards ensures smooth communication between components, minimizes electrical noise, and prevents malfunctions that could disrupt your stargazing or astrophotography sessions.
Connecting Motors, Encoders, and Control Boards
-
Motor Wiring
Connect stepper or servo motors to the control board using shielded, twisted-pair cables to reduce electromagnetic interference (EMI). Ensure that cable lengths are as short as possible without tension to maintain signal integrity and avoid motor lag or stutter during tracking. Match polarity carefully according to motor specifications to prevent damage. -
Encoder Integration
High-resolution encoders provide position feedback critical for precise tracking. Connect encoder outputs to dedicated inputs on the control board, typically involving digital quadrature signals. Use shielded cables and ground the shields properly to prevent noise pickup from motors or nearby electronics. -
Control Board Connections
The control board serves as the system’s command center. Securely attach all motor, encoder, power, and auxiliary device cables to their corresponding ports. Double-check pin assignments and configuration jumpers before powering the system to avoid short circuits or incorrect data flow.
Power Supply Configuration and Cable Management
A stable and clean power source is essential for consistent mount operation:
- Use regulated DC power supplies matching your motors and electronics voltage requirements, often 12V or 24V DC.
- Employ ferrite beads or noise filters on power lines to suppress voltage spikes and RF interference.
- Incorporate a dedicated ground line for all components to avoid ground loops, which can introduce tracking errors.
Effective cable management plays a vital role in protecting your electronics and maintaining system longevity:
- Bundle cables neatly using cable ties or Velcro straps, leaving enough slack to accommodate mount movement without strain.
- Route motor and encoder cables separately from power lines to reduce the risk of induced noise.
- Avoid sharp bends or tight loops that can damage cable shielding or internal conductors over time.
- Label cables clearly for easier troubleshooting and maintenance during future upgrades or repairs.
By carefully wiring and integrating your telescope mount's electronics with an emphasis on shielding, grounding, and organization, you enhance signal fidelity and electrical stability. This foundation is key to achieving precise automated tracking, seamless communication between components, and ultimately, stunning astrophotography results free from jitter or interruption.
Image courtesy of Mikhail Nilov
Installing and Configuring the Control Software and Firmware
After assembling the mechanical and electronic components of your computerized telescope mount, the next crucial step is installing and configuring the control software and firmware. This phase enables precise communication between your hardware and the user interface, allowing seamless automated tracking, GoTo object locating, and astrophotography synchronization. Selecting the right software, setting up correct connection protocols, performing initial configurations, and keeping firmware up to date are essential for optimal mount performance.
Choosing the Right Control Software and Firmware
Selecting suitable control software depends largely on your mount type, user expertise, and desired features:
- ASCOM Platform: Highly recommended for Windows users, ASCOM (Astronomy Common Object Model) provides standardized drivers that interface with many commercial and DIY mounts. Its vast compatibility with planetarium programs like Stellarium or Cartes du Ciel offers flexible GoTo control and autoguiding capabilities.
- INDI Framework: For Linux and macOS enthusiasts, INDI (Instrumentation Neutral Distributed Interface) provides an open-source alternative with broad device support and modular control suited to advanced setups.
- Custom Firmware: Many DIY and open-source mounts require custom firmware—such as those based on Arduino, Teensy, or Raspberry Pi microcontrollers. These can be tailored for specific motor drivers, encoders, and positional feedback systems, often offering unique features but requiring more technical know-how.
Connection Protocols and Initial Configuration
Proper setting of the communication protocols between your mount’s control board and the computer or hand controller is key to latency-free, accurate operation:
- USB, Serial, or Ethernet Interfaces: Most modern control boards support USB or serial (RS-232) connections. Confirm the correct COM port in your computer’s device manager and configure appropriate baud rates (usually 9600, 115200, or as specified by your controller).
- Wi-Fi or TCP/IP: Some advanced mounts support wireless control via Wi-Fi, enabling remote operation. Configuring network parameters and ensuring reliable, low-latency connections are critical for astrophotography sessions.
- Initial Alignment Process: Use the software’s star alignment routines—usually a two- or three-star alignment—to calibrate the mount’s tracking. Accurate input of your geographic location, date, and time is essential to ensure software’s celestial database matches real sky positions.
Firmware Updating and Performance Optimization
Keeping your mount’s firmware updated guarantees access to the latest features, bug fixes, and performance enhancements:
- Check Manufacturer or Open-Source Repositories regularly for firmware updates tailored to your specific control board and motor drivers.
- Use official flashing tools or integrated update utilities within your control software to safely upload new firmware versions.
- After updating, recalibrate motors and encoders as changes may affect position calibration or motor control parameters.
- Optimize settings such as motor current limits, microstepping modes, and tracking rates through the control software interface to reduce mechanical strain, minimize noise, and enhance tracking accuracy.
By meticulously installing and configuring your telescope mount’s control software and firmware, you unlock its full potential—enabling precise automated tracking, convenient object searching, and stable long-exposure astrophotography. This integration acts as the vital link transforming your mechanical build into a powerful computerized astronomical instrument.
Image courtesy of Jason Villanueva
Calibration and Polar Alignment Procedures for Accuracy
Achieving precise calibration and polar alignment is fundamental for the optimal performance of your computerized telescope mount. These steps ensure that your mount’s axes are perfectly aligned with Earth’s rotation, allowing your telescope to track celestial objects with minimal drift and accurate positioning—both critical for successful long-exposure astrophotography and detailed astronomical observations.
Polar Alignment Techniques
For equatorial mounts, polar alignment involves aligning the mount’s right ascension axis accurately with the celestial pole (near Polaris in the Northern Hemisphere). Methods range from traditional to highly precise instrumental techniques:
- Drift Alignment: This visual method involves observing the drift of a star near the celestial equator and adjusting the mount accordingly to minimize movement. Although time-consuming, it is extremely accurate and widely used by astrophotographers aiming for perfect tracking.
- Polar Scope Alignment: Many mounts come with a built-in polar scope featuring reticles calibrated to Polaris’ position relative to the celestial pole. Using star charts adjusted for date and time, you position Polaris within the reticle for quick and reasonably accurate alignment.
- Software-Aided Alignment: Modern computerized mounts often support polar alignment routines integrated within the control software. By slewing to specific alignment stars and analyzing drift patterns automatically, the mount guides you through refinement steps for precise alignment.
Motor Calibration and Star Alignment Procedures
Following mechanical and polar setup, motor calibration ensures that the control system correctly translates tracking commands into precise motor movements:
-
Motor Calibration involves setting parameters such as steps per revolution, gear ratios, and microstepping modes within the firmware or control interface. This fine-tuning allows the mount to move the telescope accurately according to celestial coordinates.
-
Star Alignment Techniques typically include:
-
One-Star Alignment: A basic method for rough calibration, useful primarily for initial setup or visual astronomy.
- Two- or Three-Star Alignment: More precise, these processes improve the mount’s pointing model by calibrating it against multiple stars at different sky positions, compensating for mechanical imperfections and polar misalignment.
- Multi-Star Alignment: Advanced mounts and software can perform multi-star alignments (up to 10 or more stars), dramatically increasing accuracy for GoTo targeting and tracking.
Troubleshooting Common Alignment Issues
- Inconsistent Star Positioning: Verify your mount is firmly leveled and balanced; even small tilts disrupt alignment.
- Motor Stuttering During Tracking: Check motor calibration settings and ensure encoder feedback wires are securely connected with proper shielding to minimize signal noise.
- Drift After Alignment: Revisit polar alignment accuracy using refined drift alignment or software routines; mechanical backlash or loose couplings might also contribute.
- GoTo Target Offsets: Update the mount’s firmware and recalibrate star alignment; confirm geographic coordinates, date, and time are input correctly in the control software.
Meticulous execution of polar alignment, precise motor calibration, and rigorous star alignment procedures collectively transform your computerized telescope mount into a high-precision instrument capable of stable, accurate tracking and exquisite astrophotography imagery. Investing the time to master these calibration techniques dramatically enhances your celestial observing experience and reduces frustration during lengthy imaging sessions.
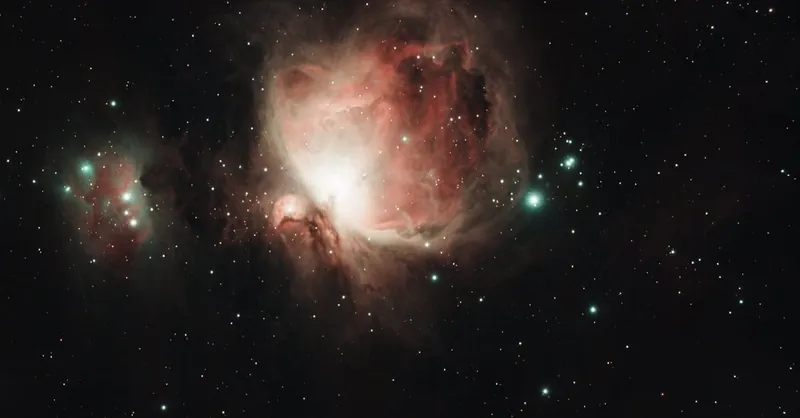
Image courtesy of Jeremy Müller
Testing Mount Functionality and Troubleshooting Common Issues
Once your computerized telescope mount is fully assembled and calibrated, conducting thorough functional tests is vital to ensure smooth operation and identify any issues early. Testing verifies motor responsiveness, encoder feedback accuracy, software communication, and mechanical stability, enabling you to address common problems that might otherwise degrade tracking performance or interrupt your astrophotography sessions.
Performing Functional Tests
Begin with simple manual and automated checks to confirm all subsystems operate as expected:
-
Manual Axis Movement Test
Gently move each axis (RA and DEC or Alt and Az) by hand to check for any mechanical resistance, binding, or unusual noise. Smooth, friction-free movement is critical for precise tracking. -
Motor Response and Direction Verification
Use your control software to send commands that jog the mount axes in both directions. Confirm that the mount responds promptly and moves the correct way—reversals often result from wiring errors or firmware configuration mismatches. -
Encoder Signal Validation
Monitor encoder outputs through diagnostic software or onboard control interfaces. Erratic or missing signals can cause tracking errors and may stem from loose or damaged cables, improper shielding, or encoder faults. -
GoTo and Tracking Accuracy Test
Perform a basic star alignment followed by slewing to a known bright star. Observe the mount’s ability to locate and track the star smoothly over several minutes without noticeable drift or stutter. Any tracking instability should trigger recalibration or physical inspection. -
Power Supply Stability Check
Verify consistent voltage delivery under load conditions. Voltage drops or spikes can disrupt motor control and cause intermittent failures.
Identifying and Resolving Common Assembly and Software Issues
Even with careful assembly and configuration, several issues can arise frequently during mount testing and early use. Addressing them effectively improves reliability and extends mount longevity:
-
Mechanical Backlash and Stiction
Symptoms include jerky axis movement or overshoot during tracking. Solutions involve adjusting gear mesh, lubricating bearings, and applying anti-backlash gears or spring tensioners where available. -
Incorrect Motor Direction or Wiring
If an axis moves opposite to commands, reverse the motor wiring or update the control software’s motor direction setting. Always consult both your hardware wiring diagrams and firmware documentation. -
Encoder Signal Noise or Dropouts
Use shielded, twisted-pair cables and ensure proper grounding to minimize electromagnetic interference. Replace damaged cables or connectors and verify encoder mounting rigidity. -
Firmware Bugs or Configuration Errors
Keep control board firmware updated to the latest stable release. Review configuration files and parameters—paying special attention to motor current limits, microstepping modes, and axis inversion settings—to avoid erratic behavior. -
Software Communication Failures
Check USB/serial port settings, baud rates, and cable integrity. Restart software and reconnect devices if communication drops; update drivers if issues persist. -
Power Issues
Use a regulated power supply matching voltage and current requirements. Employ surge protection and avoid running power cables near noisy device lines.
By instituting a structured testing routine and systematically troubleshooting common issues, you ensure your computerized telescope mount delivers smooth, precise tracking vital for astrophotography and amateur astronomy. Early detection and resolution of hardware or software glitches reduce frustration, prevent damage, and maximize the longevity and performance of your mount, enabling countless nights of rewarding celestial exploration.
Image courtesy of Sagar Soneji
Advanced Tips for Optimizing Tracking and Astrophotography Results
After assembling and calibrating your computerized telescope mount, fine-tuning its tracking accuracy and integrating autoguiding systems are essential steps to unlock its full astrophotography potential. Precision tracking minimizes star trailing during long exposures, while vibration reduction and autoguiding enable you to capture sharp, detailed images of faint celestial objects.
Fine-Tuning Tracking Accuracy
-
Adjust Motor Current and Microstepping Settings
Optimize motor current limits and microstepping modes in your control software or firmware to balance torque and smoothness. Higher microstepping reduces mechanical jitter, leading to finer incremental movements that cumulatively enhance tracking precision. -
Minimize Mechanical Backlash
Tightly adjust gear meshes, worm gears, and shaft couplings. Consider installing anti-backlash springs or employing software backlash compensation features if available. Reducing backlash prevents periodic tracking errors that degrade image sharpness. -
Refine Polar Alignment with Software-Assisted Drift Correction
Use advanced polar alignment tools embedded within control software that analyze periodic error through star drift measurements and provide corrective offsets, improving tracking stability beyond initial mechanical alignment.
Vibration Reduction Strategies
-
Reinforce Mount and Tripod Stability
Use heavy-duty tripods or fixed piers, and add vibration damping materials such as foam pads or rubber isolators beneath the mount to absorb environmental and motor-induced vibrations. -
Balance the OTA Meticulously
Imbalanced setups introduce oscillations during tracking. Adjust counterweights and mounting positions to achieve perfect balance in all axes, reducing motor strain and minimizing jitter. -
Cable Management
Secure cables to avoid tension or tugging on the telescope assembly during tracking. Loose cables can transmit vibrations or cause unwanted mechanical interference.
Integrating Autoguiding Systems for Long Exposure Imaging
To push your astrophotography capabilities further, integrating an autoguiding system is highly recommended:
-
Select a Compatible Autoguider Camera and Software
Choose sensitive CCD or CMOS autoguider cameras paired with software such as PHD2 Guiding or N.I.N.A that support your mount’s communication protocols. -
Mount the Autoguider Optics Correctly
Attach the autoguider either via an off-axis guider (OAG) or a dedicated guide scope rigidly mounted to your OTA to ensure consistent tracking of guide stars without flexure. -
Configure Autoguiding Parameters Carefully
Calibrate guide rates, pulse durations, and aggressiveness within the guiding software to fine-tune correction commands sent to the mount’s control board. Over-aggressive guiding can induce oscillations, while under-correction causes star trailing. -
Monitor Guiding Performance and Adjust as Needed
Regularly review guider error graphs and star roundness during exposures. Make incremental adjustments to improve guiding precision and eliminate residual drift or periodic error effects.
By applying these advanced optimization techniques, including motor tuning, vibration damping, and autoguiding integration, your computerized telescope mount will deliver exceptional tracking stability. This elevated performance dramatically improves the quality of your long-exposure astronomical images, allowing you to capture breathtaking details of planets, stars, nebulae, and distant galaxies with minimal post-processing corrections.
Image courtesy of Jeremy Müller
Maintenance and Upgrading Your Telescope Mount
Maintaining and upgrading your computerized telescope mount is essential to ensure long-lasting performance, smooth operation, and the continuous enhancement of your astrophotography and observing capabilities. Regular maintenance routines help prevent mechanical wear and electrical issues, while timely firmware updates and hardware upgrades unlock new features and improve tracking precision.
Regular Maintenance Routines
-
Lubrication of Moving Parts
Apply appropriate high-quality lubricants—such as synthetic greases designed for precision instruments—to bearings, worm gears, and motor shafts. Avoid over-lubrication to prevent attracting dust or debris that can cause abrasion and degrade tracking accuracy over time. Perform lubrication every 6 to 12 months depending on mount usage and environmental factors. -
Cleaning and Inspection
Periodically clean the mount’s mechanical components and electronics enclosure to remove dust, dirt, and moisture buildup. Use compressed air or soft brushes, and ensure all connectors and cables are corrosion-free and firmly seated. Check for loose screws, worn belts, or signs of metal fatigue especially on critical load-bearing parts. -
Cable and Connector Maintenance
Inspect wiring harnesses for frays or insulation cracks, and replace damaged cables to avoid signal interference or intermittent power issues. Secure any loose cables using cable ties and verify shielding integrity to maintain optimal electrical performance.
Firmware Updates
Staying current with the latest firmware releases is crucial for leveraging performance improvements and bug fixes that manufacturers or open-source communities provide. Regularly check the control board manufacturer’s website or repository for updates compatible with your mount. Before updating:
- Back up your current configuration settings.
- Follow official update procedures carefully to avoid firmware corruption.
- After updating, recalibrate motor parameters and run diagnostic tests to ensure stability.
Hardware Upgrades for Enhanced Capability
As technology advances, your computerized telescope mount can benefit significantly from hardware upgrades that extend its functionality:
- Upgrading Motors and Drivers: High-torque stepper or brushless motors with improved microstepping drivers reduce backlash and improve quietness and smoothness during tracking.
- Installing Higher-Resolution Encoders: Enhanced encoders provide finer positional feedback, dramatically increasing tracking accuracy and reducing periodic error.
- Adding Autoguiding Compatibility Modules: Expanding your mount with dedicated autoguider ports or interfaces enhances long-exposure astrophotography by enabling real-time guiding corrections.
- Integrating GPS Modules and Wi-Fi Interfaces: These upgrades streamline setup by automating location and time input and enable wireless remote control, making your mount more versatile and user-friendly.
By implementing these maintenance best practices and thoughtfully selecting firmware and hardware upgrades, you maximize your computerized telescope mount’s longevity, precision, and versatility. These proactive steps not only protect your investment but also empower you to achieve superior results in celestial tracking and astrophotography for years to come.

Image courtesy of Jeremy Müller
Resources and Communities for Support and Further Learning
Embarking on the assembly and optimization of a computerized telescope mount opens up a rewarding journey in astrophotography and amateur astronomy. To deepen your expertise and overcome challenges encountered during your project, leveraging trusted online resources and active astronomy communities is invaluable. These platforms provide access to detailed tutorials, troubleshooting advice, collaborative knowledge exchange, and up-to-date software tools essential for building, calibrating, and refining your telescope mount.
Essential Online Forums and Communities
Engaging with specialized forums connects you with passionate astronomy hobbyists, experienced telescope builders, and space engineering professionals who share insights, solutions, and innovations:
-
Cloudy Nights Forum
The largest and most comprehensive astronomy forum offering dedicated sections on computerized mounts, electronics, astrophotography, and DIY telescope projects. Users post detailed build logs, calibration guides, and troubleshooting discussions. -
Astronomy Stack Exchange
A Q&A platform where you can ask precise technical questions and receive expert answers on telescope mount assembly, firmware programming, electronic integration, and software configuration. -
CN Forums & DIY Astronomy Subreddits
Reddit’s r/telescopes and r/astrophotography communities provide real-time advice, reviews of mounts and accessories, and peer support ideal for beginners and advanced builders alike.
High-Quality Tutorial Videos and Learning Channels
Video tutorials facilitate visual learning for complex assembly, wiring, and firmware uploading processes:
- YouTube Channels: Channels like Andy’s Astro Shed, AstroBackyard, and DIY Perks feature in-depth telescope mount assembly walkthroughs, electronics soldering tutorials, and astrophotography optimization techniques.
- Maker and Electronics Tutorials: Platforms such as Adafruit, SparkFun, and Hackaday provide valuable electronics integration guides relevant to control boards, motor drivers, and encoder interfacing.
Recommended Software Tools and Utilities
Utilizing dedicated software tools enhances the precision and usability of your computerized mount:
| Software Tool | Description | Platform |
|---|---|---|
| Stellarium | Free, open-source planetarium software with GoTo mount control support and star charts. | Windows, macOS, Linux |
| PHD2 Guiding | Autoguiding software to improve tracking stability during long exposures. | Windows, macOS, Linux |
| EQMOD Suite | Provides advanced control and configuration options for EQ mounts via ASCOM drivers. | Windows |
| INDI Library | Open-source astronomy device control framework supporting a range of mounts and cameras. | Linux, macOS |
Tips for Maximizing Community Support and Learning
- Engage Actively: Share your project progress and specific challenges on forums or social media groups to receive tailored advice and potentially discover novel solutions.
- Stay Updated: Subscribe to firmware release notes, astronomy newsletters, and software update channels to incorporate the latest improvements for your mount.
- Document Your Build: Maintain detailed logs or blogs of your assembly and calibration processes; this not only aids your troubleshooting but also contributes valuable knowledge to the astronomy community.
By tapping into these rich resources and communities, you ensure continuous learning, accelerate problem-solving, and expand your capability to assemble, maintain, and optimize computerized telescope mounts effectively. Whether you’re refining tracking accuracy or exploring advanced astrophotography setups, these platforms and tools provide the essential expertise and support to take your astronomical endeavors to new heights.

Image courtesy of Pavel Danilyuk