
Top Tips for Building a DIY Dobsonian Telescope
Category: Astrophotography
Master the Art of DIY Dobsonian Telescope Building
If you’re an astronomy enthusiast or an amateur astronomer eager to deepen your celestial observations, building your own Dobsonian telescope is an incredibly rewarding project. You probably landed here because you’re looking for reliable, practical, and detailed tips to ensure your DIY Dobsonian performs well without breaking the bank or requiring advanced engineering expertise. Whether you’ve taken the plunge and already started gathering parts or you’re still sketching out your design, this guide will walk you through the essential knowledge and insider advice to build a sturdy, high-quality Dobsonian telescope from scratch.
You might have already faced typical challenges such as choosing the right optics, constructing a stable mount, or optimizing your setup for astrophotography. This post is crafted specifically for hobbyists like you—those who understand the basics but want to avoid common pitfalls and streamline the build process with tried-and-true tips sourced from top-ranking expert content online.
Unlike generic build guides, here you’ll find a well-structured approach covering everything from material selection and mechanical design to alignment and customization for astrophotography. By the end, you’ll be ready to gaze deeper into the cosmos with a telescope you made yourself, saving money and gaining invaluable hands-on space engineering experience.
- Master the Art of DIY Dobsonian Telescope Building
- Understanding the Dobsonian Telescope: Design Basics and Why It’s Ideal for DIY Projects
- Selecting the Right Optics: Choosing Mirrors and Eyepieces for Optimal Viewing
- Choosing Materials: Wood, Plywood, and Alternative Materials for the Mount and Structure
- Building the Base and Mount: Ensuring Stability, Smooth Motion, and Ease of Use
- Mirror Cell Construction and Collimation: How to Securely Hold Your Primary Mirror and Achieve Precise Alignment
- Assembly Tips: Step-by-Step Guidance on Putting All Parts Together Effectively
- Fine-Tuning Performance: Adjusting Balance, Tracking, and Minimizing Vibrations
- Customizing for Astrophotography: Modifications and Attachments for Enhanced Imaging
- Maintenance and Upgrades: Long-Term Care Advice and Ways to Improve Your Telescope
- Safety and Practical Considerations: Handling Optics and Working Safely with Tools
Understanding the Dobsonian Telescope: Design Basics and Why It’s Ideal for DIY Projects
The Dobsonian telescope is renowned among amateur astronomers for its simplicity, cost-effectiveness, and exceptional performance in deep-sky observation. At its core, the Dobsonian is a type of Newtonian reflector telescope mounted on a minimalist, altazimuth base, which makes it remarkably easy to build and maneuver. This straightforward design—featuring a large, fast primary mirror and an uncomplicated mounting system—allows for maximum light gathering at a fraction of the price compared to other telescopes of similar aperture.
What truly makes the Dobsonian ideal for DIY projects is its modular and robust construction, which requires only basic woodworking and metalworking skills alongside standard optical components. Unlike equatorial mounts that need precise mechanical calibration and complex gearing, the Dobsonian uses a gravity-based, rocking motion mount that provides smooth, intuitive tracking of celestial objects with minimal adjustments. This makes it perfect for beginners and hobbyists looking to combine practical telescope building with hands-on astronomy.
Key design features that make Dobsonians DIY-friendly include:
- Simple Altazimuth Mount – A sturdy wooden or composite base that supports the telescope and allows fast, easy movement along vertical and horizontal axes.
- Newtonian Optical Tube Assembly (OTA) – A tube housing the main mirror and secondary optics built with accessible materials like Sonotube, plywood, or acrylic.
- Low-cost, High-aperture Optics – Large primary mirrors (often 6” to 16” or more) can be sourced at affordable prices, significantly improving light gathering for deep-sky objects.
- Modularity for Customization – Easily upgradeable components such as motorized tracking, better eyepieces, or enhanced cooling fans for mirror temperature stabilization.
By choosing the Dobsonian design for your DIY telescope, you harness a proven balance of performance, simplicity, and affordability, making it one of the top choices for do-it-yourself telescope builders who want to observe nebulae, galaxies, star clusters, and planets without the need for complex engineering or astronomical budgets.
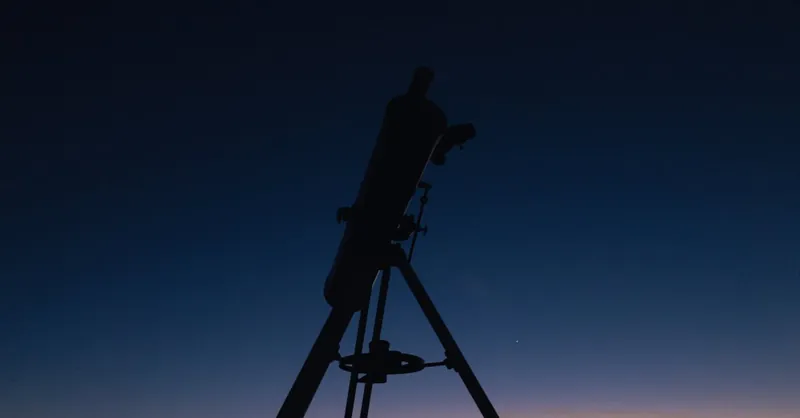
Image courtesy of Jul L. G.
Selecting the Right Optics: Choosing Mirrors and Eyepieces for Optimal Viewing
When building your DIY Dobsonian telescope, selecting high-quality optics is paramount to unlocking its full potential for deep-sky and planetary observation. The two critical optical components to focus on are the primary mirror and the eyepieces, each playing a distinct role in image clarity, brightness, and magnification.
Choosing the Primary Mirror
The heart of any Dobsonian is its primary mirror, which gathers and focuses light from celestial objects. For DIY builds, mirror diameter (aperture) and focal ratio are the top priorities:
- Aperture Size: A larger aperture collects more light, revealing fainter objects and finer detail. Common DIY Dobsonian sizes range from 6 inches (150mm) to 12 inches (300mm) or more. Starting with at least an 8-inch mirror strikes a great balance of portability, cost, and viewing power.
- Focal Ratio (f/number): The focal ratio impacts the telescope's field of view and ease of focusing. Dobsonians typically use fast mirrors (around f/4 to f/6). A lower f/number provides wider fields great for nebulae and star clusters but requires more precise collimation and higher quality secondary mirrors.
- Mirror Quality and Coating: Opt for mirrors with high reflectivity coatings like enhanced aluminum or dielectric coatings to maximize light throughput. Importantly, check surface accuracy (measured in fractions of a wavelength); mirrors rated at λ/8 or better ensure sharp, crisp images.
Selecting Eyepieces for Versatile Viewing
Eyepieces determine the magnification and field of view, critically influencing what and how you observe through your Dobsonian. Since the focal length of your telescope mirror is fixed, eyepiece selection gives you flexibility:
- Focal Length: Eyepieces with shorter focal lengths (e.g., 4mm–10mm) offer higher magnification, ideal for planetary details and lunar craters. Longer focal lengths (e.g., 20mm–40mm) deliver wide, bright views suitable for extended objects like galaxies and nebulae.
- Apparent Field of View (AFOV): Wider AFOV eyepieces (70° or more) provide immersive, panoramic sky views, enhancing the enjoyment of deep-sky object exploration.
- Barlow Lenses: Adding a Barlow lens can effectively double or triple your eyepieces’ magnification without needing multiple expensive eyepieces, making your setup more versatile while keeping costs down.
Optimizing the Optical Combination
For best results, match the eyepiece and primary mirror focal lengths to ensure practical magnification ranges. An effective magnification falls between about 20x per inch of aperture (for wide-field views) to a maximum of roughly 50x per inch without image degradation. For example, an 8-inch f/6 Dobsonian (focal length ~1200mm) pairs well with eyepieces in the 8mm to 30mm range, covering low to moderate magnifications suitable for most observing conditions.
Investing time in selecting quality mirrors and a versatile set of eyepieces will dramatically enhance your DIY Dobsonian’s performance, delivering sharp, bright views of planets, star clusters, nebulae, and distant galaxies—key to a satisfying, long-term amateur astronomy experience.

Image courtesy of Jan van der Wolf
Choosing Materials: Wood, Plywood, and Alternative Materials for the Mount and Structure
Selecting the right materials for your Dobsonian telescope’s mount and optical tube assembly (OTA) is essential to ensure durability, stability, and ease of construction—all crucial factors that impact your telescope’s performance under the night sky. Traditionally, wood has been the material of choice for Dobsonian mounts due to its accessibility, workability, and excellent vibration damping properties, which minimize image shake during observing sessions.
Wood and Plywood: The Standard for DIY Dobsonian Mounts
Solid wood, such as pine, oak, or poplar, offers robustness and stability but can be heavy and prone to warping with changes in temperature and humidity. This is where plywood, especially high-quality Baltic or birch plywood, stands out as an optimal choice:
- Plywood provides superior dimensional stability due to its cross-grain layers, making it less susceptible to warping or twisting.
- It is lighter than solid wood, facilitating easier transport and setup without sacrificing strength.
- Plywood is readily available and generally cost-effective, making it ideal for a budget-conscious build.
For the Dobsonian base, using 3/4" or thicker plywood sheets ensures rigidity, while thinner plywood (1/2") can be used for less load-bearing parts like the rocker box sides. When crafting the OTA, plywood panels or even a sturdy, cut-to-size wooden sonotube (a tubular cardboard alternate) wrapped with a reinforcing layer can provide an excellent blend of weight saving and structural integrity.
Alternative Materials and Modern Options
Beyond traditional wood, there are several alternative materials gaining traction among DIY telescope builders seeking lightweight and weather-resistant options:
- Medium Density Fiberboard (MDF): Highly stable and easy to machine, MDF can produce smooth finishes but is denser and more prone to moisture damage; sealing is mandatory.
- Foam Core Panels with Composite Covering: Used in some ultralight builds, combining foam cores with fiberglass or carbon fiber sheets yields rigid, lightweight structures but requires advanced fabrication skills.
- Metal Mounts: Aluminum or steel offer unmatched strength and precision, especially for motorized or robotic Dobsonians, yet come at a significantly higher cost and complexity due to welding and machining needs.
- PVC or Plastic Tubing for OTA: Lightweight and moisture resistant, PVC tubes are an affordable alternative to wooden tubes but may require internal reinforcement for rigidity.
Key Considerations for Material Selection
- Weight vs Stability: A heavier mount reduces vibrations but can be cumbersome; a balanced compromise using plywood or medium-density wood composites is effective.
- Workability: Materials that are easy to cut, shape, and assemble with common woodworking tools streamline the build process.
- Environmental Resistance: Given that Dobsonians are often used outdoors, sealing wooden parts with paint or varnish protects against moisture and extends longevity.
- Cost and Availability: Use materials that fit your budget and sourcing ease—often local hardware stores or lumber suppliers.
By carefully choosing materials tailored to your skill level, budget, and observing conditions, your DIY Dobsonian will boast a robust, steady mount and tube assembly, providing you with crisp, vibration-free views of planets, nebulae, star clusters, and distant galaxies for years to come.
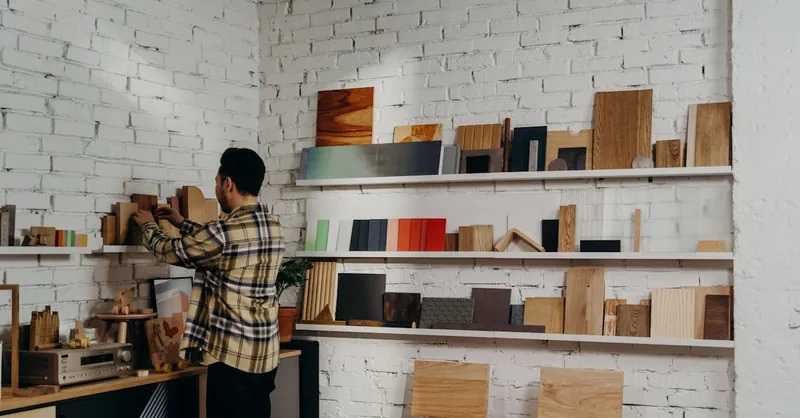
Image courtesy of cottonbro studio
Building the Base and Mount: Ensuring Stability, Smooth Motion, and Ease of Use
A Dobsonian telescope’s base and mount are critical to its overall performance, as they provide the foundation for stable viewing and smooth, precise motion across the night sky. When building your DIY Dobsonian, prioritizing rigidity, balance, and low friction in the mount design will directly impact your observing experience, reducing frustrating vibrations and making object tracking effortless.
Designing a Stable Base
The base must support the optical tube assembly (OTA) securely and resist wobbling during use. To achieve this:
- Use thick, high-quality plywood (at least 3/4") for the base platform to provide rigidity and minimize flex.
- Incorporate a wide footprint to prevent tipping when the telescope is pointed near zenith or low on the horizon.
- Include support braces or cross members under the base to enhance strength without excessive weight.
- Apply a non-slip surface or rubber feet under the base to improve grip and reduce transmission of ground vibrations.
Building an Efficient Altazimuth Mount (Rocker Box)
The Dobsonian mount’s iconic rocker box allows the OTA to pivot vertically (altitude), while the base turns horizontally (azimuth). For smooth, controlled movement:
- Precision-cut bearing pads made from materials like Teflon or UHMW polyethylene minimize friction where the rocker box contacts the base.
- Use matching laminate disks or Teflon pads on these contact points for consistent, whisper-quiet motion.
- Ensure the rocker box sides are parallel and the altitude axis bearings are flush to avoid uneven wear and binding.
- Fit adjustable tensioners or nylon straps if needed to tune the friction, allowing the telescope to hold its position without slipping but still move smoothly with gentle pressure.
Ease of Use Considerations
Ergonomics and portability considerably influence how much you’ll enjoy your DIY Dobsonian under the stars:
- Keep the mount compact enough for easy transport, but large enough to maintain stability.
- Design handles or grips into the base to facilitate carrying and setup.
- Opt for modular construction, such as a separable OTA and mount, for easier storage and transport.
- If you plan to add motorized tracking or electronic controls, allocate space and secure mounting points in the base design without compromising structural integrity.
By focusing on a robust, precisely engineered base and mount, you ensure that your DIY Dobsonian will deliver steady, vibration-free images and intuitive, smooth tracking that lets you follow planets, nebulae, and galaxies with ease—maximizing your nighttime astronomy enjoyment.
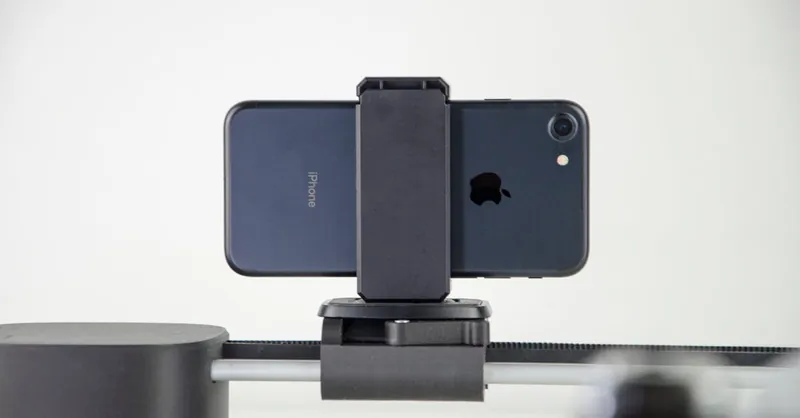
Image courtesy of Corentin HENRY
Mirror Cell Construction and Collimation: How to Securely Hold Your Primary Mirror and Achieve Precise Alignment
The primary mirror cell is a critical component in your DIY Dobsonian telescope, as it securely holds the heavy primary mirror while preventing distortions that can degrade image quality. Constructing a well-designed mirror cell ensures optimal optical performance, mechanical stability, and ease of collimation, which is essential for achieving sharp, crisp views of deep-sky objects and planets.
Building a Sturdy and Effective Mirror Cell
A functional mirror cell must support the mirror evenly and cushion it gently to avoid stress points or sagging. Here are key considerations for building your mirror cell:
- Support System: Use a 3-point or 6-point flotation support system made from soft materials such as neoprene pads or silicone cushions to distribute the mirror’s weight evenly across its back surface. This helps maintain the mirror shape and prevents warping under gravity.
- Cell Frame Material: Construct the cell frame from lightweight yet rigid materials such as aluminum or sturdy plywood. The frame should be precise to avoid any lateral movement of the mirror but not so tight as to clamp or stress the glass.
- Ventilation and Dust Protection: Incorporate holes or slots in the cell’s frame to promote airflow for cooling the mirror quickly to ambient temperature and include felt or foam strips to minimize dust intrusion.
- Adjustable Retaining Clips: Install gentle, adjustable clips or springs around the mirror perimeter to hold it firmly in place without applying excessive pressure.
Precise Collimation Techniques for Optimal Optical Alignment
Even the finest optics won’t perform well if your primary and secondary mirrors are misaligned. Collimation—the process of aligning your telescope’s mirrors to ensure light converges properly on the eyepiece—is a vital step for maximizing contrast and sharpness.
To achieve precise collimation on your Dobsonian telescope:
- Start with the Secondary Mirror: Adjust the secondary mirror tilt using its collimation screws so it appears centered when viewed through the focuser drawtube.
- Primary Mirror Alignment: Use the primary mirror collimation screws to finely tune the tilt until the reflection of the secondary mirror and the inside of the focuser tube are concentric.
- Tools for Accuracy: Utilize a collimation cap, a laser collimator, or a cheshire eyepiece—each offering increasing levels of precision and ease.
- Routine Checks: Perform collimation regularly, especially after transport or accidental bumps, as even small misalignments can significantly affect image quality, particularly with fast focal ratios (f/4–f/6 common in Dobsonians).
Well-constructed mirror cells combined with meticulous collimation result in a telescope that maintains stable optical alignment throughout your observing sessions. This foundation maximizes the capability of your primary mirror and optimizes the resolution and brightness of celestial objects, ensuring your DIY Dobsonian delivers outstanding visual experiences under the stars.
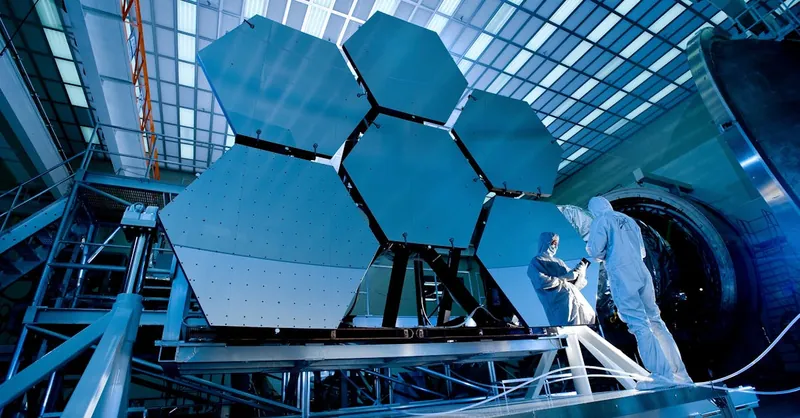
Image courtesy of Pixabay
Assembly Tips: Step-by-Step Guidance on Putting All Parts Together Effectively
Successfully assembling your DIY Dobsonian telescope requires careful attention to detail and a methodical approach to ensure each component fits perfectly and functions smoothly. Start by laying out all pre-cut and prepared parts — such as the mount base, rocker box, optical tube assembly (OTA), mirror cell, and focuser — in a clean, spacious work area. This organized setup helps avoid confusion and allows you to verify dimensions and compatibility before permanent fastening.
Step-by-Step Assembly Process
-
Assemble the Base and Rocker Box First
Begin by constructing the Dobsonian base using high-quality plywood, ensuring all joints are square and secure. Attach the Teflon bearing pads to the base platform, verifying smooth azimuth rotation. Next, build and test the rocker box for altitude motion, checking that the altitude bearings glide effortlessly on their pads with no binding or wobble. -
Mount the Mirror Cell Securely Inside the Optical Tube
Install the mirror cell carefully into the bottom end of the OTA. Confirm the primary mirror sits firmly within the neoprene supports and that the retaining clips hold it gently but securely. Avoid overtightening, which can cause stress and degrade optical performance. -
Attach the Secondary Mirror and Spider Assembly
Position the spider vanes and secondary mirror within the upper section of the OTA, making certain the secondary is centered and angled correctly toward the focuser. The spider should be taut and vibration-resistant, minimizing image distortion. -
Install the Focuser and Eyepiece Holder
Secure the focuser firmly to the optical tube at the designed location, aligning it so the light path from the secondary mirror enters without obstruction. Test the focuser travel to ensure smooth, precise focusing motion. -
Fit the Optical Tube onto the Rocker Box
With assistance if needed due to the OTA’s size and weight, mount the optical tube onto the rocker box altitude bearings. Adjust the tensioners or friction straps so the tube moves responsively but stays put at any angle without slipping. -
Perform Final Collimation and Balance Checks
After full assembly, perform a comprehensive collimation of the telescope optics using laser or Cheshire tools. Verify the telescope’s balance on the mount to prevent undue strain on the bearings and ensure effortless manual tracking.
Pro Tips for a Smooth Assembly
- Use clamps and temporary braces to hold parts in perfect alignment when gluing or screwing, reducing risk of misalignment.
- Pre-drill screw holes and employ quality fasteners to avoid splitting plywood or wood materials.
- Consider adding easy-access adjustment knobs on altitude and azimuth axes for quick fine-tuning in the field.
- Leave room for wiring if you plan to integrate motorized tracking or electronic accessories later.
By following a systematic assembly workflow and paying close attention to fit, alignment, and smooth movement, your DIY Dobsonian telescope will achieve robust structural integrity and superior functionality. A well-assembled Dobsonian not only improves viewing stability but also enhances your long-term enjoyment of stargazing, offering a dependable platform for exploring planets, nebulae, galaxies, and star clusters with ease and precision.
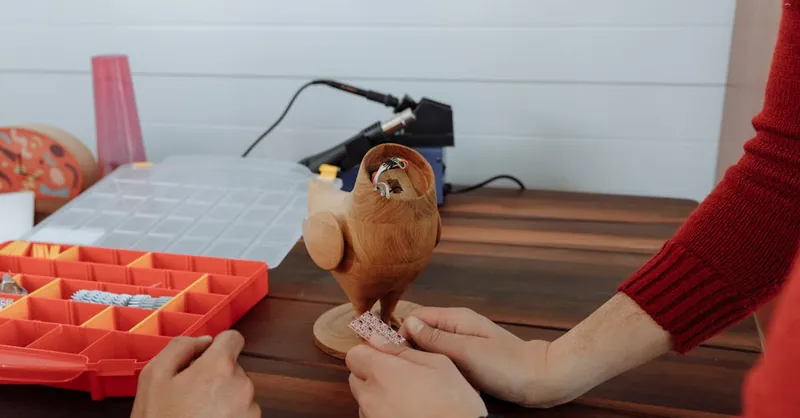
Image courtesy of Thirdman
Fine-Tuning Performance: Adjusting Balance, Tracking, and Minimizing Vibrations
Once your DIY Dobsonian telescope is fully assembled, fine-tuning its performance is crucial to unlock smooth operation and obtain the clearest possible views of celestial objects. Addressing key factors such as balance, tracking ability, and vibration reduction will elevate your stargazing experience by enabling steady images and effortless object follow-through.
Achieving Perfect Balance
Proper telescope balance ensures that the optical tube assembly (OTA) moves fluidly on the mount without placing undue stress on the altitude bearings or introducing unwanted drift. To adjust balance:
- Check the OTA's center of gravity by observing if it naturally settles when you release it at various pointing angles. If it tips forward or backward, install or reposition counterweights or adjust friction tension in the rocker box accordingly.
- Make use of adjustable nylon straps or tension knobs on the altitude bearings to maintain smooth resistance — tight enough to prevent slipping but loose enough for gentle motion.
- Ensure the azimuth rotation bearing pads move freely without wobble; lubricate or replace pads made from Teflon or UHMW polyethylene if resistance or noise arises.
Enhancing Manual Tracking and Object Stability
Since traditional Dobsonians use an altazimuth mount without motorized tracking, optimizing manual movement is essential:
- Keep the bearing surfaces clean and free of dust or debris, which can cause choppy or uneven glide.
- Utilize high-quality Teflon pads combined with laminate disks, balancing low friction with stable support.
- Consider installing slow-motion control cables or knobs on the altitude and azimuth axes to allow finer tracking adjustments during long observing sessions.
- To assist object tracking, especially at high magnifications, practice smooth hand movements and avoid rapid jerks that cause image shake.
Minimizing Vibrations for Sharper Images
Vibrations degrade image quality by causing the view to shake or blur, particularly when observing fine planetary details or faint deep-sky targets. To reduce vibrations:
- Use dense, non-resonant materials such as plywood with good vibration damping properties for the mount and base.
- Incorporate rubber or neoprene feet under the base to isolate the telescope from uneven or vibrating surfaces.
- Avoid excessive tension in altitude bearings which can transmit tremors; instead, balance friction to damp unwanted motion.
- When setting up outside, place the telescope on firm, stable ground — gravel or earth beds work better than concrete or wooden decks that may transmit structural vibrations.
- Add mirror cooling fans or ventilation ports to minimize thermal currents inside the optical tube, as fluctuating air temperatures can subtly shift focus and create apparent vibrations.
By systematically addressing balance, smoothness of tracking, and vibration control, your DIY Dobsonian will not only move more intuitively but also deliver crystal-clear, stable views deep into the cosmos. These performance tweaks are key to enjoying hours of immersive, frustration-free astronomy, enabling detailed observation of planets, nebulae, star clusters, and galaxies with your handcrafted telescope.
Image courtesy of Pavel Danilyuk
Customizing for Astrophotography: Modifications and Attachments for Enhanced Imaging
Transforming your DIY Dobsonian telescope into a capable astrophotography rig involves strategic modifications and specialized attachments to enhance imaging quality and stability. While Dobsonians excel in visual observation, capturing detailed photographs of planets, nebulae, and other celestial phenomena requires addressing key challenges such as mount tracking, vibration control, and camera integration.
Essential Modifications for Astrophotography
-
Motorized Tracking and GoTo Systems
Since standard Dobsonian mounts operate on simple altazimuth mechanics without automatic tracking, equipping the base with motorized slow-motion drives or GoTo tracking systems dramatically improves exposure consistency and image sharpness. This upgrade compensates for Earth’s rotation, allowing long-exposure astrophotography that reveals deep-sky objects otherwise blurred by manual tracking. -
Vibration Dampening Enhancements
Minimizing vibrations is crucial when capturing fine details in astrophotography. In addition to rubber isolators under the base, consider installing internal mirror locks to prevent mirror shift during imaging and using heavier base materials or ballast weights to stabilize the entire telescope setup. -
Camera and Eyepiece Adapters
Integrating your DSLR, mirrorless, or dedicated astronomy camera requires precise adapters that connect the camera body directly to the focuser or eyepiece holder. Using T-rings, nosepieces, or 1.25”/2” camera adapters ensures secure, vibration-free attachment and optimal focus plane alignment for sharp imaging. -
Upgraded Focuser for Fine Adjustments
Astrophotography demands highly accurate focusing. Upgrading to a dual-speed or electronic focuser allows subtle focus tweaks without introducing shake, which is vital for capturing crisp planetary and deep-sky photographs. -
Field Flatteners and Focal Reducers
To correct optical aberrations prevalent at fast focal ratios (f/4–f/6), adding accessories like field flatteners or focal reducers improves image flatness and increases the telescope’s effective field of view. These modifiers enhance star roundness and overall image quality across the camera sensor.
By incorporating these customized modifications and attachments, your DIY Dobsonian telescope becomes a powerful tool not only for stunning real-time viewing but also for high-quality astrophotography. Leveraging motorized tracking, vibration control, and precise camera integration will significantly broaden the range of celestial objects you can capture, unlocking new dimensions of your astrophotography journey.
Image courtesy of Tembela Bohle
Maintenance and Upgrades: Long-Term Care Advice and Ways to Improve Your Telescope
Ensuring the longevity and peak performance of your DIY Dobsonian telescope requires regular maintenance and thoughtful upgrades tailored to your evolving astronomy goals. Proactive care not only preserves the optical quality and mechanical integrity but also enhances your viewing experience by adapting the instrument to new challenges and technologies.
Essential Maintenance Tips for Your DIY Dobsonian
-
Routine Cleaning of Optics
Dust and debris accumulation on the primary and secondary mirrors can degrade image brightness and contrast. Clean optics sparingly, using only specialized optical cleaning kits with lint-free wipes and distilled water or isopropyl alcohol. Avoid abrasive materials and excessive cleaning to prevent surface damage and coating wear. -
Periodic Collimation Checks
Frequent transportation and use can cause subtle misalignment of mirrors. Regularly perform collimation using laser collimators or Cheshire eyepieces, especially before major observing sessions, to maintain sharp, crisp images essential for deep-sky observation and astrophotography. -
Inspect and Lubricate Bearings
Keep the altitude and azimuth bearings free of dust and ensure the Teflon or UHMW polyethylene pads remain smooth and lubricated with dry graphite or similar non-greasy lubricants to guarantee silent and effortless motion. Replace worn bearing pads to prevent wobble and uneven tracking. -
Protect Wooden Components
Seal exposed plywood or wood surfaces annually with waterproof varnish or paint to guard against moisture absorption, which can cause warping or structural instability. Store the telescope in a dry, temperature-stable environment to preserve material integrity over time.
Recommended Upgrades to Boost Telescope Performance
-
Enhanced Mirror Coatings: Upgrading to dielectric or protected silver coatings on primary and secondary mirrors can significantly increase reflectivity and contrast, improving faint object visibility under light-polluted skies.
-
Upgraded Eyepiece Sets: Expanding your eyepiece collection with premium wide-field or ultra-high contrast eyepieces enhances versatility, allowing detailed planetary views and immersive deep-sky exploration.
-
Motorized Tracking Add-ons: Installing affordable, off-the-shelf motorized drives or digital setting circles transforms manual Dobsonians into semi-automated trackers, vital for astrophotography and long observation periods.
-
Mirror Cooling Solutions: Adding quiet, low-vibration cooling fans or passive ventilation ports stabilizes mirror temperature rapidly, reducing thermal currents that obscure image clarity.
-
Vibration Dampening Accessories: Incorporate vibration suppression pads beneath the base and consider internal mirror locks to eliminate subtle shifts, particularly beneficial during high-magnification viewing or imaging.
By prioritizing routine upkeep and strategically integrating upgrades, your DIY Dobsonian telescope will continue to deliver exceptional optical performance and smooth mechanical operation. This long-term care approach ensures your handcrafted instrument remains a reliable gateway to exploring planets, nebulae, star clusters, and distant galaxies, enriching your astronomy pursuits for years to come.

Image courtesy of Pixabay
Safety and Practical Considerations: Handling Optics and Working Safely with Tools
When building your DIY Dobsonian telescope, prioritizing safety and proper handling of delicate optical components is essential to protect both yourself and your investment. Working cautiously with the primary and secondary mirrors—fragile elements prone to scratches or breaks—ensures that your telescope delivers peak performance without costly damage. Likewise, maintaining a safe workshop environment while using woodworking, metalworking, and assembly tools is critical to prevent injuries during your build.
Handling Optics with Care
Optical components like mirrors and lenses require gentle, precise treatment:
- Always handle mirrors by the edges, avoiding contact with the reflective surface to prevent smudges or scratches that degrade image quality.
- Use lint-free gloves or finger cots when transporting or installing optics to minimize oils and dirt transfer.
- Store mirrors on soft, clean padding placed on a flat, stable surface to avoid warping or chipping.
- When cleaning optics, apply mild, specialty cleaning solutions sparingly, using soft microfiber cloths dedicated to optical surfaces; never use household cleaners or abrasive materials.
- Avoid placing optics in direct sunlight or dusty environments during assembly to reduce the risk of overheating or contamination.
Workshop Safety and Tool Best Practices
Working with power tools, saws, drills, and adhesives demands adherence to safety protocols:
- Always wear appropriate personal protective equipment (PPE) such as safety glasses, dust masks, and hearing protection.
- Keep your workspace well-ventilated and organized to minimize hazards and ensure easy access to tools and parts.
- Use clamps and jigs to secure materials firmly, preventing slips or misalignment that could cause accidents or damage.
- Follow manufacturers’ instructions for all tools and adhesives, and never force tools beyond their designed capacities.
- Maintain sharp blades and bits to reduce kickback and produce clean cuts that help maintain precise dimensions critical for telescope components.
Practical Tips to Optimize Safety and Efficiency
- Set aside sufficient time for each construction phase to avoid rushed mistakes that compromise safety or quality.
- Keep a well-stocked first aid kit nearby and be familiar with basic treatment for cuts, splinters, and eye injuries.
- If unfamiliar with any tool or procedure, seek tutorials or mentorship before proceeding to build confidence and skill.
- Label parts and keep fasteners organized to streamline assembly and avoid confusion that may lead to improper installation.
By integrating careful optics handling with rigorous workshop safety practices, your DIY Dobsonian telescope build will not only be a successful technical endeavor but also a safe and enjoyable hands-on project. This approach safeguards your investment and well-being, producing a telescopic instrument ready to unlock the wonders of the night sky with precision and reliability.
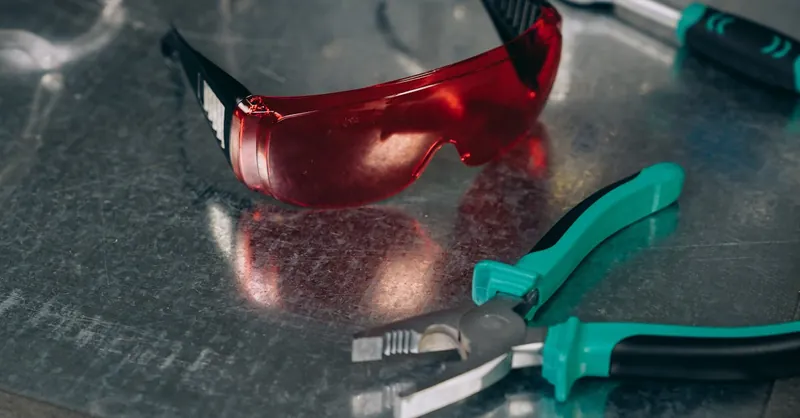
Image courtesy of Mikhail Nilov