How to Track Planets in the Night Sky: A Complete Guide
Category: Astrophotography
Unlocking the Night Sky: How to Track Planets Like a Pro
For astronomy enthusiasts, amateur astronomers, and astrophotography learners, spotting and tracking planets offers an incredible gateway into understanding our solar system's dynamics firsthand. If you’ve ever found yourself gazing at the stars wondering how to identify planets among countless celestial points, you’re not alone—and you’ve arrived at the right place. This guide is crafted specifically for those who want to demystify planetary tracking, using practical methods and clear techniques without overwhelming technical barriers. Maybe you’ve tried apps or star charts before but found the information inconsistent or too simplified. Perhaps you want to learn how to anticipate planetary positions, recognize them with the naked eye or a telescope, and capture stunning images to enrich your astrophotography skills. This post stands apart by blending foundational astronomy insights with hands-on tips tailored to a range of experience levels—whether you’re building your first telescope or aiming to level up your night sky observations. We’ll navigate through tools, celestial mechanics, observation strategies, and key challenges, ensuring you get actionable knowledge to confidently follow planets as they wander across the night sky. Stay with us to transform your stargazing sessions into an engaging, rewarding exploration of our neighboring worlds.
- Unlocking the Night Sky: How to Track Planets Like a Pro
- Understanding Planetary Motion: Retrograde, Orbit Paths, and Visibility Cycles
- Identifying Planets Visually: Characteristics That Differentiate Planets from Stars
- Best Times and Seasons to Track Each Visible Planet
- Using Star Charts and Planetarium Apps for Precise Planet Locations
- Telescope Setup and Techniques for Planet Tracking
- Astrophotography Tips for Capturing Planets: Camera Settings, Exposure, Filters, and Post-Processing
- Tracking Planets with Mobile Apps and Software: Review of the Most Popular Real-Time Planetary Trackers
- Overcoming Common Challenges: Light Pollution, Weather, and Atmospheric Conditions
- Advanced Techniques: Using Ephemerides and Astronomical Data Resources
- Engaging with the Astronomy Community and Resources for Continuous Learning
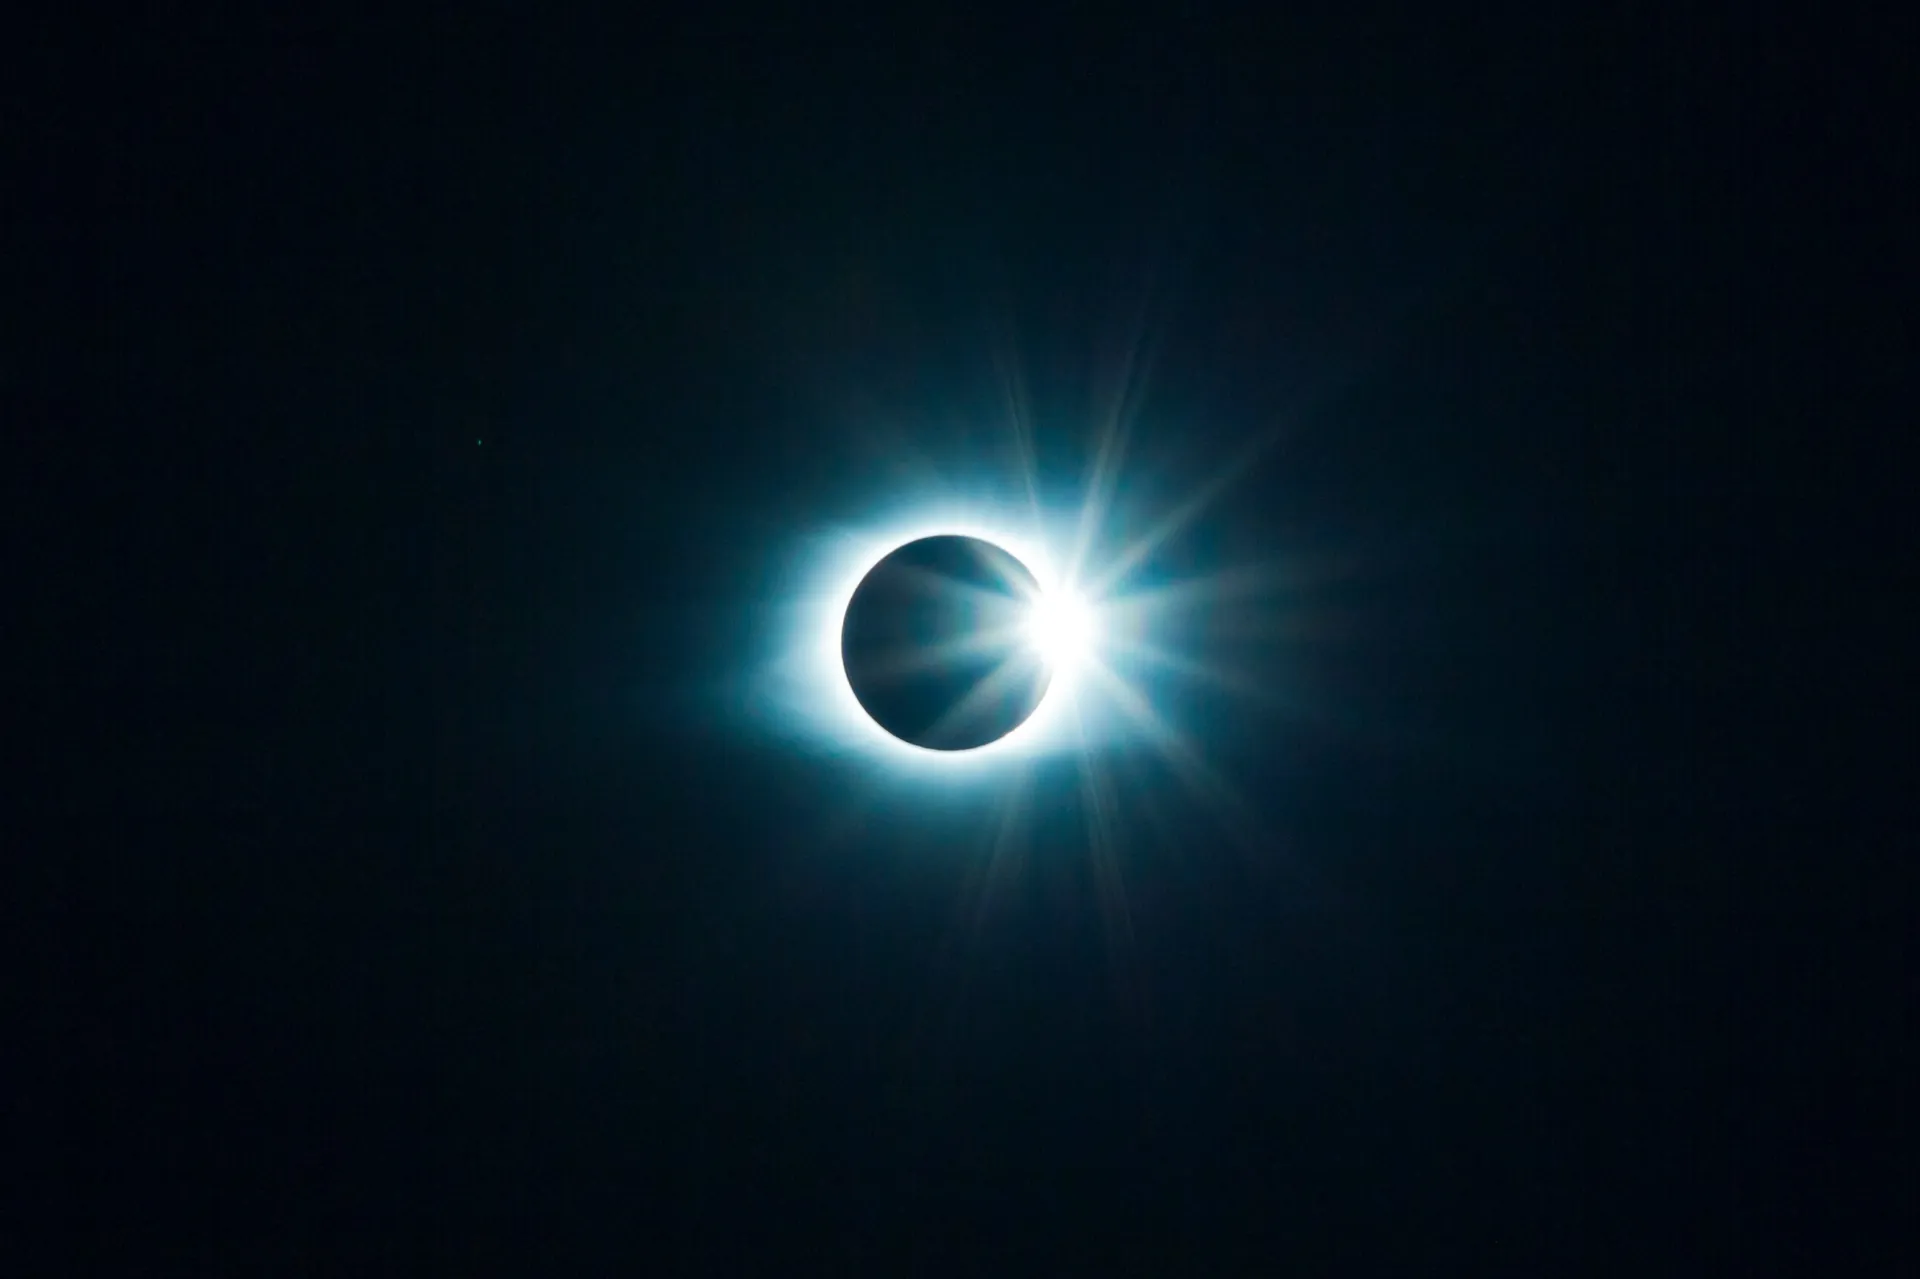
Understanding Planetary Motion: Retrograde, Orbit Paths, and Visibility Cycles
To accurately track planets in the night sky, it is crucial to grasp how planetary motion works relative to the fixed stars and why planetary visibility changes over time. Unlike stars that maintain relatively fixed positions in constellations, planets exhibit complex movements due to their orbits around the Sun, making their paths and brightness vary in subtle yet predictable ways.
The Basics of Planetary Orbits and Motion
Planets orbit the Sun in elliptical paths, with varying distances and speeds. As Earth itself is in motion, our perspective from the ground causes planets to appear to move against the stellar background. This apparent motion includes:
- Direct (Prograde) Motion: Planets generally drift eastward relative to stars over days and weeks.
- Retrograde Motion: At certain times, a planet seems to reverse its path, moving westward temporarily. This optical illusion happens when Earth overtakes an outer planet in its orbit or when an inner planet swings between Earth and the Sun.
Understanding these motions clarifies why planets don’t stay fixed in one spot and why predictions of their positions are essential for consistent tracking.
Visibility Cycles: Why Planets Appear and Disappear
Each planet has a unique visibility cycle tied to its orbit:
- Inferior planets (Mercury and Venus) are visible only near the Sun, appearing as morning or evening stars due to their orbits inside Earth’s path. Their visibility waxes and wanes with their angular separation from the Sun.
- Superior planets (Mars, Jupiter, Saturn, and beyond) exhibit longer visibility periods but change brightness and position depending on their relative location to Earth, marked by events like opposition (when the planet is closest and fully illuminated) and conjunction (when it is near the Sun and often not visible).
Tracking these cycles requires awareness of when planets rise or set, their elongation angles, and understanding the influence of Earth’s own orbital speed. Tools like ephemerides or planetarium software can help predict these transitions so you know exactly when and where to look.
By mastering the fundamentals of retrograde motion, orbital paths, and visible phases, you’ll transform your planetary observations from chance sightings to systematic, rewarding exploration. This knowledge forms the cornerstone for planning observation sessions, capturing compelling astrophotography, and deepening your connection with the workings of our solar system.
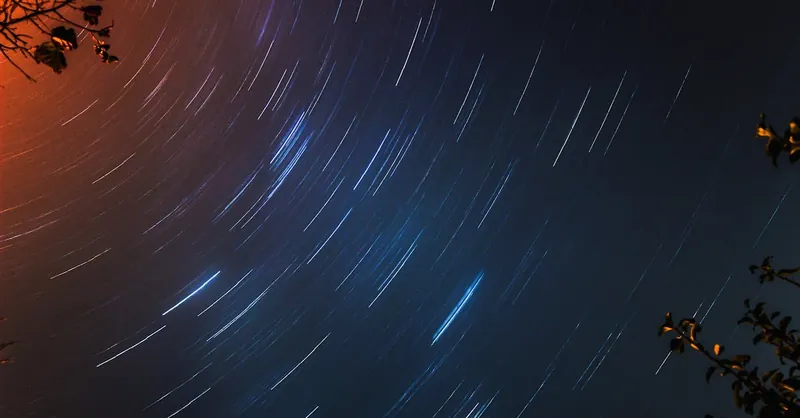
Image courtesy of Aleksa Kalajdzic
Identifying Planets Visually: Characteristics That Differentiate Planets from Stars
When scanning the night sky with the naked eye, one of the most rewarding skills is the ability to distinguish planets from stars without relying on gadgets. Although stars and planets may appear as similar points of light, several key visual characteristics set planets apart, making them easier to track night after night.
Brightness: Planets Shine Steadily and Often Brighter
Planets generally exhibit a steady, brighter glow than most stars. Because they reflect sunlight rather than generate light like stars, planets tend to shine with a constant intensity. Bright planets like Venus, Jupiter, and Mars can outshine the majority of stars, making them standout landmarks in the sky. For example, Venus is often the third brightest object after the Sun and Moon, typically visible just after sunset or before sunrise.
Color Hues: Subtle Clues in Planetary Light
Unlike stars, which can vary in color due to temperature (from blue to red), planets often display distinctive, usually softer color tones that help in identification:
- Mars shows a noticeable reddish-orange tint, easily recognizable even to beginners.
- Jupiter and Saturn often appear as creamy or pale yellowish-white points.
- Venus shines with a strong white light, sometimes with a slight yellowish hue.
Twinkling Behavior: Planets Burn Steadily While Stars Twinkle
One of the easiest methods to tell planets apart from stars is by observing their twinkling behavior. Stars twinkle due to atmospheric turbulence that causes their light to bend variably as it enters Earth’s atmosphere. Planets, being much closer and having an apparent disk rather than a point source, emit steadier light with minimal or no twinkling.
Quick Tips to Spot Planets Visually
- Look for points of light that are steady and bright, especially those that do not flicker.
- Notice any unusual color tint, such as red for Mars or golden for Saturn, that distinguishes the light from typical star hues.
- Check the location relative to the ecliptic plane, a path along which planets generally move—planets rarely wander far from the Zodiac constellations.
- Use a star chart or mobile app for initial confirmation, then train your eyes to identify these features unaided.
By honing your ability to recognize brightness, color, and steady illumination, your naked-eye observations will become more precise, allowing you to confidently pinpoint planets amidst the shimmering stars. These visual cues form the foundation for deeper planetary tracking, astrophotography targeting, and enriching your night sky experience.
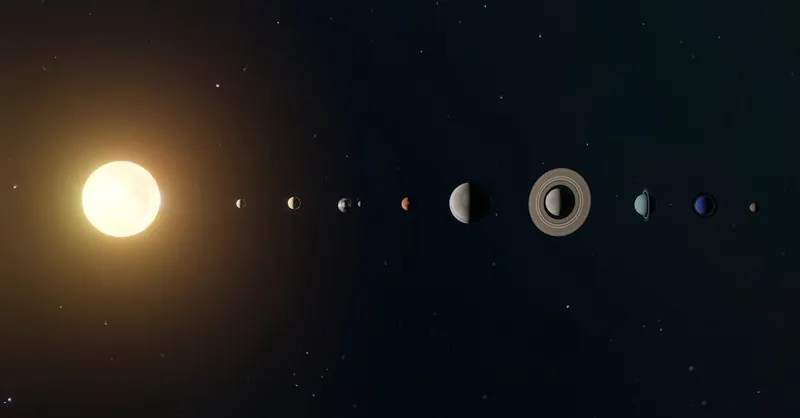
Image courtesy of Zelch Csaba
Best Times and Seasons to Track Each Visible Planet
Knowing when to observe each planet throughout the year significantly boosts your success in planetary tracking. Since planets follow distinct orbital rhythms and appear at varying times in the night sky, aligning your stargazing sessions with their peak visibility ensures clearer sightings and better astrophotography results. Here’s a concise guide on the best times and seasons to track the five brightest planets visible to the naked eye: Mercury, Venus, Mars, Jupiter, and Saturn.
Mercury: Catching the Elusive Morning and Evening Star
Mercury, the innermost planet, is notoriously challenging to spot due to its close proximity to the Sun. Your best chances to see Mercury occur during its greatest elongations—points in its orbit when it appears farthest from the Sun’s glare. These elongations happen approximately every 3-4 months, providing windows of about 1-2 weeks when Mercury is visible just after sunset or before sunrise.
- Best seasons: Usually around late winter to early spring and late summer to early autumn, when elongations align with evenings or mornings.
- Look toward the western horizon after sunset for evening elongations, or the eastern horizon before sunrise for morning elongations.
- Mercury never strays far above the horizon, so find a location with a clear, unobstructed view.
Venus: The Brilliant Morning or Evening “Star”
Venus is the brightest planet in our night sky, often visible for several months either as a brilliant “Evening Star” or “Morning Star.” Its appearance follows a predictable cycle of about 19 months between phases of evening and morning visibility.
- Best seasons: Venus is frequently most prominent in spring and autumn but check yearly ephemerides for exact shifting.
- Venus reaches greatest elongation roughly every 9 months, making these times ideal for observing.
- Since Venus is closer to the Sun than Earth, it is always seen low on the horizon, either shortly after sunset or before sunrise.
Mars: Best Viewed Near Opposition
Mars’s visibility peaks when it reaches opposition—directly opposite the Sun as seen from Earth—occurring approximately every 26 months. At opposition, Mars is closest to Earth, appearing larger and much brighter.
- Best seasons: Mars oppositions typically fall in late summer to autumn but vary year to year.
- Around opposition, Mars is visible all night, rising at sunset and setting at sunrise.
- Even when not at opposition, Mars remains visible for months in the night sky but gradually dims and shrinks as it moves away.
Jupiter: The King of the Night Sky
Jupiter shines brilliantly and is often visible for many months each year, especially near opposition which occurs roughly every 13 months. Around opposition, Jupiter is at its brightest and largest apparent size, ideal for both naked-eye viewing and telescope observation.
- Best seasons: Opposition usually falls in summer to early autumn, but it shifts annually.
- Jupiter can be visible throughout the night near opposition, rising in the evening and setting in the morning.
- Outside opposition, Jupiter is still visible but only for part of the night, appearing in the eastern or western skies.
Saturn: Ringed Beauty Near Opposition
Saturn’s stunning ring system makes it a favorite for amateur astronomers. Like Jupiter, Saturn reaches opposition about every 12-13 months, marking the best time to observe it.
- Best seasons: Saturn oppositions tend to happen in summer to early autumn, varying slightly each year.
- Near opposition, Saturn is visible all night and showcases its rings clearly through a moderate telescope.
- Before and after opposition, Saturn can be found in the night sky but typically only for part of the night as it rises or sets.
To maximize your planetary viewing success, always consult updated astronomical calendars or planetarium software that provide precise dates of elongations, oppositions, and conjunctions for the current year. Combining this timing knowledge with your observational patience will significantly enhance your ability to track planets reliably across seasons, deepening your appreciation of our dynamic solar system.
Image courtesy of Fatih Turan
Using Star Charts and Planetarium Apps for Precise Planet Locations
In the quest to accurately track planets in the night sky, leveraging reliable sky mapping tools is indispensable—whether you prefer traditional print star charts or state-of-the-art planetarium apps. These resources provide detailed, real-time data on planetary positions, movements, and celestial events, transforming what could be a frustrating search into a rewarding, efficient stargazing experience.
Traditional Star Charts: Timeless Tools for Planetary Navigation
Printed star charts and planispheres remain highly valuable for beginners and seasoned observers alike. These charts typically depict the night sky for a specific date and time, showing stars, constellations, and importantly, the locations of visible planets along the ecliptic. To interpret star charts effectively:
- Align the chart with your observing direction and time—rotate the planisphere or match the chart to the date/time to reflect the sky overhead accurately.
- Locate the ecliptic line, the pathway along which planets move, which helps narrow your search area.
- Identify constellations surrounding the ecliptic, as planets often appear within or near these Zodiac signs.
- Use the magnitude scale on the chart to differentiate brighter planets from stars.
While star charts require manual adjustment and some practice, they promote a deep understanding of the sky’s layout and foster observational skills beyond relying solely on screens.
Planetarium Apps: Real-Time Precision and Convenience
Digital planetarium apps and software bring unparalleled precision and ease to planet tracking by dynamically mapping the sky based on your exact location and time. Popular apps like Stellarium, SkySafari, and Star Walk offer intuitive interfaces and powerful features, including:
- Real-time tracking of all visible planets with accurate rise, set, and transit times.
- Interactive sky maps that update as you move your device or change settings.
- Zoomable views to pinpoint small or distant planets not easily visible to the naked eye.
- Notifications on planetary events like oppositions, conjunctions, or transits.
- Integration with telescope controllers for automated slewing to planetary targets.
Maximizing the Use of Sky Mapping Tools
To get the most accurate data from these tools:
- Always input your precise geographic location to ensure the sky map matches your local horizon.
- Set the correct date and time, especially if planning observations hours or days in advance.
- Familiarize yourself with key astronomical terms and symbols used in charts and apps to interpret data correctly.
- Combine app data with naked-eye observations to build intuition about planetary motion and positioning.
By integrating star charts and planetarium apps into your observational routine, you gain precise, up-to-date planetary locations that allow for efficient viewing, targeted telescope sessions, and better astrophotography planning. These tools bridge the gap between theoretical knowledge and practical application, empowering you to confidently chase planets across the night sky.
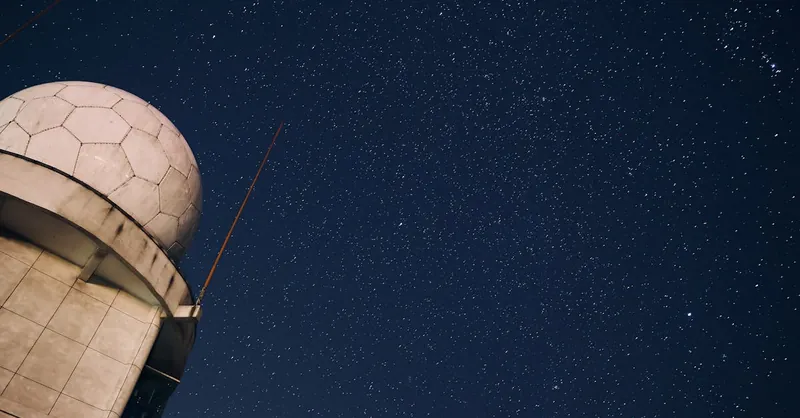
Image courtesy of 静
Telescope Setup and Techniques for Planet Tracking
To reliably track planets in the night sky, choosing the right telescope and setting it up correctly are critical steps that directly impact your observation quality and ease of use. Whether you’re a beginner selecting your first telescope or refining your existing setup for more precise planetary viewing, understanding telescope types, calibration methods, and alignment strategies will optimize your sessions and help you follow planetary movement smoothly.
Choosing the Right Telescope for Planetary Observation
For planetary tracking, the key factors in selecting a telescope include aperture size, focal length, and optical quality:
- Aperture: A medium aperture (4 to 8 inches) balances light-gathering ability and portability, allowing clear views of planetary disks and surface details like Jupiter’s cloud bands or Saturn’s rings. Larger apertures offer better resolution but can be cumbersome for field use.
- Focal Length and Focal Ratio: Longer focal lengths (f/10 or higher) provide higher magnification with eyepieces, crucial for resolving planetary features. A telescope with good optical coatings reduces light loss and enhances contrast.
- Type of Telescope:
- Refractors offer sharp, high-contrast images with minimal maintenance, ideal for beginners focused on planets.
- Schmidt-Cassegrain Telescopes (SCTs) combine portability with long focal lengths, making them popular for planetary and deep-sky observation.
- Dobsonian telescopes afford large apertures at low cost but may require manual tracking aids.
Calibration and Alignment: Foundations for Smooth Planet Tracking
Ensuring your telescope is properly calibrated and aligned is fundamental for following planets accurately during their nightly and seasonal movements. Consider these essential steps:
- Polar Alignment: For telescopes mounted on equatorial mounts, precise polar alignment with the celestial pole allows the mount to track planets by compensating for Earth’s rotation. This reduces image drift during long observations or astrophotography.
- Finder Scope Alignment: Aligning your finder scope with your main telescope ensures quick and accurate targeting of planets once located on star charts or apps.
- Collimation: Regularly check and adjust the collimation of reflectors and compound telescopes to maintain optical performance and sharp planetary images.
- Software-Assisted Alignment: Use computerized GoTo mounts and star alignment procedures (e.g., 2-star or 3-star alignment) for automated, accurate positioning, which is especially helpful for tracking planets that move relative to the stars.
Techniques for Smooth Planet Tracking
Once your telescope is optimized, applying effective tracking techniques enhances your ability to hold planets in view for extended observation or astrophotography:
- Use slow-motion controls or motorized tracking to compensate for Earth’s rotation, keeping planets centered even at high magnification.
- When manually tracking, move in small increments along the planet’s path, following its known direction derived from the ecliptic line and star charts.
- For astrophotography, employ autoguiding systems that lock onto nearby guide stars, fixing slight tracking errors to capture clear, detailed planetary images.
- Allow your telescope to thermally equilibrate before observing; this reduces atmospheric distortions inside the instrument caused by temperature differences, sharpening planetary details.
Mastering telescope setup and calibration techniques not only improves your overall planetary tracking experience but also enhances observational confidence and image quality. By investing time in proper equipment alignment and learning smooth tracking strategies, you position yourself to unlock the fascinating movements and features of planets with precision and ease.
Image courtesy of Jeremy Müller
Astrophotography Tips for Capturing Planets: Camera Settings, Exposure, Filters, and Post-Processing
Capturing stunning planetary images through your telescope requires a blend of precise camera settings, thoughtful exposure control, appropriate use of filters, and effective post-processing techniques. Unlike deep-sky objects, planets are often bright but small targets, so optimizing your imaging workflow is essential to reveal surface details like Jupiter’s cloud bands, Saturn’s rings, or the phases of Venus with clarity and contrast.
Optimizing Camera Settings and Exposure for Planetary Imaging
- Use a High Frame Rate Camera or Video Mode: Planets can appear blurry due to atmospheric turbulence (seeing). Capturing video sequences at high frame rates (30-100 fps) allows you to select the sharpest frames during post-processing. This technique, known as “lucky imaging,” dramatically improves final image quality.
- Set Exposure Time Carefully: Avoid overexposing bright planets by using short exposure times (milliseconds range). Overexposure washes out surface details and reduces contrast. Adjust exposure so the planet’s disk is bright but not saturated.
- Use a Low ISO for Dedicated Cameras: For DSLR or mirrorless cameras attached to telescopes, choose a low ISO setting (100-400) to minimize sensor noise while maintaining sufficient brightness.
- Manual Focus is Critical: Autofocus struggles with planetary targets. Use live view zoom and slowly adjust focus for the sharpest edge on the planetary disk.
Leveraging Filters to Enhance Planetary Features
Filters can enhance subtle planetary details that are otherwise difficult to detect:
- Infrared (IR) Filters reduce atmospheric distortion by capturing longer wavelengths, helping to sharpen images on turbulent nights.
- Color Filters (red, green, blue) allow separate color channel imaging, which can later be combined for high-detail color photos.
- UV/IR Cut Filters improve sharpness for color cameras by blocking unwanted UV and IR wavelengths that may blur details.
- Neutral Density (ND) or Polarizing Filters can reduce brightness for extremely bright planets like Venus, helping to avoid overexposure.
Essential Post-Processing Techniques
Post-processing is the final step to transform your raw planetary captures into breathtaking images:
- Stacking Software: Use programs like AutoStakkert! or RegiStax to align and stack thousands of frames, boosting signal-to-noise ratio and sharpening fine details.
- Wavelet Sharpening: Apply wavelet or deconvolution filters carefully in RegiStax or Photoshop to bring out textures such as cloud bands, storms, and ring divisions.
- Color Correction and Contrast Adjustment: After combining color channels or stacking grayscale images, adjust hue, saturation, and contrast to produce natural, vivid planetary colors without overprocessing.
- Noise Reduction: Smooth the background sky while preserving sharp planetary edges to improve overall image aesthetics.
By mastering the interplay between camera settings, exposure control, appropriate filtering, and meticulous post-processing, astrophotographers can consistently capture clear, detailed, and stunning images of planets. Coupled with your knowledge of planetary motion and telescope setup, these techniques elevate both visual observations and documented results, enriching your celestial discoveries and sharing the beauty of our solar system with the world.

Image courtesy of Kaique Rocha
Tracking Planets with Mobile Apps and Software: Review of the Most Popular Real-Time Planetary Trackers
In today’s digital era, mobile apps and astronomy software have revolutionized how enthusiasts and professionals track planets in the night sky. These powerful tools not only offer real-time planetary positions customized for your location but also provide notifications, interactive sky maps, and predictive data that make planetary tracking more accessible and precise than ever. Whether you’re a beginner trying to identify Venus at dusk or an advanced user calculating Mars’ position for astrophotography, using the right app or software can dramatically enhance your night sky experience.
Top Mobile Apps for Real-Time Planetary Tracking
-
Stellarium Mobile
Often regarded as the gold standard for planetarium apps, Stellarium provides a highly detailed, user-friendly interface showing real-time planetary positions, conjunctions, and retrograde motions. Its ability to simulate the sky for any date and location makes it invaluable for planning observations and understanding the dynamic movement of planets. -
SkySafari
SkySafari combines precise astronomy data with excellent graphics and augmented reality features. It offers in-depth information on planets and other celestial bodies, notifications about upcoming planetary events, and the option to control compatible telescopes directly from your phone or tablet. -
Star Walk 2
Star Walk 2 appeals to casual stargazers with its elegant design and simple yet comprehensive tracking of planets. Its “Time Machine” feature lets users fast forward or rewind planetary positions, ideal for understanding visibility windows and motions like retrograde clearly over time. -
Heavens-Above
Though primarily known for satellite tracking, Heavens-Above also offers accurate ephemeris data for planets, including rise/set times and magnitudes. The app’s precise timings and notifications help alert users to prime viewing moments, especially for less conspicuous planets like Mercury.
Key Software for Desktop and Advanced Tracking
-
Stellarium (Desktop Version): Beyond mobile, Stellarium’s desktop version provides advanced customization, superior resolution sky maps, and plugin support for detailed planetary data and visualization. It supports scripting and telescope control, making it ideal for serious astronomy researchers and astrophotographers.
-
Cartes du Ciel: This free planetarium software offers precise planetary ephemerides and powerful charting capabilities. It’s well-suited for users who want to combine star mapping with detailed planetary tracking and observation planning.
Advantages of Using Apps and Software for Planet Tracking
- Real-Time Updates: Instant access to planetary positions as they change each night, factoring in your exact GPS location.
- Predictive Notifications: Alerts for planetary oppositions, conjunctions, and visibility windows help you never miss key observing events.
- Enhanced Visual Aids: Interactive sky maps, zoom functions, and augmented reality overlays guide you precisely to planetary targets.
- Integration with Telescopes: Many apps connect with computerized mounts for automated slewing and tracking, improving efficiency during observation or imaging sessions.
By incorporating these mobile apps and software solutions into your astronomy toolkit, you streamline the process of tracking planets and increase your success rate in planetary observations. Most importantly, they foster continual learning by visually illustrating the complex motions and cyclical appearances of planets, thereby deepening your understanding of our solar system’s workings. Whether you are planning a casual nighttime stroll through the stars or preparing for a detailed astrophotography session, these apps bring the cosmos to your fingertips—making planetary tracking both intuitive and exciting.
Image courtesy of Min An
Overcoming Common Challenges: Light Pollution, Weather, and Atmospheric Conditions
Tracking planets in the night sky can be immensely rewarding, but environmental obstacles like light pollution, adverse weather, and atmospheric turbulence often hinder clear observations. Mastering how to mitigate these factors is essential for optimizing your planetary viewing and astrophotography experiences, regardless of your location or season.
Tackling Light Pollution for Clearer Planetary Views
Light pollution from urban and suburban environments dramatically reduces the contrast between planets and the night sky, making faint or low-brightness planets harder to spot. To counter this:
- Choose Darker Observation Sites: Whenever possible, plan your observing sessions away from city lights—parks, rural areas, or designated dark-sky reserves provide vastly improved visibility.
- Use Light Pollution Filters: Specialized filters, such as broadband or narrowband filters, can reduce unwanted artificial lighting by filtering out common light sources (e.g., sodium or LED streetlights), enhancing planetary contrast in telescopic views.
- Shield Your Eyes from Local Lights: Avoid using bright flashlights or screens during observation, or use red-light illumination to preserve night vision—this simple practice enhances your ability to detect subtle planetary details.
- Schedule Observations During New Moon or Moonless Nights: The natural brightness of the Moon can swamp faint planetary features, so the darkest lunar phases yield better contrast.
Navigating Weather and Atmospheric Conditions
Clear skies are fundamental, but even perfectly clear nights may present atmospheric challenges like turbulence, humidity, or thin clouds that blur planetary images:
- Monitor Weather Forecasts and Seeing Conditions: Use specialized astronomy weather services to check for nights with stable atmospheric "seeing," where minimal air turbulence allows for sharper planetary views.
- Avoid Observing Low on the Horizon: Planets near the horizon are observed through thicker layers of atmosphere, increasing distortion. Waiting for planets to rise higher improves image clarity.
- Allow Equipment to Equalize Thermally: Let your telescope adapt to outside temperatures before observation to reduce air currents within the instrument caused by temperature gradients.
- Employ Adaptive Techniques: For astrophotographers, using short exposure imaging and “lucky imaging” can overcome momentary atmospheric disturbances by selecting the clearest frames.
By understanding and applying these strategies to combat light pollution, poor weather, and atmospheric instability, you significantly enhance your ability to track planets with greater precision and enjoyment. These optimizations not only improve visual clarity but also boost the quality of your astrophotography results, empowering you to capture the captivating details of our solar system even under challenging environmental conditions.
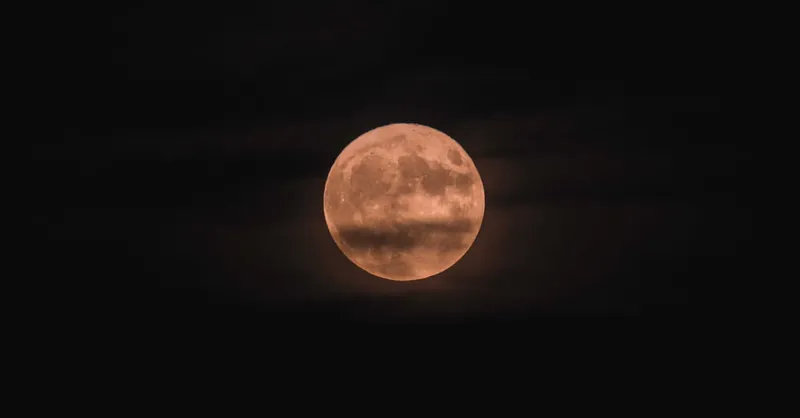
Image courtesy of Francesco Ungaro
Advanced Techniques: Using Ephemerides and Astronomical Data Resources
For astronomers seeking precise planet tracking and planning, mastering the use of ephemerides and astronomical data resources is essential. Ephemerides are detailed tables or digital datasets that provide the exact positions of planets (and other celestial bodies) at specific dates and times, showing their coordinates relative to the celestial sphere. Unlike star charts or basic apps that offer approximate locations, ephemerides deliver highly accurate positional data derived from orbital mechanics and observations, empowering you to plan observations or imaging sessions with pinpoint precision.
Understanding How to Read Planetary Ephemerides
Ephemerides typically list several important parameters critical for tracking planets, including:
- Right Ascension (RA) and Declination (Dec): These celestial coordinates locate a planet on the sky’s sphere, analogous to longitude and latitude.
- Ecliptic Longitude and Latitude: Position relative to the Sun’s apparent path, useful for following planets along the Zodiac constellations.
- Magnitude: The brightness of the planet at the given time.
- Distance from Earth and Sun: Helpful for anticipating brightness and apparent size changes.
- Rise, Transit, and Set Times: Indicate when the planet will appear above your local horizon, cross the meridian (highest point), and set.
By consulting ephemerides with these data points, you can determine the exact best observing windows, anticipate retrograde motion periods, and plan your sessions to catch planets at their brightest or largest apparent disks.
Key Astronomical Data Resources for Ephemerides
Several reliable sources provide up-to-date and customizable ephemerides, suitable for both casual observers and advanced astronomers:
-
JPL Horizons System
Offered by NASA’s Jet Propulsion Laboratory, this service generates precise ephemeris data for all planets, moons, and spacecraft missions. It allows user-defined output formats and epochs, making it a gold standard for research-level accuracy. -
Minor Planet Center (MPC)
While focusing primarily on asteroids and comets, the MPC also provides orbital elements and ephemerides that are useful when combined with planetary data for multi-object tracking. -
US Naval Observatory (USNO) Astronomical Applications
The USNO offers accessible online ephemerides, providing rise/set times, phases, and positions of major planets with high reliability. -
Astronomical Almanacs and Software Packages
Physical publications such as the Astronomical Almanac or software tools like MoonCalc, SkyTools, and Cartes du Ciel incorporate ephemeris computations, facilitating both planning and real-time tracking.
Integrating Ephemerides into Your Observation Workflow
To leverage ephemerides and data resources effectively:
- Cross-check ephemeris data with your location and local time zone to convert Universal Time (UT) entries into local observation times.
- Use ephemerides to predict conjunctions, oppositions, and retrograde loops well in advance, enabling scheduling of ideal viewing or imaging sessions.
- Input ephemeris coordinates into computerized telescope mounts or planetarium software for automated slewing and accurate tracking.
- Combine ephemeris insights with weather forecasts and seeing conditions for optimal planetary observations or astrophotography.
Incorporating ephemerides and reliable astronomical data into your planet tracking practice transforms your approach from casual skywatching into a precise, predictive science—maximizing your success in discovering, observing, and capturing the ever-changing dance of planets across our night sky.
Image courtesy of Fatih Turan
Engaging with the Astronomy Community and Resources for Continuous Learning
Astronomy is a deeply rewarding hobby that flourishes when shared with others. To expand your knowledge and refine your planet tracking skills, actively engaging with the astronomy community and utilizing diverse educational resources is essential. Connecting with fellow enthusiasts opens opportunities for mentorship, collaboration, and access to specialized knowledge that books or apps alone cannot provide.
Join Local Astronomy Clubs and Societies
Local astronomy clubs offer hands-on learning experiences, group observation nights, and access to expert advice. Many clubs organize planetary tracking sessions, telescope workshops, and astrophotography meetups, creating an ideal environment to practice identifying and following planets under guided conditions. Benefits include:
- Learning from experienced astronomers who can assist with telescope setup, tracking techniques, and interpreting celestial events.
- Sharing equipment and resources, such as loaner telescopes or specialized filters, making advanced observations more accessible.
- Participating in outreach and public stargazing events, which deepen your understanding through teaching others and discussing astronomy topics.
Websites like the International Astronomical Union (IAU) or local astronomical society listings can help you find clubs nearby.
Engage in Online Forums and Astronomy Communities
Online forums and social media groups foster a global exchange of ideas, tips, and the latest planetary tracking discoveries. Platforms such as Cloudy Nights, Reddit’s r/astronomy, and specialized Facebook groups allow you to:
- Ask questions and receive detailed answers about planetary visibility, equipment setup, and astrophotography techniques.
- Share your planetary observations or images and get constructive feedback.
- Stay updated with current celestial events, ephemeris discussions, and software tool recommendations.
These communities often host live discussions or webinars, providing opportunities for continuous learning beyond your local surroundings.
Recommended Literature and Continuous Learning Resources
Complement your practical experience with authoritative literature that deepens your understanding of planetary science and observational astronomy. Key recommendations include:
- “NightWatch: A Practical Guide to Viewing the Universe” by Terence Dickinson – an excellent introduction with practical tips on tracking planets and stars.
- “Turn Left at Orion” by Guy Consolmagno and Dan M. Davis – focuses on star and planet identification for beginners and intermediate astronomers.
- Scientific journals and magazines like Sky & Telescope and Astronomy provide updated astrophysical research, observing guides, and technology reviews relevant to planetary tracking.
Additionally, many universities and science centers offer online courses and workshops in astronomy and astrophotography to systematically enhance your skills.
Summary of Community Engagement Benefits
- Accelerates learning through shared knowledge and experience.
- Provides motivation and inspiration via social interaction and collective goals.
- Offers access to specialized resources and observational opportunities not easily available solo.
By integrating yourself into active astronomy communities—both locally and online—and committing to continual study through recommended literature, you ensure that your planetary tracking journey remains dynamic, informed, and deeply rewarding. This ongoing engagement helps you stay current with evolving techniques and astronomical discoveries, making your stargazing ever more precise and enjoyable.
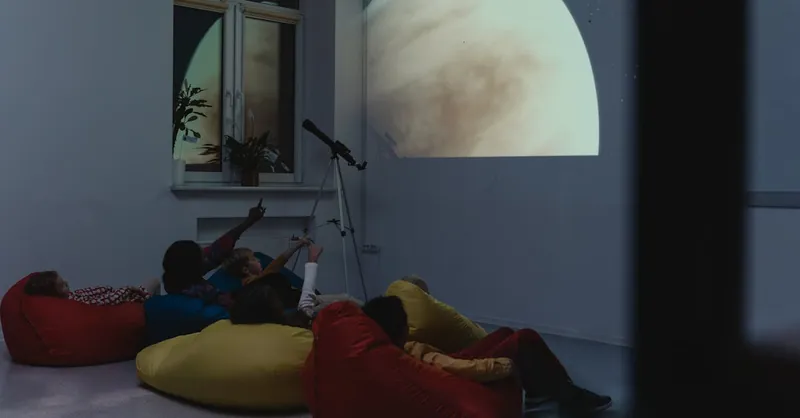
Image courtesy of Tima Miroshnichenko