Astrophotography Post-Processing Basics: A Beginner's Guide
Category: Astrophotography
Mastering Astrophotography Post-Processing Basics
If you've just captured your first stunning images of the night sky but find your photos lacking the vibrancy and detail you imagined, you're not alone. Many astronomy enthusiasts and budding astrophotographers hit a wall when transitioning from capturing raw data to unveiling the celestial beauty hidden within their shots. You likely arrived here searching for clear, practical guidance on astrophotography post-processing basics—techniques that can transform your images, reduce noise, bring out faint stars, and reveal nebulae's ethereal colors. Whether you're an amateur astronomer experimenting with your first telescope-mounted camera or a hobbyist fascinated by planetology and deep-sky objects, understanding post-processing is critical to your astrophotography journey. This post cuts through the complexity by breaking down fundamental post-processing steps, software options, and essential tips tailored just for you. Unlike generic tutorials, here, we focus on actionable insights, from calibration frames to stacking and color correction, ensuring you not only learn the “how” but also the “why” behind each technique. Ready to elevate your night sky photos and dive deep into the art and science of astrophotography post-processing? Let’s explore the essential basics and equip you with tools to reveal the universe in your images like never before.
- Mastering Astrophotography Post-Processing Basics
- Understanding Raw Data from Astrophotography
- Calibration Frames: Dark, Bias, and Flat Frames
- Image Stacking Fundamentals: Enhancing Signal-to-Noise Ratio in Astrophotography
- Alignment and Registration Techniques: Ensuring Perfect Star and Celestial Object Positioning
- Noise Reduction Strategies: Minimizing Noise Without Losing Detail in Astrophotography Post-Processing
- Enhancing Details and Contrast: Histogram Stretching, Curves Adjustment, and Sharpening Techniques
- Color Calibration and Correction: Managing Color Balance for True Celestial Hues
- Advanced Post-Processing Tips: Layer Masks, Selective Processing, Gradient Removal, and Managing Star Sizes
- Popular Software Tools for Post-Processing: From Beginner to Advanced
- Exporting and Sharing Your Final Images: Best Practices for Saving and Preparing Astrophotography Files
Understanding Raw Data from Astrophotography
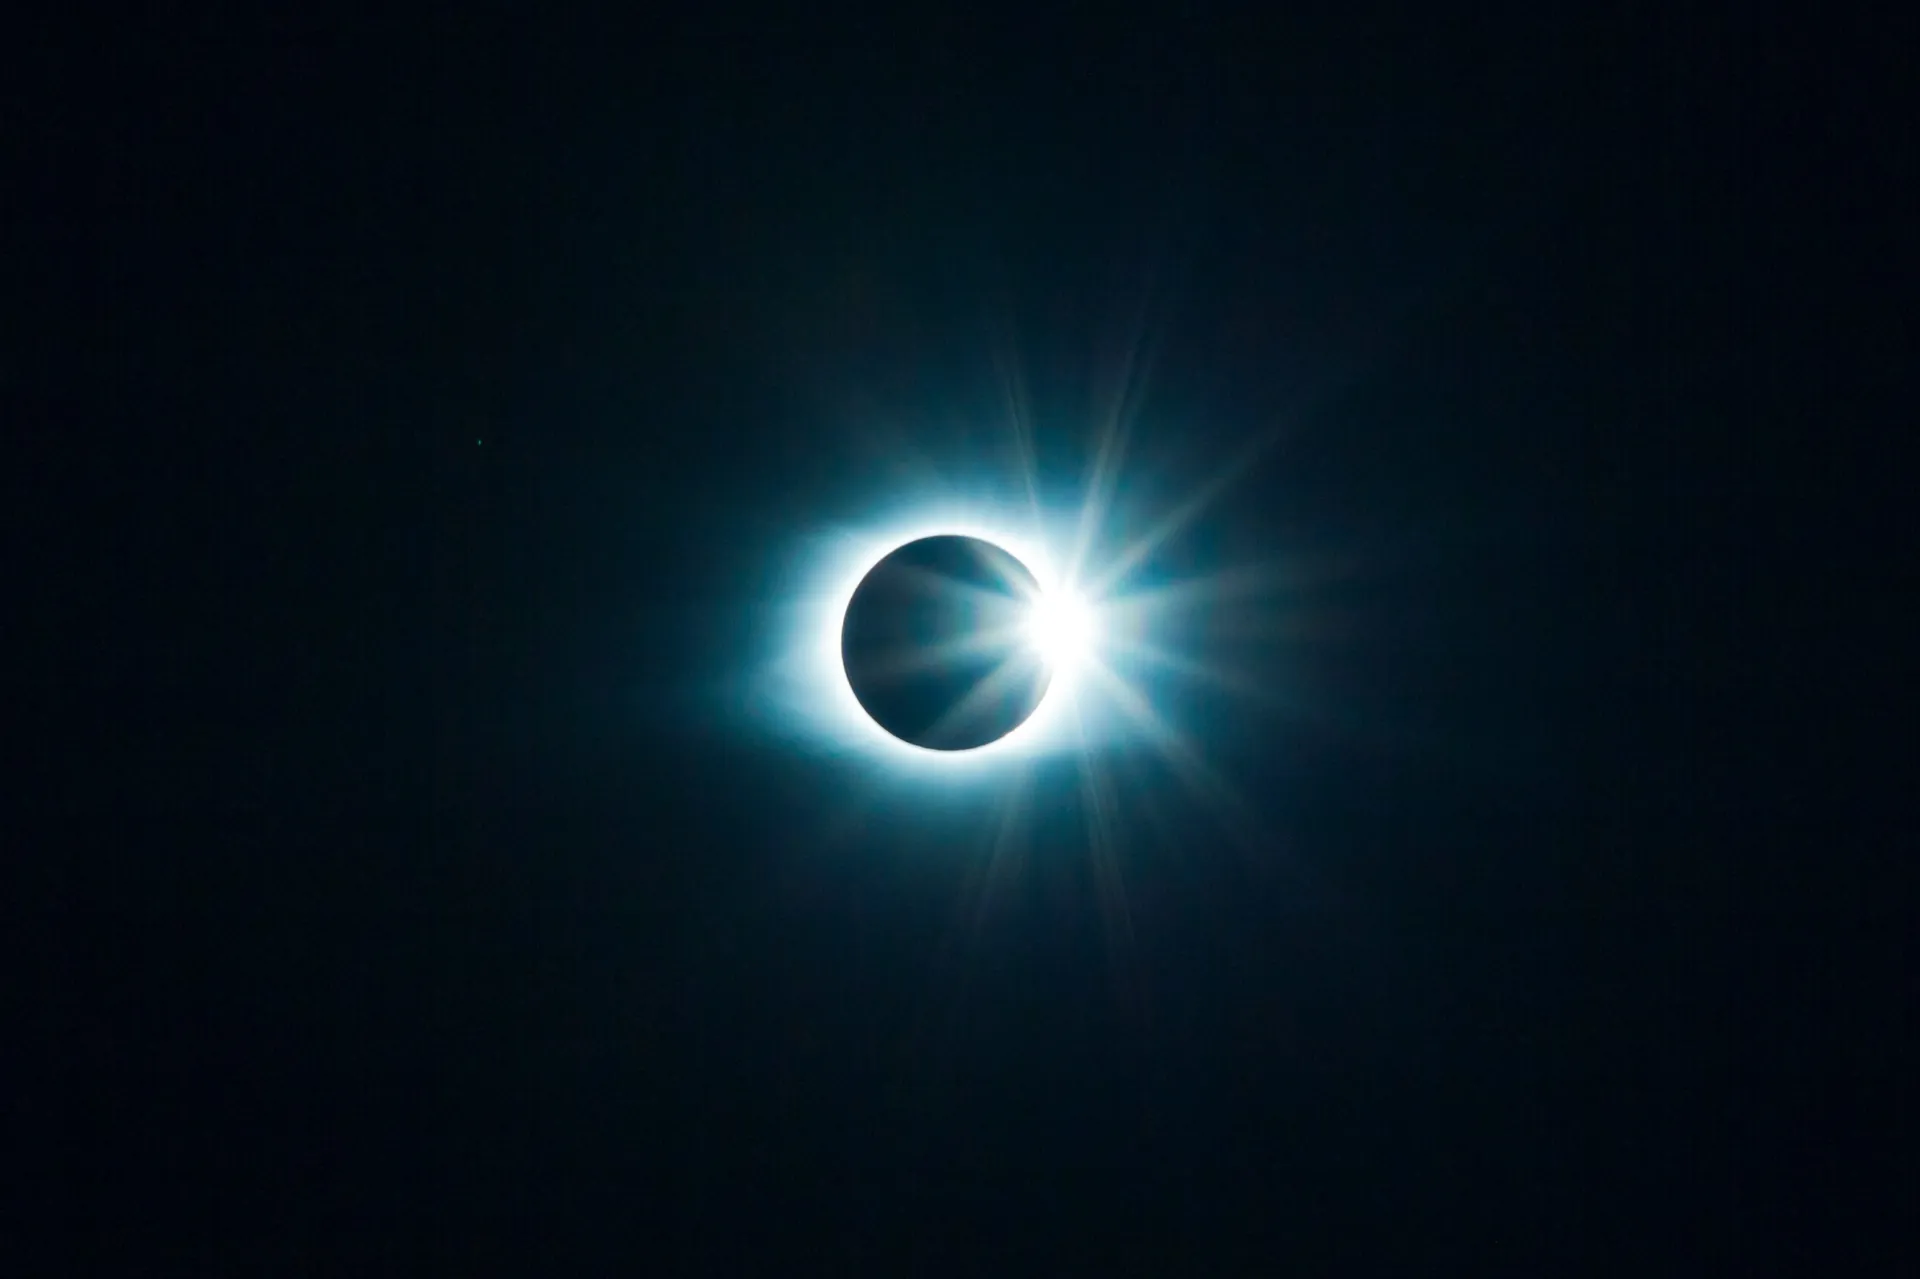
In astrophotography, raw image files are the cornerstone of capturing the true essence of the night sky. Unlike JPEG or other compressed formats, raw files contain the full sensor data directly recorded by your camera without any in-camera processing or compression. This means every photon of light captured—from distant stars to faint nebulae—is preserved in its most pristine form, providing maximum flexibility for post-processing. By working with raw files, you ensure that subtle details such as delicate gradients, faint star clusters, and nebular hues remain intact, ready to be enhanced through carefully calibrated adjustments.
Sensor Data Characteristics and Initial Image Quality
The raw data from an astrophotography session directly reflects the sensitivity and limitations of your camera sensor. Understanding these characteristics is key to producing high-quality images:
- Dynamic Range: Raw files capture a wider dynamic range, preserving detail in both bright star cores and dim nebular regions, which compression formats often lose.
- Noise Profile: Astrophotography sensors inherently introduce noise, especially in long exposures or high ISO settings. Raw data allows for more effective noise reduction techniques during post-processing.
- Bayer Matrix and Color Interpolation: Most color sensors use a Bayer filter array, which requires demosaicing algorithms to reconstruct true colors. Raw processing lets you control this step for maximum color fidelity.
- Bit Depth: Typically 12 or 14 bits per channel, raw files contain more tonal information than 8-bit JPEGs, providing finer gradations essential for subtle celestial detail.
Initial Image Quality Factors to Consider
Before delving into post-processing, assess factors affecting your raw data’s quality to optimize the final image:
- Focus Precision – Any slight misfocus reduces fine detail; always check focus with tools like Bahtinov masks or focusing software.
- Tracking Accuracy – Use a reliable equatorial mount or auto-guiding to minimize star trailing, which blurs image details.
- Exposure Settings – Properly balance exposure length and ISO to capture sufficient light without overwhelming noise or star saturation.
- Calibration Frames – Collect dark frames, bias frames, and flat frames during your session to correct sensor artifacts such as hot pixels, vignetting, and dust spots.
By thoroughly understanding and managing your raw sensor data and initial image quality, you set the stage for effective post-processing workflows that can unlock the stunning cosmos hidden within your astrophotography captures.
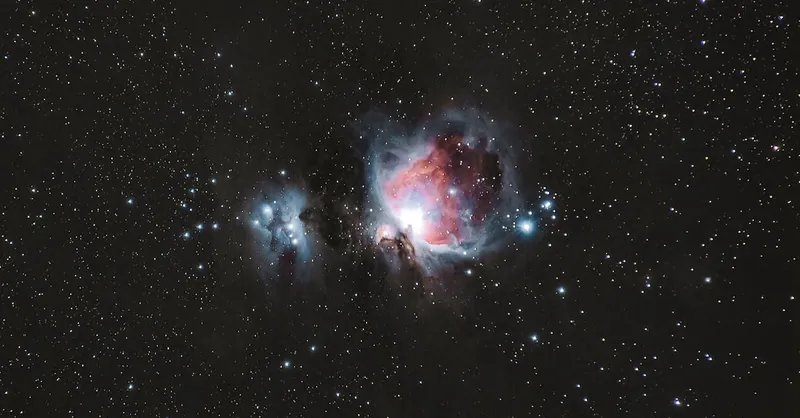
Image courtesy of Alex Andrews
Calibration Frames: Dark, Bias, and Flat Frames
One of the most crucial steps in astrophotography post-processing is the use of calibration frames—special images taken to correct inherent sensor noise and optical artifacts. These frames include dark frames, bias frames, and flat frames, each serving a unique purpose in improving the quality and accuracy of your final astrophotography images. Applying these calibration frames properly helps remove sensor imperfections such as hot pixels, electronic noise, vignetting, and dust shadows, which, if left uncorrected, can degrade the subtle details captured in deep-sky objects and star fields.
Dark Frames: Eliminating Thermal Noise
Dark frames are captured with your camera’s sensor at the same temperature and exposure length as your light frames (the actual astrophotography images), but with the lens cap on or shutter closed. These frames record only the thermal noise and hot pixels generated by the sensor. By subtracting dark frames from light frames during processing, you effectively remove this unwanted noise that typically worsens with longer exposure times.
Bias Frames: Correcting Readout Noise
Bias frames are very short exposure images taken with the camera shutter closed, capturing the sensor’s readout noise—the baseline electronic noise generated every time the camera sensor reads out the pixel values, regardless of exposure length or temperature. Bias frames help calibrate this constant noise signature, and they are especially useful for correcting the signal in shorter exposures or for creating master frames used to improve dark frame quality.
Flat Frames: Fixing Optical Imperfections
Flat frames are images taken of a uniformly illuminated surface—like a white screen, the twilight sky, or a flat-field panel—using the same optical setup as your astrophotography session. Flats capture the vignetting, dust spots on the sensor or optical elements, and uneven illumination caused by the telescope or camera optics. Applying flat frames during post-processing corrects these issues, ensuring your final images have even brightness across the frame and free of distracting blemishes.
Best Practices for Capturing and Applying Calibration Frames
- Capture calibration frames at the same temperature and optical configuration as your light frames to ensure accurate correction.
- Take multiple frames of each type (typically 20 or more) and combine them into master calibration frames to reduce random noise and improve correction precision.
- Use astrophotography processing software (e.g., DeepSkyStacker, PixInsight, or AstroPixelProcessor) to properly apply these calibration frames in the stacking workflow.
- Maintain consistency by regularly capturing new calibration frames for each imaging session, especially after changes in temperature or optical setup.
By mastering the capture and application of dark, bias, and flat calibration frames, you significantly enhance image clarity, minimize noise, and correct optical artifacts—paving the way for breathtaking astrophotography results that truly reveal the marvels of the night sky.
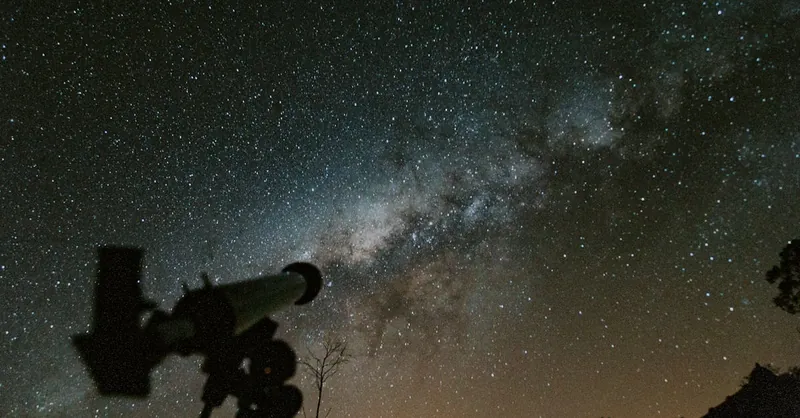
Image courtesy of Lucas Pezeta
Image Stacking Fundamentals: Enhancing Signal-to-Noise Ratio in Astrophotography
One of the most transformative techniques in astrophotography post-processing is image stacking—the process of combining multiple exposures of the same celestial target to improve the overall image quality. Stacking significantly boosts the signal-to-noise ratio (SNR), allowing faint stars, nebulae, and other deep-sky objects to emerge with striking clarity while effectively suppressing random noise inherent in individual frames.
Why Stacking Improves Signal-to-Noise Ratio
Every single exposure you capture contains a combination of valuable celestial signal and varying degrees of sensor noise, atmospheric distortion, and light pollution artifacts. Noise varies randomly between exposures, whereas the actual astronomical signal remains consistent across frames. By mathematically aligning and averaging multiple images:
- The consistent celestial signal strengthens proportionally to the number of frames stacked.
- The random noise components average out, reducing their visual impact.
- Details like faint stars, nebula textures, and galactic structures become more visible without increasing exposure times, which may introduce tracking errors or sensor saturation.
This improvement in SNR is crucial for revealing subtle astronomical features that single exposures could not capture effectively, making stacking a foundational pillar in astrophotography.
Common Software Tools for Stacking Astrophotography Images
To harness the power of stacking, astrophotographers rely on specialized software designed to accurately align, calibrate, and combine multiple exposures while applying calibration frames for optimal results. Some of the leading stacking tools include:
- DeepSkyStacker (DSS): A widely popular, free Windows program known for its user-friendly interface and robust calibration and stacking features. DSS automates dark, bias, and flat frame integration, making it an excellent choice for beginners and intermediate users.
- PixInsight: A comprehensive, professional-grade astrophotography software offering powerful stacking, image calibration, and advanced post-processing capabilities. PixInsight is favored by experienced astrophotographers who require fine control over every processing step.
- AstroPixelProcessor (APP): Renowned for its cutting-edge algorithms, multi-threading, and GPU acceleration, APP excels at stacking large datasets and offers efficient noise reduction and post-calibration image enhancement.
- Sequator: A lightweight, straightforward tool optimized for deep-sky stacking on Windows, particularly useful for wide-field astrophotography.
Best Practices for Effective Stacking
To maximize the benefits of stacking, consider the following practices:
- Capture a large number of quality light frames, as stacking more exposures boosts SNR significantly.
- Ensure all light frames are taken with consistent settings and minimal tracking errors.
- Incorporate master calibration frames (dark, bias, and flat) to correct sensor and optical imperfections during stacking.
- Use software features such as star alignment and rejection algorithms to exclude frames with distortions or satellites.
- Experiment with stacking parameters like normalization and weighting to optimize the final stacked image.
By mastering image stacking fundamentals and leveraging dedicated stacking software, you take a crucial step toward producing astrophotography images with enhanced detail, reduced noise, and vibrant accuracy—inviting your audience to explore the universe’s grandeur with each shot you share.
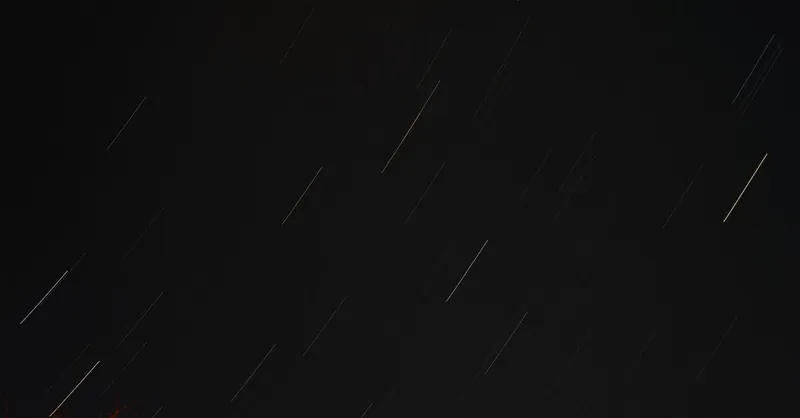
Image courtesy of Alican Helik
Alignment and Registration Techniques: Ensuring Perfect Star and Celestial Object Positioning
Before stacking your astrophotography images, alignment and registration are essential processes that ensure stars and celestial objects line up precisely across multiple frames. During an imaging session, subtle shifts can occur from slight mount tracking errors, atmospheric refraction, or even flexure in your optical system. If these misalignments are not corrected, stacking can result in blurred stars, loss of fine details, and overall image degradation.
Image alignment involves detecting stars or other reference points in each exposure and transforming each frame—by shifting, rotating, or scaling it—to match a master reference frame. This meticulous alignment is crucial for producing sharp, crisp final images that reveal intricate nebular structures and fine stellar details.
Key Techniques for Accurate Alignment and Registration
- Star Detection and Matching: Software algorithms identify common stars across frames as control points to calculate the necessary transformations for alignment.
- Subpixel Shifting: Alignment operates at a subpixel level, allowing fractional pixel adjustments to maximize sharpness and detail retention.
- Distortion Correction: Some advanced tools also correct for minor optical distortions or field rotation encountered during long exposure sequences.
- Batch Registration: For large datasets, batch processing automates alignment, ensuring consistent registration across dozens or hundreds of images.
Leading astrophotography software such as DeepSkyStacker, PixInsight, and AstroPixelProcessor incorporate sophisticated registration algorithms that handle translation, rotation, and scaling seamlessly. Properly aligned images stack without star trailing or ghosting artifacts, dramatically improving the final image quality by preserving the integrity of celestial features.
In summary, mastering alignment and registration is a foundational step in astrophotography post-processing that prepares your images for optimal stacking results. With precise registration, your composite images will showcase the universe’s fine cosmic tapestry with stunning clarity and detail.
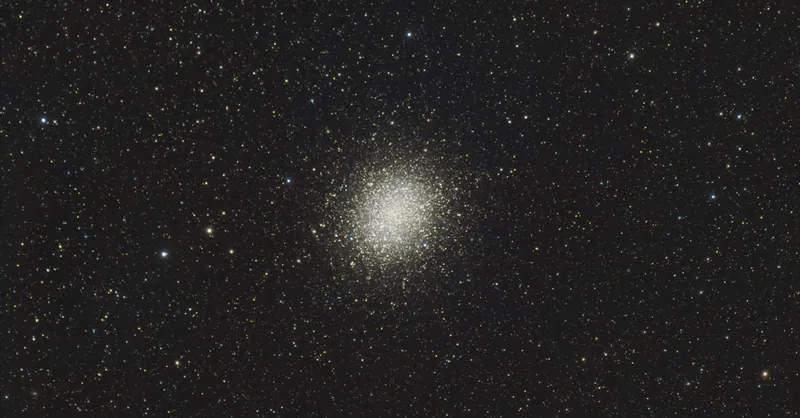
Image courtesy of Adam Krypel
Noise Reduction Strategies: Minimizing Noise Without Losing Detail in Astrophotography Post-Processing
Astrophotography images are inherently prone to various types of noise, which can obscure fine celestial details and degrade overall image quality. Common noise sources include thermal noise generated by the camera sensor during long exposures, readout noise from electronic signal processing, and photon noise caused by the statistical nature of light itself, especially in dim deep-sky objects. Additionally, environmental factors such as light pollution and atmospheric turbulence contribute to unwanted image artifacts. Effective noise reduction in post-processing is crucial to preserving subtle star colors, delicate nebula structures, and faint galactic features while maintaining sharpness and detail.
Key Noise Types in Astrophotography
- Thermal Noise: Heat-induced electrons accumulate during long exposures, visible as random bright pixels or blotches.
- Readout Noise: Electronic interference during sensor data transfer causes a consistent background noise pattern.
- Photon Noise (Shot Noise): Statistical variation in the number of photons detected, especially prominent in low-light regions.
- Pattern Noise: Fixed pixel or column defects typical in some sensors, often mitigated through calibration frames.
Effective Noise Reduction Methods
- Stacking Multiple Frames: As discussed earlier, image stacking inherently reduces random noise by averaging out inconsistencies across exposures, improving the signal-to-noise ratio without softening details.
- Use of Master Calibration Frames: Applying darks and bias frames eliminates thermal and readout noise patterns early in processing, decreasing the noise load for subsequent reduction steps.
- Selective Noise Reduction Filters: Post-stacking, employ software tools like PixInsight’s ACDNR, Photoshop’s Noise Reduction filters, or Topaz DeNoise AI that target noise while preserving edges and fine details by distinguishing noise patterns from real image structures.
- Masking Techniques: Create star and structure masks to apply noise reduction selectively—reducing noise only in background areas while protecting stars and nebulae from becoming blurred or overly smooth.
- Wavelet and Multiscale Processing: Advanced techniques that decompose images into different scales allow noise removal at the fine structure level while retaining larger details, enhancing clarity without softening.
Best Practices for Balanced Noise Reduction
- Avoid aggressive noise reduction that can smear or erase faint stars and nebular filaments.
- Gradually apply noise reduction, combining stacking gains, calibration frame corrections, and post-process filtering for optimal results.
- Regularly compare before-and-after views during post-processing to ensure detail retention.
- Leverage GPU-accelerated or AI-driven noise reduction tools capable of maintaining textural nuances.
By understanding the varied noise sources in astrophotography and applying a strategic combination of stacking, calibration, and selective noise reduction filters, you can dramatically enhance image quality without compromising the intricate details that make your night sky photos breathtakingly vivid and scientifically valuable. This balancing act is central to unlocking the true potential of your astrophotography captures through post-processing mastery.
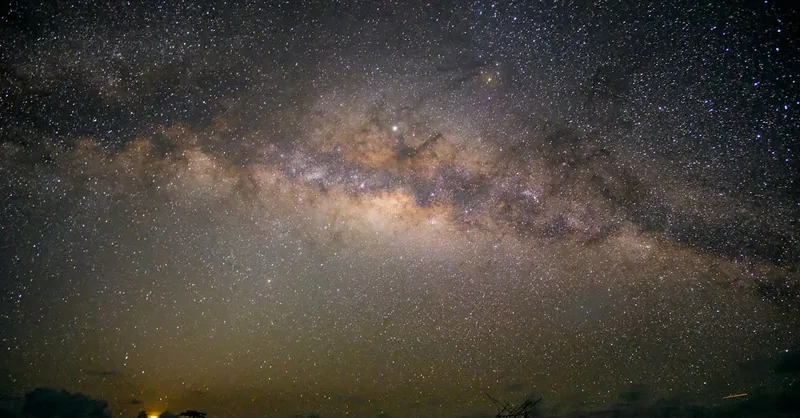
Image courtesy of Jobert Enamno
Enhancing Details and Contrast: Histogram Stretching, Curves Adjustment, and Sharpening Techniques
Once your astrophotography images are stacked, aligned, and noise-reduced, the next critical step is to enhance the faint celestial details and bring out vibrant contrasts that reveal the true splendor of stars, nebulae, and planetary surfaces. Many raw or stacked frames often appear flat or washed out because the subtle light variations captured by your sensor need to be digitally emphasized. Mastering techniques like histogram stretching, curves adjustment, and sharpening will elevate your images from mere captures into compelling visual narratives of the cosmos.
Histogram Stretching for Dynamic Range Expansion
Histogram stretching is a fundamental post-processing method that redistributes pixel brightness values to increase contrast and highlight faint features such as dim stars and nebular wisps, which typically lie buried in the lower intensity range. By carefully pulling the shadows and midtones upward while preserving highlights, you expand the visible dynamic range without clipping important bright details.
Key points for effective histogram stretching include:
- Avoid clipping the left (black) and right (white) ends of the histogram to retain detail in dark and bright regions.
- Use gradual, non-destructive adjustments to prevent posterization or banding artifacts.
- Perform multiple, subtle stretches rather than a single aggressive one for better tonal control.
Curves Adjustment: Fine-Tuning Contrast and Brightness
Beyond histogram stretching, the curves tool offers precise control over the tonal response of your image by mapping input brightness values to customized output levels. Astrophotographers utilize curves to:
- Boost midtones and shadows selectively, unmasking faint nebulosity.
- Enhance contrast in specific brightness ranges to make star clusters and planetary features pop.
- Adjust RGB curves individually for balanced color correction and to mitigate color casts caused by light pollution or atmospheric effects.
Through intelligent curves manipulation, you deepen contrast where needed without losing subtle gradients, vital for rendering nebular gases or planetary surface markings accurately.
Sharpening: Bringing Out Fine Celestial Details
After tonal and contrast enhancements, sharpening refines edges and textures to improve the perceived clarity of stars, nebula filaments, and planetary details. Unlike general sharpening, astrophotography demands targeted techniques that emphasize fine structures without amplifying noise. Some effective sharpening strategies include:
- Applying unsharp mask or deconvolution algorithms at low radii and moderate amounts to preserve natural star shapes.
- Utilizing selective sharpening masks to restrict enhancement to nebular filaments or planetary surface features while protecting background noise and stars from over-processing.
- Combining sharpening with noise reduction workflows to maintain a clean yet detailed final image.
Integrating Techniques for Optimal Results
To maximize the impact of detail and contrast enhancement:
- Approach histogram stretching and curves adjustment in small, iterative steps—evaluating the effect after each change.
- Sharpen your image only after noise reduction and tonal adjustments to avoid exaggerating artifacts.
- Use high-bit-depth editing environments (16-bit or higher) throughout to prevent quality loss during gradual edits.
By incorporating these techniques—histogram stretching, curves adjustment, and sharpening—you bring out the faint stars, delicate nebular structures, and planetary surface details that make astrophotography so captivating. This meticulous enhancement phase is essential not only for aesthetic appeal but also for scientific clarity, unlocking the hidden wonders captured in your night sky imagery.
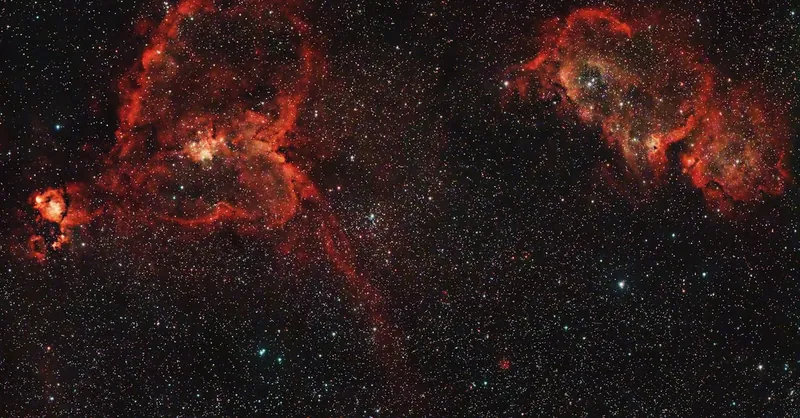
Image courtesy of Wayne Zuhl
Color Calibration and Correction: Managing Color Balance for True Celestial Hues
Achieving accurate color representation in astrophotography is essential for creating images that not only please the eye but also reflect the true nature of celestial objects. Colors in raw astrophotography data often appear skewed or washed out due to sensor characteristics, light pollution, atmospheric conditions, and the complex interplay of different wavelengths of light emitted by stars, nebulae, and galaxies. To manage color balance and remove unwanted color casts, thoughtful color calibration and correction must be applied during post-processing to restore and emphasize authentic cosmic colors.
Why Color Calibration is Vital in Astrophotography
- Raw sensor data does not inherently match human vision or the true spectral properties of space objects.
- Variations in camera sensor response and white balance settings can introduce unnatural tints.
- Atmospheric absorption and urban light pollution often cause dominant color casts, such as orange or green hues, which obscure delicate nebular reds and blues.
- Proper calibration extracts and preserves scientifically valuable color information, helping differentiate star temperatures, nebula composition, and dust structures.
Essential Steps for Effective Color Calibration and Correction
-
Set a Baseline White Balance
Begin by adjusting white balance towards a neutral gray point in the image background, often a dark sky patch free of stars or nebula. This step removes pervasive color tints imposed by environmental lighting. -
Use Color Reference Points
Identify known objects such as bright stars with well-documented colors (e.g., blue-white Rigel or red Betelgeuse) to fine-tune color balance. This ensures stars retain realistic hues corresponding to their spectral class. -
Calibrate Using Histograms and RGB Curves
Balance the red, green, and blue channels independently with curves or levels adjustments to eliminate channel dominance and enhance subtle color variations in nebulae and galaxies. -
Neutralize Light Pollution and Atmospheric Effects
Apply gradient removal or color correction masks to selectively suppress artificial light gradients without sacrificing natural star colors. -
Preserve Faint Color Gradients
Avoid over-saturation or clipping which can erase delicate color variations in nebulae gas clouds. Use gentle saturation boosts and consider local adjustments to enhance color contrast where needed.
Tools and Techniques for Color Correction
Astrophotography processing software like PixInsight, Photoshop, and DeepSkyStacker provide powerful tools for color calibration:
- Background Neutralization and Color Calibration scripts in PixInsight automate removing unwanted color casts.
- Photoshop’s Selective Color and Curves adjustment layers allow detailed channel balancing and color refinement.
- Masks and luminosity selections help isolate stars or nebulae for targeted color enhancements.
By mastering color calibration and correction, you ensure your astrophotographs reflect the true celestial palette, from the warm reds of hydrogen-alpha nebulae to the soft blues of reflection nebulae and the myriad star colors across the Hertzsprung-Russell diagram. This vital post-processing step transforms raw images into vivid, scientifically meaningful representations of the cosmos while captivating viewers with their authentic beauty.
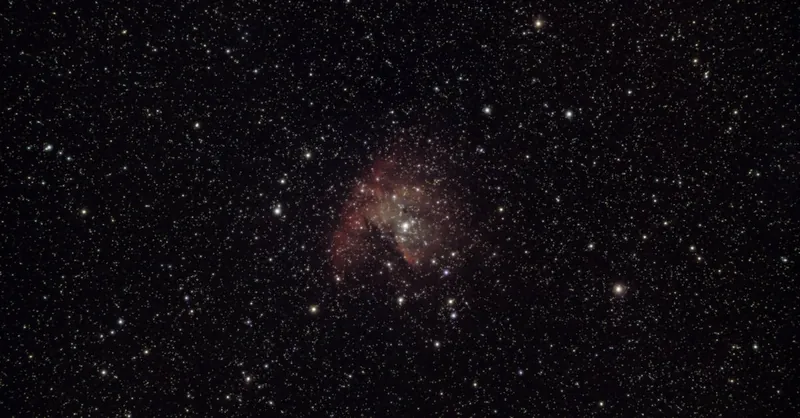
Image courtesy of Jeremy Müller
Advanced Post-Processing Tips: Layer Masks, Selective Processing, Gradient Removal, and Managing Star Sizes
To take your astrophotography images from impressive to professional-quality, mastering advanced post-processing techniques is essential. These methods focus on precise control over specific image areas, enabling you to enhance details, balance brightness, and reduce distracting artifacts without compromising the overall aesthetic or scientific value of your celestial photos.
Utilizing Layer Masks for Selective Editing
Layer masks are invaluable tools in programs like Photoshop and PixInsight that allow you to apply adjustments selectively—targeting stars, nebulae, or background sky independently. Instead of applying global edits that may wash out details or exaggerate unwanted noise, layer masks help you:
- Protect bright stars while enhancing faint nebular structures.
- Apply noise reduction only to background areas to preserve star sharpness.
- Adjust color saturation locally without introducing halos or color bleeding.
Selective masking keeps your processing focused and refined. For example, creating a star mask lets you specifically adjust star size and brightness without altering complex nebular details, while a luminosity mask can isolate faint gas clouds for targeted contrast boosts.
Effective Gradient Removal for Even Sky Backgrounds
Light pollution, moonlight, and atmospheric glow often impose unwanted gradients—uneven brightness or color shifts—across astrophotography images. Removing these gradients is critical to bringing out real celestial features without distracting bands of light or color tint. Gradient removal techniques include:
- Using dedicated tools like PixInsight’s Dynamic Background Extraction (DBE) or Photoshop’s gradient removal workflows.
- Applying carefully crafted masks to protect stars and nebulae while flattening the background.
- Working in multiple passes to prevent over-correction that could result in unnaturally flat or blotchy backgrounds.
Mastering gradient removal preserves the natural transition of sky brightness and enhances the visibility of faint objects, especially in wide-field and deep-sky imaging.
Managing Star Sizes for Balanced Composition
Stars in astrophotography images often dominate the frame when they become oversized or overly bright due to telescope optics or processing oversharpening. Controlling star sizes is crucial for achieving a balanced composition that highlights nebulae, galaxies, or planetary textures without distraction. Techniques to manage star sizes include:
- Using star size reduction scripts or plugins to shrink stars selectively while keeping their brightness intact.
- Applying star masks to isolate stars during sharpening and noise reduction, preventing undesired growth or blurring.
- Fine-tuning curves and contrast adjustments specifically on stars to maintain their natural roundness and avoid irregular halos.
By carefully balancing star size and prominence, your astrophotography images will exhibit enhanced detail and artistic harmony, inviting viewers deeper into the cosmic scene.
Incorporating these advanced post-processing techniques—layer masks, selective editing, gradient removal, and star size management—empowers astrophotographers to create truly professional and visually compelling images. These skills not only elevate the aesthetic quality but also preserve the intricate scientific details essential for astronomy enthusiasts, researchers, and educators sharing the wonders of the night sky.
Image courtesy of Thirdman
Popular Software Tools for Post-Processing: From Beginner to Advanced
Choosing the right software is a critical step in astrophotography post-processing, as it directly influences your ability to calibrate, stack, align, and enhance your night sky images effectively. Whether you are a beginner looking for intuitive free options or an advanced astrophotographer seeking professional-grade control, there is a range of tools tailored to diverse experience levels and workflows.
Beginner-Level Software: Easy and Accessible
-
DeepSkyStacker (DSS)
DeepSkyStacker is one of the most popular free tools for astrophotography beginners. It offers automatic calibration frame application, stacking, and simple alignment features in a user-friendly interface. This Windows-only application supports the integration of dark, bias, and flat frames and offers basic post-stacking tools that greatly improve signal-to-noise ratio. While it lacks advanced editing capabilities, DSS is perfect for newcomers to learn the fundamentals of image stacking and calibration without a steep learning curve. -
Sequator
Sequator is a free, lightweight option focused on wide-field deep-sky stacking with an emphasis on simplicity and speed. Ideal for those using DSLR or mirrorless cameras, it automatically detects and aligns stars, removes light pollution gradients, and stacks images without complex setup, making it excellent for beginners eager to quickly enhance Milky Way shots or star fields.
Intermediate Software: Enhanced Control and Flexibility
-
Adobe Photoshop
Photoshop is widely used in astrophotography for its powerful image editing capabilities, including curves and levels adjustments, noise reduction, sharpening, and layer masking for selective processing. While not specialized for astro workflows, Photoshop integrates well with raw astrophotography workflows once your images are calibrated and stacked. With extensive tutorials and plugins available, it provides a flexible platform for refining colors, enhancing contrast, and perfecting final aesthetics. -
GIMP
For those seeking a free alternative to Photoshop, GIMP offers many comparable tools for color correction, masking, and detail enhancement. Though it requires some customization for astrophotography pipelines, GIMP is a robust solution for hobbyists committed to post-processing without investing in commercial software.
Advanced Software: Professional-Grade Astrophotography Processing
-
PixInsight
PixInsight is widely regarded as the industry standard for advanced astrophotography post-processing, offering an extensive suite of tools designed specifically for astronomical image calibration, stacking, noise reduction, color calibration, gradient removal, and multiscale processing. Its sophisticated algorithms and scripting capabilities provide unparalleled control over every image detail, making it the preferred choice for experienced astrophotographers seeking scientific accuracy and stunning visual results. Although it has a steeper learning curve, the investment in mastering PixInsight pays off in exceptional image quality and workflow efficiency. -
AstroPixelProcessor (APP)
APP offers cutting-edge algorithms for calibration, alignment, and stacking while supporting multi-core CPU and GPU acceleration. It excels in handling large datasets, automatic gradient removal, and narrowband imaging integration. APP’s intuitive interface combines ease of use with powerful professional features, making it a favorite among serious astrophotographers who want a streamlined yet advanced post-processing solution.
By selecting software that matches your skill level and processing goals—from user-friendly free programs like DeepSkyStacker to the comprehensive capabilities of PixInsight and AstroPixelProcessor—you build a solid foundation to unlock the full potential of your astrophotography images. Experimenting with these tools and mastering their distinct workflows is key to transforming raw night sky captures into breathtaking celestial masterpieces that showcase the universe in all its glory.

Image courtesy of MART PRODUCTION
Exporting and Sharing Your Final Images: Best Practices for Saving and Preparing Astrophotography Files
After meticulously processing your astrophotography images—calibrating, stacking, aligning, noise reducing, and enhancing details—the final step is to export and share your masterpieces in formats that preserve quality and optimize viewing across platforms. Choosing the right file formats and preparing images for online sharing or print publication is crucial to maintaining the fine celestial details and vibrant colors you worked hard to reveal.
Saving Images in Appropriate Formats
-
Use Lossless Formats for Archiving and Further Editing
Save your fully processed images in lossless formats like TIFF or PNG to retain all color depth, dynamic range, and detail without compression artifacts. Use 16-bit or 32-bit floating point TIFF files if your software supports them to preserve the highest quality for future edits or scientific analysis. -
Create JPEG Versions for Web and Social Media Sharing
For online platforms where file size and compatibility matter, export optimized JPEG files with high-quality settings (minimum 90% quality) to balance file size and image fidelity. Applying a slight sharpening and color profile conversion to sRGB before export ensures consistent display on most devices and browsers. -
Embed Color Profiles and Metadata
Embedding ICC color profiles (preferably sRGB for web or AdobeRGB for print) within exported files guarantees color accuracy across different screens and printers. Also, include descriptive metadata and keywords related to your image—such as object names, equipment used, and location—to improve discoverability and SEO when shared online.
Preparing Images for Print and Web Display
-
Resize and Optimize for Print
When preparing astrophotography images for printing, ensure the resolution is at least 300 DPI (dots per inch) at the desired print size. Convert your image to the appropriate color profile (usually AdobeRGB or CMYK for commercial printers) and save in a high-quality TIFF or PDF to retain sharpness and color fidelity. -
Optimize Images for Fast Web Loading
For website or social media use, resize images to no more than 1920 pixels on the longest side to reduce loading times while maintaining visual impact. Compress images lightly without sacrificing noticeable quality and use the sRGB color space to ensure broad compatibility. -
Consider Creating Multiple Versions
Have different versions of your final image tailored for various uses—high-resolution for prints and downloads, medium-sized for blog posts or portfolios, and smaller thumbnails for quick previews or mobile browsing.
Sharing Strategies to Maximize Exposure
-
Utilize Astronomy and Astrophotography Communities
Share your images on specialized platforms such as AstroBin, Cloudy Nights forums, or social media groups dedicated to astronomy to reach an engaged audience that appreciates technical quality and scientific relevance. -
Leverage SEO-Friendly Descriptions and Tags
When uploading images, accompany them with rich descriptions, relevant keywords (e.g., object name, telescope model, location), and links to your blog or portfolio to enhance search engine indexing and drive traffic.
By following these best exporting practices and sharing strategies, you ensure your astrophotography images maintain their stunning quality and reach the widest possible audience—whether showcased on a personal website, social media, or printed in astronomy publications. Proper file format selection, resolution optimization, and metadata inclusion not only preserve your images’ scientific and aesthetic integrity but also maximize their visibility and impact within the global astronomy community.

Image courtesy of Alex Andrews