Beginner Astrophotography Settings for Moon Shots
Category: Astrophotography
Mastering Beginner Astrophotography Settings for Stunning Moon Shots
If you're an astronomy enthusiast or an amateur astronomer stepping into the captivating world of astrophotography, capturing the moon in all its glory can be both exciting and daunting. You have your camera and telescope ready, but the question remains—what settings will give you those crisp, detailed moon shots that stand out? Many beginners find themselves overwhelmed with technical jargon and countless suggestions that don’t quite fit their equipment or experience level.
This post is crafted especially for beginners like you, who want clear, practical guidance on how to set up your camera for moon photography. We understand your pain points: balancing exposure, choosing the right ISO, shutter speed, and lens settings without endless trial and error. You’ve arrived here because you want straightforward answers to optimize your gear and technique efficiently.
Unlike other articles scattered with overly complex instructions or assumptions of advanced knowledge, this guide offers a step-by-step approach tailored to your needs. Whether you’re using a DSLR, mirrorless, or smartphone with an adapter, these beginner-friendly settings will help you capture crisp and detailed moon images. Get ready to elevate your astrophotography skills and impress your friends with moon shots that truly shine.
- Mastering Beginner Astrophotography Settings for Stunning Moon Shots
- Understanding the Basics of Moon Photography: Why the Moon is Different from Other Night Sky Targets
- Essential Equipment for Beginner Moon Astrophotography: Cameras, Lenses, Telescopes, and Mounts
- Camera Settings Overview: Shutter Speed, Aperture, ISO, and White Balance Explained for Moon Shots
- Optimal Exposure Settings for Moon Photography: How to Avoid Overexposure and Capture Detail
- Focusing Techniques for Sharp Moon Images: Manual Focus, Live View, and Using Zoom
- Using Tripods and Remote Shutters to Reduce Vibrations and Improve Image Clarity
- Basic Post-Processing Tips for Enhancing Moon Photos Without Overdoing It
- Common Mistakes Beginners Make and How to Avoid Them for Better Moon Shots
- Advanced Tips for Experimenting with Different Moon Phases and Composition
- Troubleshooting and Frequently Asked Questions Related to Beginner Moon Astrophotography Settings
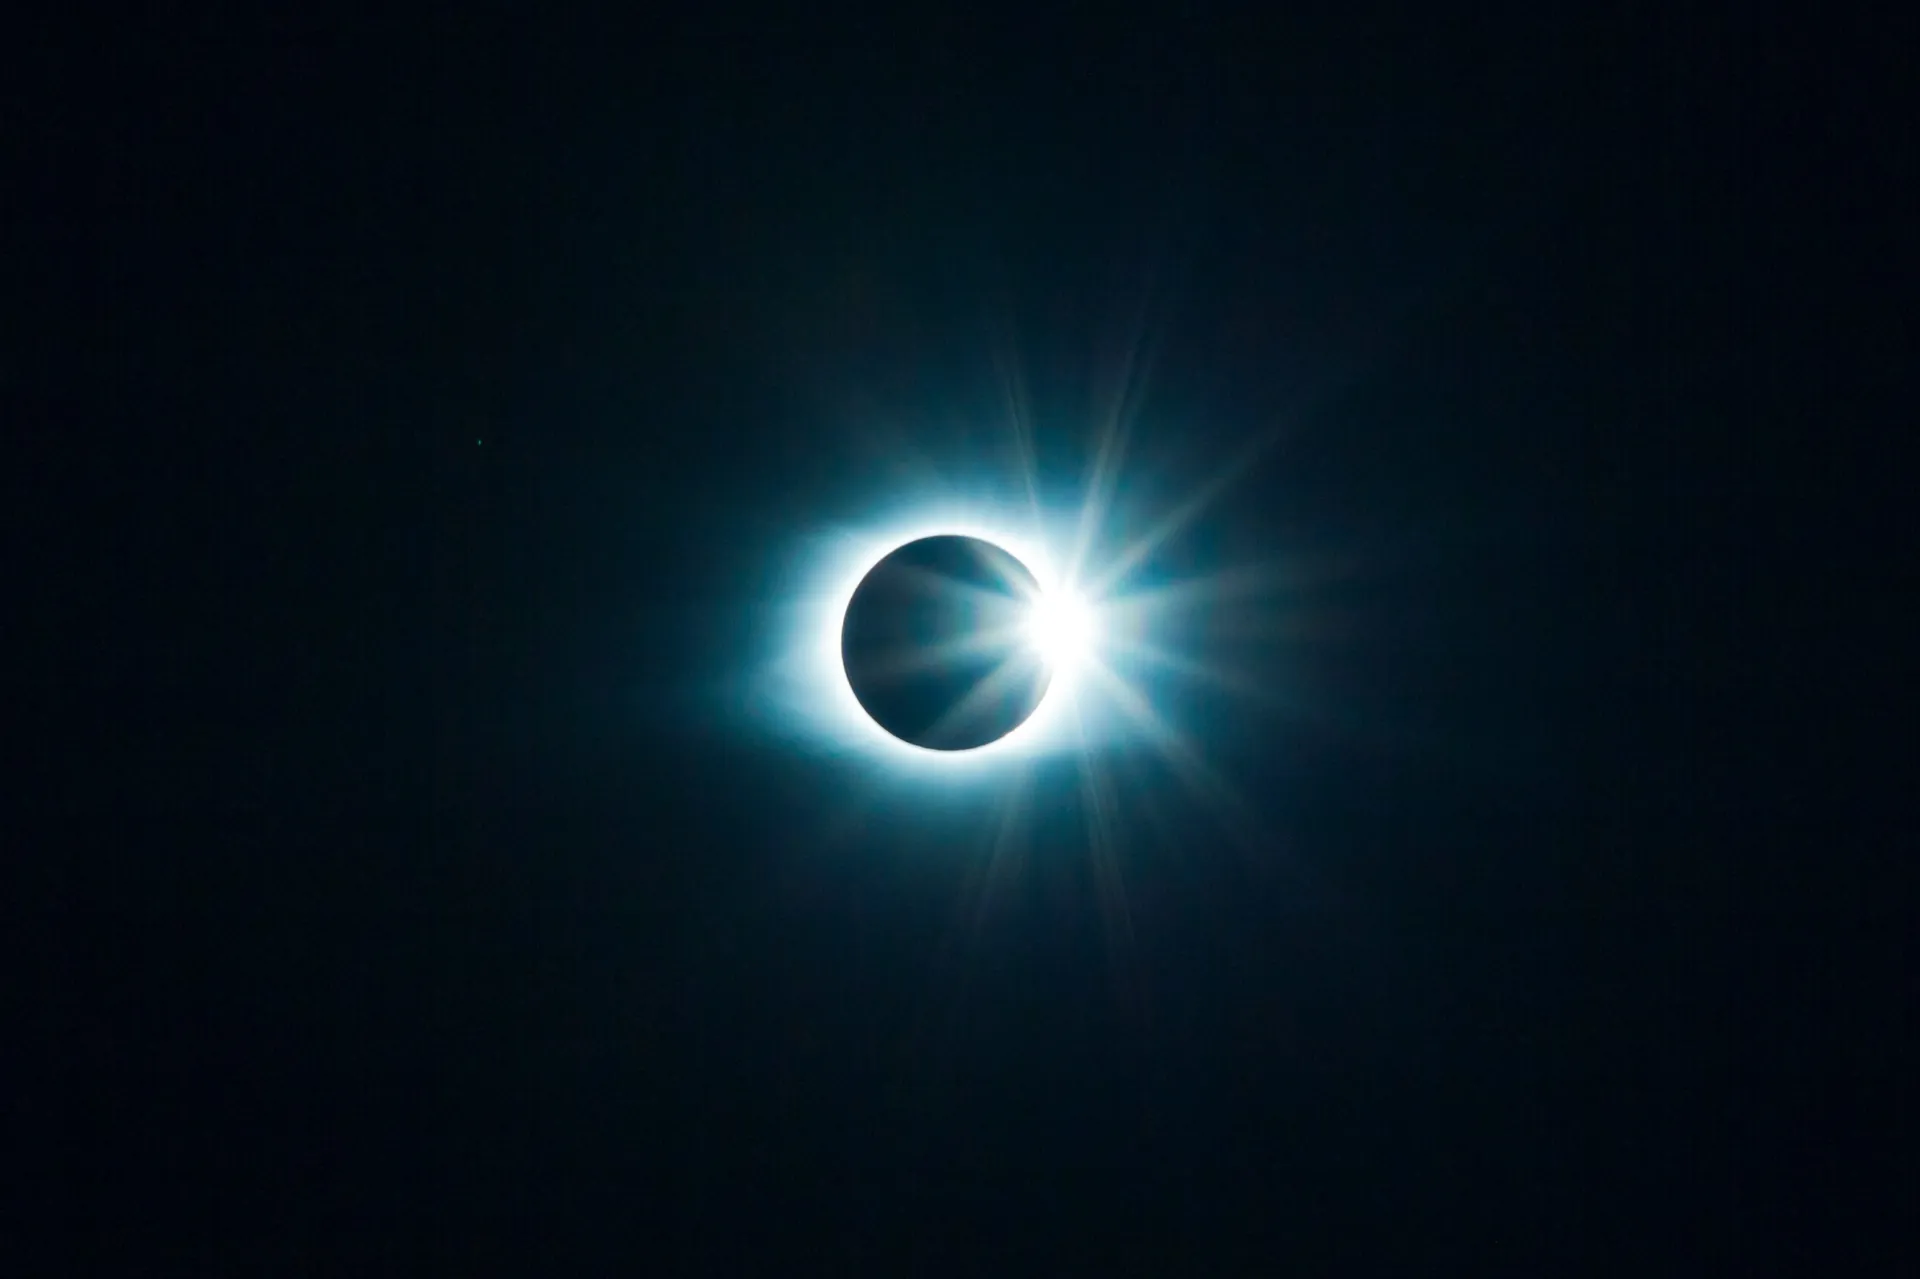
Understanding the Basics of Moon Photography: Why the Moon is Different from Other Night Sky Targets
When diving into astrophotography, it's crucial to recognize that the Moon presents a unique set of characteristics that distinguish it from other celestial objects like stars, planets, or deep-sky nebulae. Unlike distant stars, which appear as tiny points of light requiring long exposures to capture their faint glow, the Moon is a bright, reflective body with intricate surface details visible even through basic telescopes and lenses.
This brightness means that typical astrophotography settings used for capturing dimmer objects won't work well for moon photography. For example, long exposure times can result in overexposed images, washing out craters and textures and producing an uninteresting bright blob instead of a detailed lunar surface. Instead, shorter shutter speeds combined with lower ISO settings help preserve sharpness and surface contrast.
Additionally, the Moon moves relatively quickly across the sky—roughly 0.5 degrees per hour—meaning that too long an exposure can also cause motion blur, further degrading image quality. Understanding these differences is the first step to optimizing your camera settings for moon shots. The key is to strike a balance that highlights the Moon’s natural luminosity and rugged topography without sacrificing clarity or detail, setting it apart from typical night sky targets.
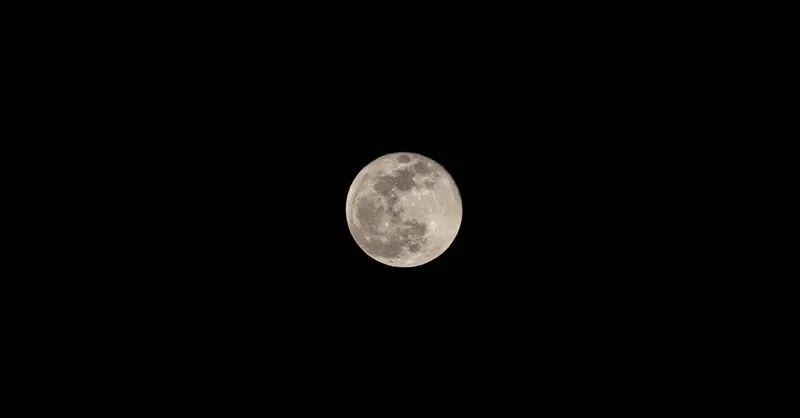
Image courtesy of Simão Moreira
Essential Equipment for Beginner Moon Astrophotography: Cameras, Lenses, Telescopes, and Mounts
To successfully capture stunning moon shots as a beginner astrophotographer, having the right equipment tailored to lunar photography is just as crucial as understanding camera settings. The Moon’s brightness and surface detail demand gear that can maximize resolution and minimize blur, so choosing suitable cameras, lenses, telescopes, and mounts will elevate your results significantly.
Cameras: DSLR, Mirrorless, and Smartphones
For beginners, DSLR and mirrorless cameras are ideal due to their manual control over exposure, ISO, and focus. These cameras allow you to fine-tune your settings to adapt to the Moon’s bright surface. Look for models with:
- A good megapixel count (12MP or higher) for capturing fine lunar details
- The ability to shoot in RAW format to preserve image quality during post-processing
- Responsive manual focus and exposure controls
If you don’t have a dedicated camera, modern smartphones with clip-on telescope adapters can also work surprisingly well for moon shots, especially if paired with apps that offer manual exposure and focus controls.
Lenses and Telescopes: Focal Length for Lunar Detail
Capturing the Moon’s craters and textures requires a lens or telescope with sufficient focal length to zoom in without losing clarity. Here’s what beginners should consider:
- Telephoto lenses with a focal length of 200mm or more are recommended for DSLR and mirrorless cameras to bring the Moon close enough in the frame.
- For enhanced detail, using a telescope as a telephoto lens replacement is ideal. Refractor or reflector telescopes with focal lengths between 500mm to 1500mm offer excellent magnification and sharpness.
- Consider using Barlow lenses to increase your effective focal length when photographing through telescopes, boosting lunar surface resolution.
Mounts and Stabilization: The Backbone of Sharp Images
Since the Moon moves steadily across the sky, mount stability is critical to avoid motion blur during your shot. Beginners should invest in:
- A stable tripod with adjustable height and sturdy legs to hold your camera or smartphone firmly in place.
- For telescope users, an equatorial mount or motorized alt-azimuth mount that can track the Moon’s motion compensates for its movement, enabling longer exposures when necessary.
- Optional remote shutter release or intervalometer to prevent shakes caused by pressing the camera button manually.
Together, the right combination of camera, lens or telescope, and stable mounting will empower beginners to capture sharp, well-exposed images highlighting the Moon’s captivating surface like never before. Selecting equipment suited to moon astrophotography lays the foundation before fine-tuning your camera settings for breathtaking lunar photography.
Image courtesy of Tima Miroshnichenko
Camera Settings Overview: Shutter Speed, Aperture, ISO, and White Balance Explained for Moon Shots
When capturing the Moon, mastering your camera settings is essential to reveal crisp details and avoid common pitfalls such as overexposure or motion blur. Each setting—shutter speed, aperture, ISO, and white balance—plays a pivotal role in balancing brightness, sharpness, and color accuracy for stunning lunar images.
Shutter Speed: Freezing Lunar Detail
Because the Moon is bright and moves steadily across the sky, fast shutter speeds are critical to avoid overexposing its surface and minimizing motion blur. For most moon photography scenarios, starting with a shutter speed of around 1/125 to 1/250 seconds strikes a good balance. This range is fast enough to capture the Moon’s sharp details without introducing blur from either lunar movement or atmospheric turbulence. Experimenting within this range depending on lunar phase and brightness ensures your shot retains surface textures like craters and mountains.
Aperture: Maximizing Sharpness and Depth of Field
The aperture setting (f-stop) directly influences image sharpness and depth of field. For lunar photography, an aperture between f/8 and f/11 is ideal. This range offers a sweet spot where your lens delivers maximum sharpness, reducing optical aberrations like chromatic distortion or softness often seen at wider apertures. Additionally, a smaller aperture increases the depth of field to keep the entire lunar surface crisp, especially when using telephoto lenses or telescope lenses.
ISO: Balancing Sensitivity and Noise
Since the Moon is one of the brightest objects in the night sky, you can use a low ISO setting to maintain image clarity and minimize noise. Beginners should typically start with ISO 100 or 200, which preserves fine detail and keeps your image clean. Increasing ISO isn’t usually necessary unless shooting under unusual conditions like heavy clouds or through an optical system that reduces light transmission. Keeping ISO low ensures your photo’s texture and contrast remain high, crucial for showcasing lunar topography.
White Balance: Keeping Moon Colors Natural
The Moon’s subtle colors can be affected by atmospheric conditions and camera presets, making white balance an important but often overlooked setting. For realistic moon shots, setting your camera’s white balance to Daylight (around 5200K) or using a custom white balance are excellent choices. Shooting in RAW format allows you to adjust white balance precisely in post-processing without degrading image quality, ensuring that the cool greys and warmer tones of the lunar surface come through naturally without unwanted color casts.
By understanding and applying these key camera settings—shutter speed, aperture, ISO, and white balance—you’ll transform your moon photography from blurry, washed-out images to vibrant, highly detailed celestial portraits. These foundational settings empower beginner astrophotographers to confidently capture breathtaking lunar shots with ease and consistency.
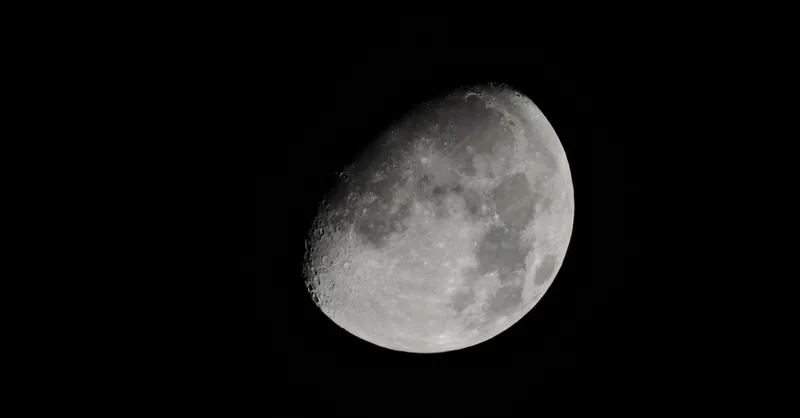
Image courtesy of Pixabay
Optimal Exposure Settings for Moon Photography: How to Avoid Overexposure and Capture Detail
Achieving the perfect exposure when photographing the Moon is key to preventing overexposure—a common challenge that washes out the lunar surface and obscures its stunning craters, valleys, and mountains. Because the Moon reflects sunlight intensely, using the same settings you would for darker celestial objects will almost always result in blown-out highlights and lost texture. To avoid this, start by considering the following optimal exposure strategies that balance brightness with fine detail:
-
Shutter Speed: Use a relatively fast shutter speed, typically between 1/125 and 1/250 seconds. This duration allows enough light to capture details without saturating the image or causing motion blur. The exact speed may vary depending on the lunar phase—brighter phases like the full Moon may require faster speeds, while crescent or gibbous phases can tolerate slightly slower shutter speeds to capture subtle shadows and contours.
-
Aperture: Stick to a moderate aperture setting around f/8 to f/11 to achieve a sharp image with maximum depth of field. This prevents light from flooding the sensor excessively while maintaining clarity across the uneven terrain of the Moon’s surface.
-
ISO: Keep the ISO sensitivity low, usually at ISO 100 or 200, to minimize image noise and preserve the natural contrast of the lunar features. Higher ISOs often degrade image sharpness, which detracts from the intricate details you want to reveal.
-
Exposure Compensation: If your camera tends to overexpose the Moon even with these settings, consider dialing in negative exposure compensation (e.g., -1 to -2 stops) to intentionally darken the image. This technique helps enhance surface textures and the subtle interplay of light and shadow.
Additionally, many photographers employ the "Looney 11 rule" as a practical guideline for moon exposure: set your aperture to f/11, shutter speed to the reciprocal of your ISO (e.g., 1/100 sec for ISO 100), and adjust from there based on conditions. This rule approximates balanced exposure for bright daylight subjects like the Moon and can be helpful for beginners to quickly find suitable starting points.
By carefully controlling exposure and avoiding excessive light capture, you highlight the Moon’s fascinating topography with crisp, well-defined detail. Mastering these optimal exposure settings helps you sidestep the pitfalls of overexposure and ensures every crater and mountain stands out beautifully in your moon shots.
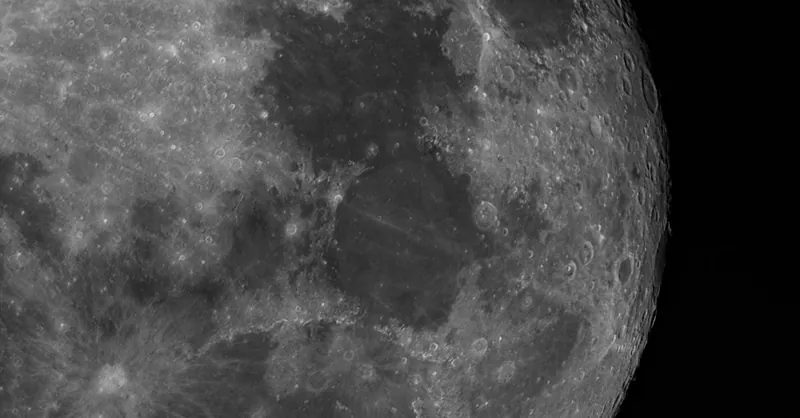
Image courtesy of Antonio Moura
Focusing Techniques for Sharp Moon Images: Manual Focus, Live View, and Using Zoom
Achieving razor-sharp focus is one of the most critical steps in moon astrophotography, yet many beginners struggle with autofocus systems that often falter under low light or struggle to lock onto the lunar surface. To capture crisp lunar details like craters and ridges, it is highly recommended to rely on manual focusing techniques instead of autofocus. Here’s how you can maximize sharpness using manual focus, live view aids, and zoom features:
-
Switch to Manual Focus Mode: Disable autofocus on your camera or lens and manually adjust the focus ring. Autofocus tends to hunt or get confused because the Moon's bright but textured surface can be misread by camera sensors, especially at telephoto focal lengths.
-
Use Live View for Precision: Activate your camera’s live view mode and zoom in on a distinct lunar feature—such as a crater rim or shadow line—to precisely fine-tune focus. Most modern cameras let you digitally magnify the live view image (up to 10x or more), which makes it easier to identify the sharpest point.
-
Employ Zoom-in Focus Assistance: By combining optical zoom (on zoom lenses) or digital zoom (in live view), you can closely inspect the focus critically. Slowly turn the focus ring until the lunar details appear crisp and edges are sharply defined. This method significantly reduces the risk of soft or out-of-focus images.
-
Test and Refine Focus Regularly: Atmospheric conditions and slight vibrations can shift focus during your session. Revisit live view zoom periodically throughout your shoot to make tiny adjustments, ensuring consistent sharpness across your frames.
By embracing manual focus supported by live view magnification and zoom tools, beginner astrophotographers can overcome common focusing challenges and produce stunningly sharp, detailed moon photos. This approach bypasses the limitations of autofocus systems, enabling your camera to lock onto the Moon’s surface texture with precision and clarity—essential for gorgeous lunar images that truly stand out.
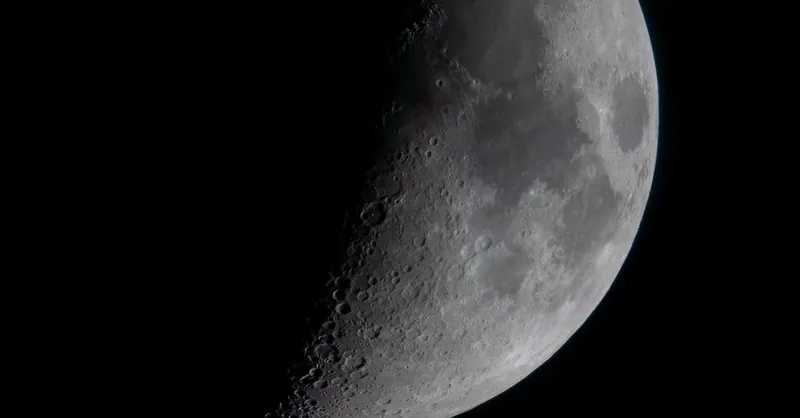
Image courtesy of Rafael Minguet Delgado
Using Tripods and Remote Shutters to Reduce Vibrations and Improve Image Clarity
In moon astrophotography, minimizing vibrations is paramount to achieving sharp, detailed images that showcase the lunar surface's intricate textures. Even the slightest movement—whether from hand-holding your camera or pressing the shutter button—can introduce blur or loss of fine detail, undermining all your careful settings and focusing efforts. This is where a sturdy tripod and a remote shutter release or equivalent shutter control tools become indispensable.
The Importance of a Stable Tripod
A high-quality tripod serves as the foundation for every crisp moon photograph. It stabilizes your camera or telescope setup, counteracting any natural hand tremors or environmental vibrations such as wind. When selecting a tripod for moon photography, consider the following:
- Choose a tripod with robust, heavy-duty legs made from materials like aluminum or carbon fiber to reduce shaking.
- Ensure it has an adjustable, smooth pan-and-tilt head or ball head to easily align your camera with the Moon’s position.
- Avoid lightweight or flimsy tripods that may flex or sway, which directly impacts image sharpness at telephoto focal lengths or high magnifications.
Leveraging Remote Shutter Releases and Self-Timers
Pressing the shutter button manually—even with a stable tripod—can cause subtle camera shake detrimental to image clarity. To eliminate this, employ one of the following vibration-reducing techniques:
- Remote Shutter Release: Wired or wireless remote triggers allow you to activate the camera shutter without touching the body, effectively preventing camera movement during exposure.
- Intervalometer: For cameras without built-in wireless options, intervalometers provide programmable shutter control and multiple shooting modes, helping beginners capture moon images with steady timing.
- Camera Self-Timer: If a remote shutter isn’t available, using your camera’s 2- or 10-second self-timer delays the shot until vibrations from button pressing settle completely.
By combining a stable tripod with remote shutter control or self-timer functionality, you dramatically reduce camera shake, leading to noticeably sharper moon photos. This technique is essential when working with longer focal lengths and faster shutter speeds where even the smallest vibration can blur delicate lunar details. For beginner astrophotographers seeking crisp, professional-quality lunar images, investing in proper stabilization and vibration mitigation tools is one of the most effective ways to elevate your moon photography to new heights.
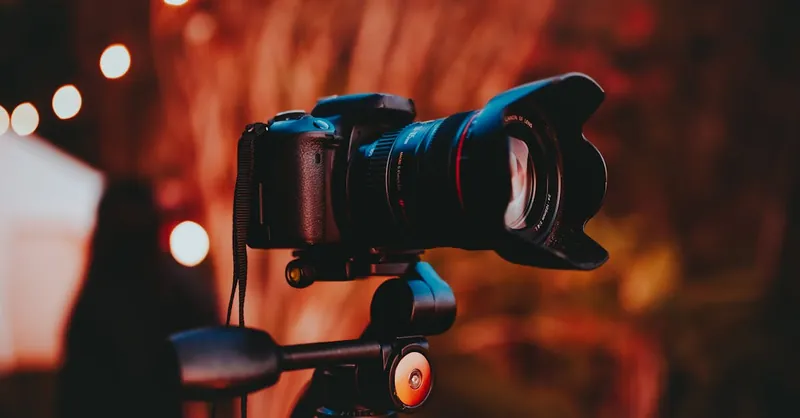
Image courtesy of Matheus Bertelli
Basic Post-Processing Tips for Enhancing Moon Photos Without Overdoing It
Once you've captured your moon images with optimized camera settings and stabilized equipment, the next crucial step is post-processing—a powerful way to bring out the lunar surface’s fine details, improve contrast, and correct minor imperfections. However, it’s equally important to enhance your photos without overdoing it, as excessive editing can introduce unnatural artifacts, reduce sharpness, or produce unrealistic colors that detract from the Moon’s authentic beauty.
Here are some essential post-processing tips tailored for beginner astrophotographers looking to refine moon shots while preserving natural detail:
-
Work with RAW Files: Always shoot in RAW format when possible, as RAW preserves the highest image fidelity and dynamic range. This flexibility allows for precise exposure and white balance adjustments without degrading quality.
-
Adjust Exposure and Contrast Moderately: Slightly increasing contrast and fine-tuning brightness can help emphasize crater shadows and rugged textures. Avoid drastic contrast boosts that may cause blown highlights or crushed shadows.
-
Enhance Sharpness with Care: Use sharpening tools selectively to clarify lunar surface details, focusing on edges of craters and ridges. Excessive sharpening, however, can create halo effects or noise amplification.
-
Noise Reduction: Apply mild noise reduction, especially if you had to use higher ISO settings or stack multiple images. Strike a balance that smooths graininess without sacrificing resolution.
-
Color Correction and White Balance Refinement: Subtly adjust white balance to preserve the Moon’s natural grey tones and avoid overly warm or cool color casts. Shooting RAW allows you to perform this with great accuracy post-capture.
-
Crop and Frame Thoughtfully: Crop distractions or empty space to better center the Moon and highlight its details. Maintain aspect ratios that support display across various platforms while keeping composition balanced.
By incorporating these basic but effective post-processing steps, beginners can elevate their moon photos from flat captures to stunning, detailed images that truly convey the Moon’s mesmerizing topography. Remember, subtlety is key; aim for natural enhancement that respects the Moon’s authentic look and enriches your astrophotography portfolio with compelling lunar portraits.
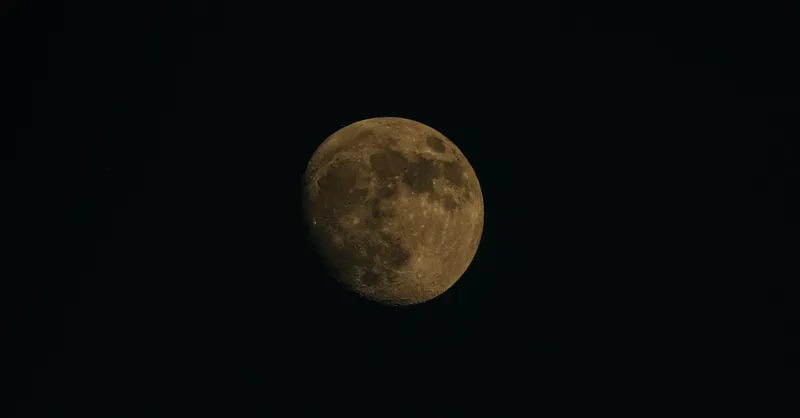
Image courtesy of Laura Cleffmann
Common Mistakes Beginners Make and How to Avoid Them for Better Moon Shots
Even with the right equipment and understanding of basic settings, beginners often encounter predictable challenges that can hinder their moon photography results. Recognizing and avoiding these common mistakes will significantly improve your lunar shots and save time during your astrophotography sessions.
1. Using Auto Mode Instead of Manual Settings
One of the most frequent errors new astrophotographers make is relying on auto or semi-auto camera modes. While convenient for everyday photography, these modes typically fail with the Moon because they misinterpret the bright lunar surface and dark sky, leading to overexposure or incorrect focus. To capture sharp, well-exposed moon images, always switch to full manual control to adjust shutter speed, aperture, ISO, and focus precisely.
2. Ignoring Proper Focus Techniques
Beginners often trust autofocus to lock onto the Moon, only to end up with blurry or soft images. The Moon’s surface details require manual focus adjusted via live view zoom-in methods to ensure crystal-clear sharpness. Regularly checking and refining focus during shooting helps combat atmospheric turbulence or slight shifts that can degrade image quality.
3. Overexposing the Moon’s Bright Surface
Because the Moon is highly reflective, using settings suitable for dimmer night sky objects often results in overexposed photos where all surface texture is lost. Avoid this by starting with low ISO (100-200), fast shutter speeds (1/125 sec or faster), and moderate apertures (f/8 to f/11). Employing negative exposure compensation can also help dial back brightness to preserve crater details.
4. Skipping Image Stabilization Tools
A shaky camera is a guaranteed recipe for blurry moon shots, especially with long focal lengths or telescope attachments. Many beginners overlook the importance of using a sturdy tripod and remote shutter releases or self-timers to eliminate vibrations caused by handholding or pressing the shutter button.
5. Forgetting to Shoot in RAW Format
Shooting in JPEG restricts your ability to correct exposure, white balance, and sharpness during post-processing. To maximize image quality and flexibility, always shoot in RAW format, giving you room to enhance lunar details without introducing artifacts or noise.
6. Neglecting Atmospheric Conditions
Moon photography is highly influenced by weather, air turbulence, and light pollution. Beginners sometimes attempt shots on hazy or windy nights, resulting in blurry or washed-out images. Prioritize nights with clear skies, low humidity, and minimal atmospheric disturbance to get the best clarity and contrast in your moon photos.
By actively avoiding these pitfalls and adopting proven techniques, beginner astrophotographers can dramatically improve their moon photography results, capturing stunning, detailed lunar images that rival more advanced setups. Remember, patience and practice combined with sound settings form the foundation of successful lunar astrophotography.

Image courtesy of Nandakumar R
Advanced Tips for Experimenting with Different Moon Phases and Composition
Once you're comfortable with basic moon photography settings, elevating your skills by exploring various lunar phases and compositions can lead to more captivating and diverse moon images. Each phase—from the slender crescent to the dramatic full Moon—offers unique lighting, shadow play, and surface texture, opening new creative possibilities while challenging your technical approach.
Harnessing the Unique Characteristics of Moon Phases
-
Crescent and Quarter Moons: These phases are ideal for highlighting the Moon’s topography due to the strong contrast between illuminated and shadowed areas. The shadows cast by crater rims and mountain ranges appear longer and more defined, allowing you to capture stunning surface relief. Utilize slightly slower shutter speeds and consider boosting exposure carefully to avoid underexposing the darker regions.
-
Gibbous Moon: This phase strikes a balance between brightness and surface detail. You can use moderate shutter speeds to maintain texture while preventing overexposure. Experiment with framing to emphasize the crescent shadow areas for dynamic composition.
-
Full Moon: Full moons are very bright, often requiring the fastest shutter speeds and smallest apertures to prevent overexposure. Although the full Moon offers less pronounced shadows, it presents an excellent opportunity to capture high-contrast, detailed images of the entire lunar disk. Try composing with terrestrial foreground elements, such as trees or buildings, to add scale and storytelling to your shots.
Composition Techniques for Impactful Moon Photography
-
Rule of Thirds: Place the Moon off-center in your frame to create a balanced and aesthetically pleasing image. This simple compositional rule increases visual interest compared to centering the Moon.
-
Include Foreground Objects: Incorporating silhouettes like rooftops, treetops, or landscape features can add depth and context, making your moon shots more engaging and unique. This also helps demonstrate the scale and relationship between Earth and the lunar surface.
-
Play with Negative Space: Using vast expanses of dark sky around the Moon can emphasize its isolation and grandeur. This minimalist approach works well when paired with clean, high-resolution lunar details.
Experiment with Exposure Bracketing and Stacking
To further refine detail across various moon phases and compositions, try exposure bracketing—capturing multiple images at different exposures—and stacking them during post-processing. This method enhances dynamic range, preserves both shadow and highlight information, and creates exceptionally sharp final images.
By experimenting proactively with different lunar phases, creative compositions, and advanced techniques like bracketing and stacking, you unlock the potential to craft moon photographs that are not only technically sound but visually compelling and rich in storytelling. This exploration will sharpen your astrophotography skills and set your moon images apart in quality and artistic impact.
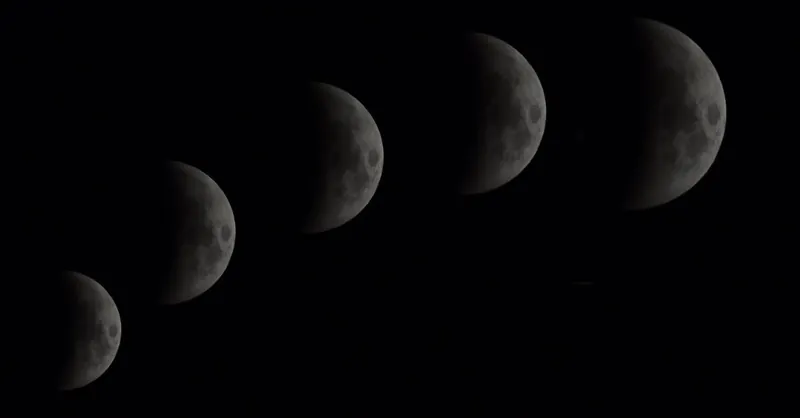
Image courtesy of Sourabh Narwade
Troubleshooting and Frequently Asked Questions Related to Beginner Moon Astrophotography Settings
Even with the best preparation, beginners often face challenges when capturing moon shots. Troubleshooting common issues and understanding frequently asked questions can greatly enhance your astrophotography experience and ensure more consistent, high-quality results.
Common Troubleshooting Tips for Moon Astrophotography
- Image Appears Washed Out or Overexposed:
- Double-check your shutter speed and ISO settings; lower ISO (100-200) and faster shutter speeds (1/125 sec or faster) usually prevent overexposure.
- Use negative exposure compensation (-1 to -2 stops) if your camera still overexposes the Moon despite proper settings.
-
Avoid overly wide apertures—stick to f/8 to f/11 for balanced brightness and sharpness.
-
Blurry or Soft Moon Details:
- Switch to manual focus and use your camera’s live view zoom feature to fine-tune focus on crater edges.
- Confirm your tripod stability and use a remote shutter release or self-timer to reduce vibrations.
-
Check for atmospheric turbulence; try shooting when the air is stable and clear.
-
Dark or Underexposed Moon:
- Increase exposure slightly by slowing shutter speed (but not too much to cause motion blur).
-
Ensure your camera's metering mode is suitable—spot metering on the Moon is often better than matrix or evaluative modes for precise exposure.
-
Colored or Unnatural Moon Tones:
- Confirm your white balance is set to Daylight (around 5200K) or shoot in RAW to adjust later in post-processing.
-
Avoid using auto white balance, which can introduce unwanted color casts under night sky conditions.
-
Difficulty Tracking the Moon with a Telescope or Camera Setup:
- Use a motorized or equatorial mount to compensate for the Moon’s gradual movement.
- For manual mounts, periodically adjust your framing to keep the Moon centered during longer sessions.
Frequently Asked Questions (FAQs)
Q: Can I shoot the Moon with a smartphone?
A: Yes! With a smartphone adapter and apps that allow manual control of focus, ISO, and shutter speed, you can capture impressive moon images. However, using a telephoto lens or telescope will dramatically improve detail.
Q: What is the ideal time to photograph the Moon?
A: For dramatic shadows and textures, shoot during crescent or quarter phases. Full Moon shots require faster shutter speeds due to brightness and offer less surface shadow detail.
Q: How can I avoid lens flare or halos around the Moon?
A: Use a lens hood to reduce stray light and ensure your lens is clean. Shooting from locations with minimal artificial lighting also helps minimize unwanted flares.
Q: Is stacking multiple moon shots necessary?
A: While not essential for beginners, stacking multiple frames can reduce noise and improve sharpness, especially in less-than-ideal atmospheric conditions.
By addressing these common issues and questions, beginner astrophotographers can quickly troubleshoot challenges, optimize their gear and settings, and achieve stunning moon photographs with confidence. Incorporating these insights will help your moon astrophotography journey be both rewarding and successful.
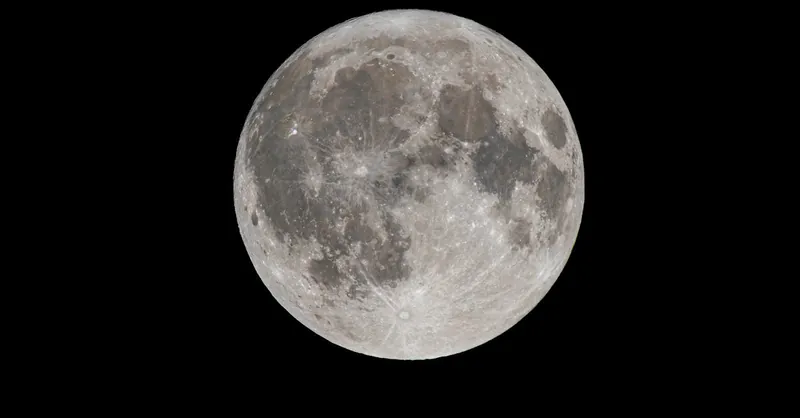
Image courtesy of Jay Brand