Beginner Astrophotography Settings for Stunning Moon Shots
Category: Astrophotography
Mastering Beginner Astrophotography Settings for Moon Shots
If you're stepping into the captivating universe of astrophotography, capturing the Moon's intricate details often becomes your first exciting challenge. As a beginner, you likely have your camera ready but feel overwhelmed by the ideal settings that balance clarity, exposure, and detail without complicated gear or extensive experience. This guide is tailored precisely for astronomy enthusiasts, amateur astronomers, and budding astrophotographers seeking straightforward, effective settings to snap stunning Moon shots that showcase craters, shadows, and lunar texture.
You might have searched through endless forums, hastily compiled camera manuals, or watched countless tutorials, yet the perfect starting point remains elusive. Here, we dive straight into proven camera settings, equipment recommendations, and practical tips—all explained simply and clearly. Unlike generic photography advice, this post focuses exclusively on moonlit astrophotography tailored for beginners who want real results without unnecessary jargon or expensive gear.
Read on to discover the perfect ISO, aperture, shutter speed, and focusing techniques, alongside tips on post-processing and telescope integration if you want to elevate your lunar images further. Whether you're using a DSLR, mirrorless, or even a smartphone with an adapter, understanding these core settings will transform your night sky shots from blurry impressions to breathtaking moonlit masterpieces. Let's illuminate the dark skies together with confidence and ease!
- Mastering Beginner Astrophotography Settings for Moon Shots
- Understanding the Basics: Why Moon Photography is Unique
- Essential Equipment for Beginners
- Recommended Camera Settings: ISO, Shutter Speed, and Aperture
- Manual Focus Techniques for Crisp Moon Images
- Using the Histogram and Exposure Compensation – Tips for Reading Histograms to Avoid Overexposure and Properly Expose the Bright Lunar Surface
- Stabilization and Vibration Reduction – Best Practices for Minimizing Camera Shake
- Shooting Modes and File Formats – Benefits of RAW Format Over JPEG and Recommended Camera Modes
- Post-Processing Basics for Moon Photography
- Incorporating Telescopes and Smartphone Adapters for Moon Photography
- Common Beginner Mistakes and How to Avoid Them
Understanding the Basics: Why Moon Photography is Unique
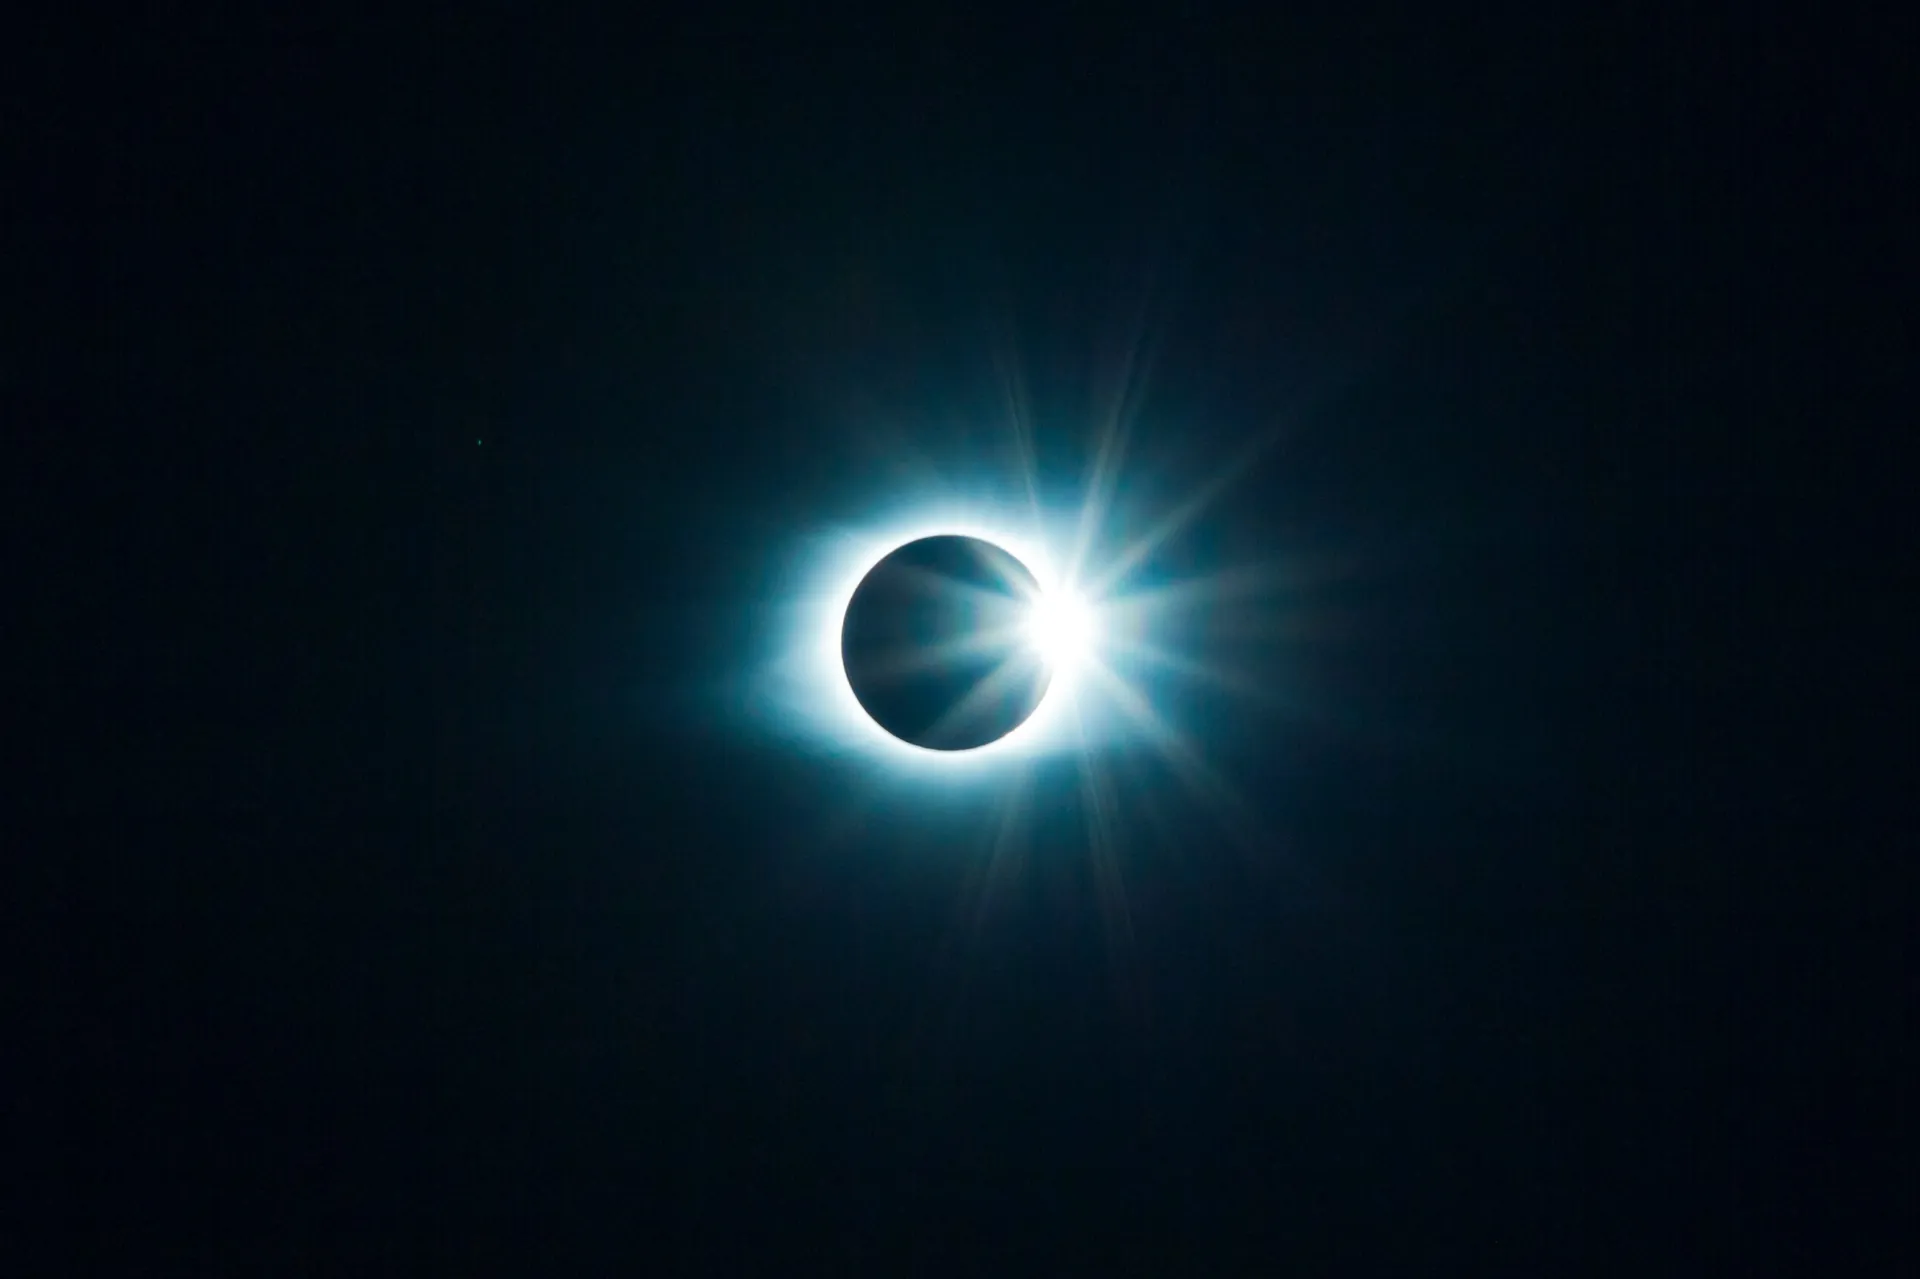
Astrophotography of the Moon stands apart from capturing other celestial bodies because of its striking brightness and relative proximity to Earth. Unlike distant stars and faint nebulae that require long exposures to gather enough light, the Moon reflects sunlight intensely, making it an incredibly bright target in the night sky. This brightness demands much shorter exposure times to prevent overexposure and loss of detail in lunar features like craters, maria, and mountain ranges.
Additionally, the Moon’s distance of approximately 384,400 kilometers (238,855 miles) positions it far closer than most astrophotography subjects, allowing for high-resolution shots with smaller focal lengths. However, this closeness also means that any shaking or misfocus is more noticeable, requiring stable setups and precise focusing techniques.
When configuring your camera:
- Exposure Settings Differ Significantly – Typical deep-sky objects require longer exposures, whereas the Moon often needs shutter speeds of around 1/125 to 1/250 seconds, paired with lower ISO values (100-400) to maintain sharpness and avoid noise.
- Aperture Choices Affect Detail and Sharpness – Using a moderate aperture (around f/8 to f/11) balances sharpness and depth of field, capturing detailed textures without diffraction softening.
- ISO Sensitivity Should Be Kept Low – Since the Moon is brightly illuminated, keeping ISO lower preserves image clarity and reduces grain, which is essential for crisp lunar photography.
In essence, mastering Moon photography requires understanding how its luminance and scale uniquely influence your camera settings, setting it apart from photographing dimmer, distant stars, or nebulae where long exposures and high ISO values are crucial. This foundational knowledge will empower you to capture the Moon’s breathtaking surface with clarity and precision right from the start.
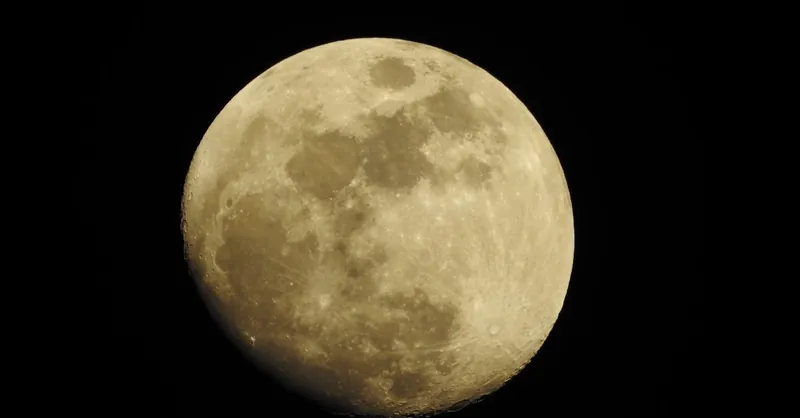
Image courtesy of Chris Pelser
Essential Equipment for Beginners
Stepping into beginner astrophotography requires selecting the right equipment that balances usability, quality, and budget. Fortunately, capturing stunning Moon shots doesn’t demand high-end gear. Understanding your options—from camera types to stabilization tools—will set a strong foundation for your lunar photography journey.
Camera Types: DSLR, Mirrorless, and Smartphones
-
DSLR Cameras
DSLRs remain a popular choice for beginners due to their versatility, manual control, and relatively affordable entry points. They feature larger sensors that enhance image quality, especially useful for capturing the Moon’s detailed surface textures. Their extensive lens compatibility gives you flexibility for longer focal lengths essential in Moon photography. -
Mirrorless Cameras
Mirrorless cameras offer a compact alternative with comparable sensor performance and manual controls. Their electronic viewfinders provide real-time exposure previews, making it easier to fine-tune settings in low light. Many models support interchangeable lenses and high ISO performance, suited for crisp moonlit images. -
Smartphones
Modern smartphones have made impressive advances in camera technology and computational photography. While limited by smaller sensors and fixed lenses, using smartphone adapters or clip-on telephoto lenses can significantly improve lunar detail. Smartphones offer unmatched convenience and shareability, especially for beginners exploring astrophotography casually.
Lenses: Choosing the Right Focal Length
To capture the Moon with adequate detail, lens choice is critical:
- Telephoto lenses (200mm to 600mm) provide a tighter field of view, allowing for close-up lunar surface shots.
- Standard zoom lenses (70mm to 200mm) can work well initially, although detail may be less pronounced.
- Using lenses with a moderate aperture of f/8 to f/11 helps optimize sharpness and depth of field.
Tripods: Stability Is Key
No astrophotography setup is complete without a stable tripod. Because Moon photography relies on sharp focus and relatively short shutter speeds (usually 1/125 to 1/250 seconds), even minor vibrations can blur your images. Investing in a sturdy tripod with adjustable height and a smooth pan/tilt head ensures steady framing and easy composition adjustments.
Optional Telescope Adapters
For those interested in pushing lunar photography further, telescope adapters provide a means to mount your DSLR, mirrorless, or smartphone camera directly to a telescope. This setup enables extremely high magnification and resolution, revealing finer lunar details invisible to naked eye or standard lenses. While optional, it’s an excellent upgrade path for beginners aiming to merge astrophotography with amateur telescope use.
By choosing any combination of these essential tools—be it a DSLR with a telephoto lens on a heavy-duty tripod, or a smartphone paired with a compact adapter—you’ll equip yourself to capture crisp, captivating shots of the Moon that highlight its dramatic surface features. Balancing affordability with quality and usability will keep your astrophotography journey enjoyable and productive from the very first click.
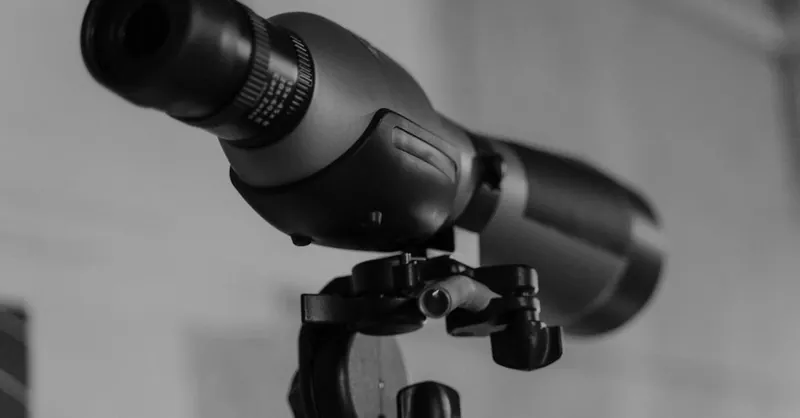
Image courtesy of Tima Miroshnichenko
Recommended Camera Settings: ISO, Shutter Speed, and Aperture
When photographing the Moon as a beginner astrophotographer, selecting the right camera settings is crucial to capturing detailed and sharp images that reveal the lunar surface’s craters, ridges, and shadows without overexposure or noise. Understanding how to balance ISO, shutter speed, and aperture will dramatically improve your lunar shots, even with entry-level gear.
ISO: Keep It Low for Crisp Lunar Details
Since the Moon reflects strong sunlight, it requires only a low ISO setting between 100 and 400 to produce clean, noise-free images. Higher ISO values can introduce unwanted graininess that obscures fine lunar textures and reduces image quality. Keeping ISO low preserves sharpness and contrast, essential when your goal is to highlight the Moon’s rugged topography rather than brightening a dim subject.
Shutter Speed: Fast Enough to Freeze Lunar Surface Features
A key difference between lunar photography and deep-sky imaging is exposure time. The Moon’s brightness means you should use relatively fast shutter speeds, typically ranging from 1/125 to 1/250 seconds. This fast exposure prevents overexposure of the bright lunar surface and helps freeze any slight movement of the Moon or vibrations—crucial for sharp details. If you notice your images coming out blurry or washed out, adjusting the shutter speed within this range is the first step to improvement.
Aperture: Optimal Sharpness with Moderate Settings
For aperture, shooting between f/8 and f/11 offers a sweet spot that balances sharpness across the frame and sufficient depth of field. Wide apertures (low f-numbers) may cause lens aberrations or reduce detail sharpness, while very narrow apertures (high f-numbers like f/16 or above) risk diffractive softening. Using an aperture in this moderate range ensures that the Moon’s surface textures—from dark maria to crater edges—appear crisp and well-defined.
Quick Reference Table for Beginner Moon Photography Settings
| Setting | Recommended Range | Why It Matters |
|---|---|---|
| ISO | 100 – 400 | Minimizes noise and preserves detail |
| Shutter Speed | 1/125 – 1/250 seconds | Avoids overexposure and motion blur |
| Aperture | f/8 – f/11 | Maximizes sharpness and depth of field |
Combining these settings as a starting baseline allows beginners to confidently capture the Moon’s intricate details in a single, well-exposed frame. Remember, slight adjustments may be necessary based on your lens capabilities, local atmospheric conditions, and the Moon’s phase. However, sticking close to these parameters gives you a reliable foundation to create stunning lunar shots right from your first astrophotography outings.
Image courtesy of Micotino
Manual Focus Techniques for Crisp Moon Images
Achieving accurate manual focus is essential for capturing sharp, detailed photos of the Moon. Unlike autofocus, which often struggles with nighttime or illuminated celestial bodies due to low contrast or bright highlights, manual focus puts you in full control to fine-tune your lens precisely on the lunar surface’s intricate features. Using your camera’s live view mode combined with focus peaking tools allows you to visually confirm sharpness in real time, dramatically improving the crispness of your Moon shots.
How to Achieve Precise Manual Focus Using Live View
- Switch your camera to manual focus mode (MF). This disables autofocus and lets you control the focus ring on your lens or telescope adapter.
- Activate live view on your camera LCD screen. This provides a magnified, real-time preview of the Moon’s surface, making it easier to identify when craters and ridges are perfectly sharp.
- Zoom in digitally using live view magnification (typically 5x to 10x). This lets you isolate a small, detailed area of the Moon to focus on, rather than the entire frame.
- Slowly turn the focus ring while observing the target area. Adjust focus until the edges of craters and features appear crisp and well-defined.
- Use focus peaking if available. This feature highlights the areas of highest contrast and sharpness with colored outlines, helping you confirm when the Moon’s details have reached optimal focus.
Tips for Reliable Manual Focus in Moon Photography
- If your lens or camera lacks focus peaking, use the zoomed live view combined with slight adjustments to the focus ring and compare clarity differences carefully.
- Ensure your telescope adapter or lens is securely mounted to minimize any accidental focus shifts during adjustments.
- Avoid focusing by eye through the optical viewfinder alone, as it’s harder to judge small focus changes in night conditions.
- Consider practicing daytime manual focusing on distant objects (like faraway trees or buildings) using the same gear to build confidence before your Moon sessions.
Mastering these manual focusing techniques with live view and focus peaking will enable you to consistently capture remarkably sharp lunar images. This attention to focus precision complements your ISO, shutter speed, and aperture settings, transforming your beginner moon photography into professional-quality astrophotography results.

Image courtesy of Micotino
Using the Histogram and Exposure Compensation – Tips for Reading Histograms to Avoid Overexposure and Properly Expose the Bright Lunar Surface
A critical yet often overlooked tool in beginner moon photography is your camera’s histogram. This graphical representation shows the distribution of brightness levels across your image, helping you avoid the common pitfall of overexposing the Moon’s bright surface. Because the Moon reflects intense sunlight, it’s easy to lose valuable details in highlights when the exposure skews too far to the right of the histogram.
How to Read the Histogram for Moon Shots
When you review your image’s histogram after a test shot, look for these signs:
- Clipping on the right side (highlights) – Indicates areas of pure white where lunar texture is lost. Avoid this by adjusting your shutter speed or exposure compensation to darken those highlights.
- A balanced histogram peak – Ideally, the graph should show a concentration of pixels in midtones and highlights without a sharp peak at the extreme right or left edges. This balance preserves the Moon’s craters and shadow gradients.
- No heavy clipping on the left side (shadows) – Since the night sky around the Moon is mostly black, some clipping here is normal and acceptable.
Using Exposure Compensation to Fine-Tune Lunar Exposure
If your Moon images look washed out or too bright despite using the recommended settings, apply negative exposure compensation (-0.3 to -1.0 EV). This adjustment reduces the brightness, preventing overexposure and enhancing the visibility of subtle surface details such as crater edges and ridges.
- Use your camera’s exposure compensation dial or menu to quickly adjust brightness without changing ISO or shutter speed.
- Review the histogram after each adjustment to ensure highlights remain detailed and the lunar surface is not “blown out.”
- Small incremental changes are most effective—avoid large jumps in exposure compensation that may cause underexposure.
By mastering your camera’s histogram and utilizing exposure compensation smartly, you ensure your lunar images capture the Moon’s full range of textures and contrasts. This step significantly improves image quality, especially in bright phases like the full Moon, making your beginner astrophotography efforts yield impressively detailed and well-exposed moon shots every time.

Image courtesy of Micotino
Stabilization and Vibration Reduction – Best Practices for Minimizing Camera Shake
Achieving sharp, detailed moon photographs depends heavily on minimizing camera shake and vibrations. Even the slightest movement during exposure can blur fine lunar features, diminishing the crispness and clarity you aim to capture. For beginner astrophotographers, effective stabilization techniques are crucial, especially since moon photography typically involves telephoto lenses or telescope attachments that magnify any jitter.
Use a Sturdy Tripod and Secure Mounting
The foundation of vibration reduction is a solid, robust tripod that firmly supports your camera or telescope. Ensure all tripod legs are fully extended and locked, and that the head securely holds your equipment without wobbling. Avoid using lightweight or unstable tripods as these increase the risk of motion blur.
Employ Remote Shutter Release or Timer
Pressing the camera’s shutter button can introduce vibrations that spoil your shot, so using a remote shutter release—wired or wireless—is highly recommended. This allows you to trigger the exposure without physically touching the camera, preserving stability. If a remote release isn’t available, utilizing your camera’s 2-second or 10-second self-timer provides enough delay to let vibrations settle before the shutter opens.
Activate Mirror Lock-Up on DSLR Cameras
For DSLR users, the mirror mechanism inside the camera causes subtle shakes the instant it flips up to expose the sensor. Enabling the mirror lock-up feature raises the mirror in advance, reducing internal vibration. Pair mirror lock-up with a remote shutter release or self-timer to ensure minimal movement right before the exposure starts, resulting in sharper lunar images.
Additional Tips for Reducing Vibration
- Avoid touching or adjusting the tripod during exposure.
- Position the tripod on stable ground, away from wind or passing footsteps that may shake the setup.
- Use a weighted tripod base or sandbags if possible to add extra stability in windy or uneven conditions.
- When using telescope adapters, double-check all connections to prevent looseness causing micro-movements.
By integrating these stabilization and vibration reduction techniques into your moon photography workflow, you significantly enhance image sharpness and detail. Proper support plus vibration minimization ensures your camera captures the Moon’s intricate surface features crisply and clearly, helping beginner astrophotographers achieve stunning lunar images without blur or softness.
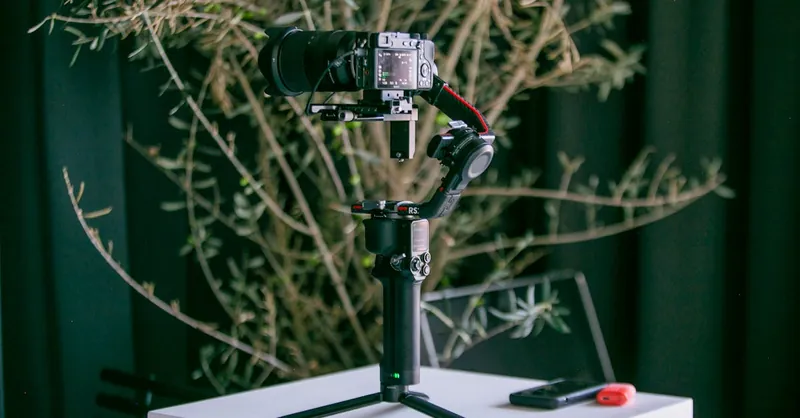
Image courtesy of Amar Preciado
Shooting Modes and File Formats – Benefits of RAW Format Over JPEG and Recommended Camera Modes
When capturing the Moon, your choice of shooting mode and file format greatly influences the quality and flexibility of your final images. For beginners in astrophotography, understanding these settings is critical to maximize detail retention and enable effective post-processing.
Why Shoot in RAW Instead of JPEG?
RAW files preserve the full range of data captured by your camera’s sensor, unlike JPEGs, which apply compression and irreversible adjustments that limit image quality. Here are the key benefits of shooting the Moon in RAW format:
- Greater Dynamic Range: RAW retains subtle brightness differences and shadow details on the lunar surface, which is essential for revealing crater textures and shadow gradients.
- Improved Exposure Adjustment: RAW files allow significant exposure tweaks without degrading image quality, helping correct slight overexposure or underexposure common in Moon shots.
- Enhanced Color Accuracy and White Balance Control: The Moon's color varies subtly depending on atmospheric conditions and camera sensor characteristics. RAW preserves this data, enabling precise white balance corrections during editing.
- Minimized Compression Artifacts: JPEG compression can introduce noise and banding in gradient-rich areas, distorting fine lunar details. RAW files avoid this, ensuring cleaner images.
For astrophotographers aiming to capture the Moon’s intricate textures and contrasts, RAW is unquestionably the superior choice, offering unmatched post-processing flexibility to bring out the best in your lunar photos.
Recommended Camera Shooting Modes for Moon Photography
To harness your camera’s full potential for moon shots, selecting the right shooting mode enhances control and optimizes results:
-
Manual Mode (M):
This is the optimal mode for Moon photography as it allows you to independently control ISO, shutter speed, and aperture settings. Manual mode ensures consistent exposures across multiple shots, vital for stacking or compositing images later. -
Aperture Priority Mode (A or Av):
For those new to manual settings, aperture priority lets you fix aperture (recommended between f/8 and f/11) while your camera automatically selects shutter speed. However, this can lead to variable exposures if lighting conditions change, so manual is preferable once confident. -
Shutter Priority Mode (S or Tv):
Less common for lunar shots since shutter speed directly affects exposure, this mode can risk under- or overexposure if ISO and aperture are not carefully managed. -
Program Mode (P):
Generally discouraged for astrophotography as the camera chooses settings automatically, often prioritizing balanced exposures not ideal for the Moon's brightness and surface contrast emphasis.
Summary of Best Practices for Shooting Mode and Format
| Setting | Recommendation | Reason |
|---|---|---|
| File Format | RAW | Preserves maximum data for post-processing |
| Shooting Mode | Manual (M) | Full exposure control for consistent results |
| ISO | Set manually, typically 100-400 | Noise control and brightness accuracy |
| Exposure | Manual shutter speed to avoid overexposure | Ensures detail retention on lunar surface |
By choosing RAW format alongside manual shooting mode, beginner astrophotographers gain the essential latitude needed to fine-tune their lunar images with post-processing software. This strategy significantly boosts image quality, allowing you to extract stunning Moon details and contrast that JPEGs and auto modes often compromise. Embracing these settings early in your astrophotography journey prepares you for advanced editing techniques, making every Moon shot a captivating masterpiece.
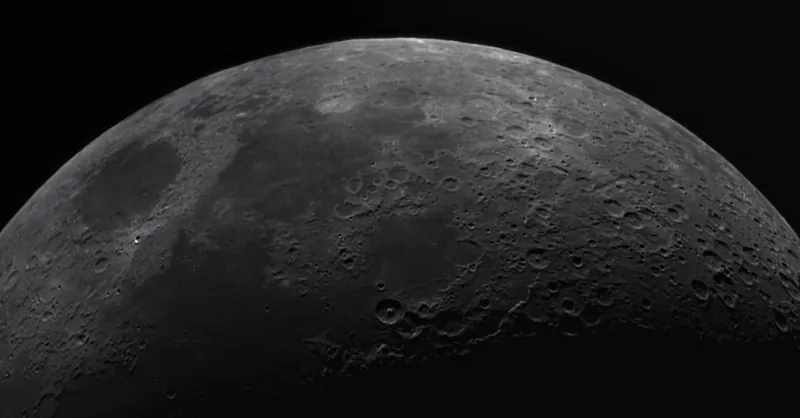
Image courtesy of Antonio Moura
Post-Processing Basics for Moon Photography
After capturing your lunar images with the right camera settings and stable equipment, post-processing becomes essential to enhance details and bring out the Moon’s dramatic textures. Software like Adobe Lightroom and Photoshop is invaluable in refining contrast, sharpness, and tonal balance, transforming your raw captures into stunning, high-quality moonshots.
Key Post-Processing Steps to Enhance Lunar Details
-
Adjust Contrast and Clarity
Increasing contrast emphasizes the subtle shadows and highlights on the Moon’s surface, making craters and maria more defined. Use clarity sliders or texture adjustments moderately to enhance midtone contrast without introducing noise or unnatural halos. -
Fine-Tune Sharpness
Applying selective sharpening improves crater edges and surface features. Avoid over-sharpening, which can produce artifacts. In Lightroom, use the Detail panel to control radius and amount; in Photoshop, tools like the Unsharp Mask or Smart Sharpen filters offer precise control. -
Optimize Exposure and Highlights
Slightly lowering highlights and increasing shadows can recover details lost in overexposed bright areas or deepen engraved shadows. Adjust exposure carefully to maintain a natural lunar appearance, especially for full Moon photos. -
Use Dehaze if Needed
The Dehaze filter in Lightroom or Camera Raw can help reduce atmospheric haze or light pollution effects, sharpening the Moon’s contrast further and improving visibility of fine structures. -
Correct White Balance and Color
Although the Moon is mostly gray, subtle color casts from atmospheric conditions can affect your image. Adjust white balance to neutralize unwanted hues and bring out natural gray tones using the temperature and tint sliders.
Why Post-Processing Matters for Moon Astrophotography
Raw images straight from the camera usually appear flat or less detailed due to sensor compression and conservative in-camera rendering to avoid noise. Post-processing unlocks the full dynamic range and data captured in RAW files, allowing you to enhance textures, deepen shadows, and refine highlights that reveal the Moon’s intricate surface. Beginners should familiarize themselves with these basic enhancement techniques, as they are critical for creating compelling lunar images that are crisp, vibrant, and true to the Moon’s natural features.
By mastering these post-processing basics in Lightroom or Photoshop, you elevate your beginner lunar photos into breathtaking astrophotography masterpieces, ready to impress and inspire fellow astronomy enthusiasts.
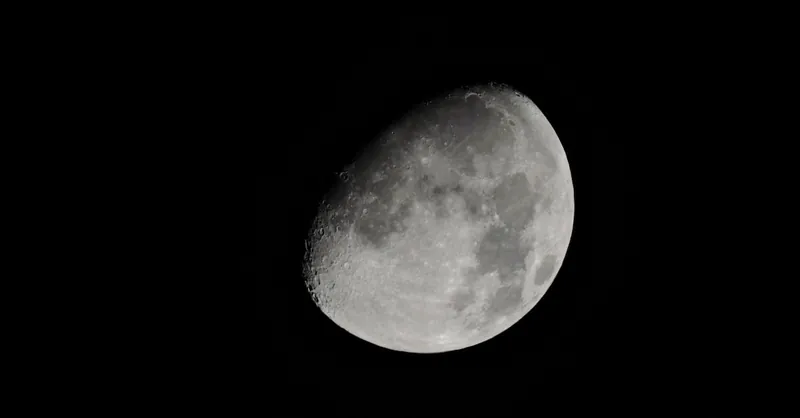
Image courtesy of Pixabay
Incorporating Telescopes and Smartphone Adapters for Moon Photography
For beginners eager to capture close-up, detailed images of the Moon, integrating telescopes or smartphone adapters offers an accessible and effective way to dramatically improve lunar photography without requiring advanced camera lenses or expensive gear. These beginner-friendly methods expand your equipment options and optimize your Moon shots by harnessing optical magnification.
Using Telescopes with Camera Attachments
Attaching your DSLR or mirrorless camera directly to a telescope allows for greater focal length and higher magnification, revealing surface features like craters, rilles, and lunar mountains with remarkable clarity. This method, called prime focus astrophotography, uses the telescope as a powerful telephoto lens:
- Choose a compatible telescope adapter or T-ring mount for your camera model, ensuring a secure connection to the telescope’s eyepiece or focus tube.
- Attach your camera body without a lens to the adapter, effectively turning the telescope into your lens.
- Use manual focus on the telescope’s focuser and your camera’s live view to achieve sharp lunar detail.
- Due to higher magnification, increase shutter speed slightly to reduce motion blur, keeping ISO low to minimize noise.
This technique is beginner-friendly, especially when using commonly available telescopes such as refractors or Schmidt-Cassegrains paired with standard DSLR mirrorless cameras. It significantly enhances image scale and detail compared to traditional camera lenses alone.
Smartphone Adapters: Affordable Gateway to Lunar Close-Ups
If you prefer moon photography with your smartphone, clip-on smartphone adapters and afocal setups provide an excellent, budget-friendly solution:
- These adapters attach your smartphone camera to a telescope or spotting scope eyepiece, aligning the phone’s lens with the telescope optics to capture magnified Moon images.
- Many adapters are easy to use and adjustable to fit various phone sizes and telescope eyepiece diameters.
- Coupled with apps that allow for manual ISO and exposure settings on smartphones, this method can yield surprisingly detailed lunar photos even for beginners.
- Secure mounting is essential to avoid vibrations; using a tripod along with the adapter ensures stability.
Whether using an entry-level telescope with your DSLR or a smartphone mounted on a scope via an adapter, these setups bridge the gap between casual snapshots and high-quality lunar astrophotography. Incorporating telescopes or smartphone holders not only increases your image resolution but also deepens your engagement with planetary imaging, making the Moon’s stunning landscape far more accessible for beginner astrophotographers.
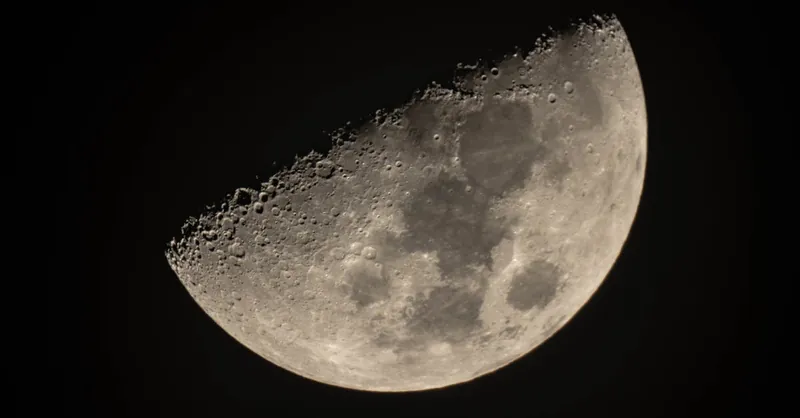
Image courtesy of Jmohan Balachandaram
Common Beginner Mistakes and How to Avoid Them
Embarking on moon photography as a beginner often involves encountering familiar challenges that can hinder the quality of your lunar images. Understanding and proactively addressing these common astrophotography mistakes will dramatically improve your Moon shots, saving time and frustration.
Avoiding Blur: The Most Frequent Issue
Blurred lunar images typically result from camera shake, improper focus, or excessive exposure times. Even with fast shutter speeds, vibrations caused by hand-holding your camera, unstable tripods, or pressing the shutter button can soften details. To avoid blur:
- Always use a solid tripod and make sure it is firmly positioned on stable ground.
- Utilize a remote shutter release or camera self-timer to eliminate shutter-press vibrations.
- Ensure manual focus accuracy by using your camera’s live view with magnification and focus peaking whenever possible.
- Keep shutter speeds between 1/125 and 1/250 seconds to freeze motion and reduce atmospheric distortion effects.
Failing to stabilize your setup or rushing focus adjustments will blur fine lunar structures such as crater rims and mountain shadows, compromising image sharpness.
Dealing with Atmospheric Distortion
The Earth’s atmosphere causes turbulence and distortion that can blur or warp detailed lunar features, especially when the Moon is low on the horizon. This phenomenon, also called seeing conditions, varies nightly and impacts clarity:
- To minimize atmospheric interference, shoot when the Moon is higher in the sky, ideally above 30 degrees elevation. This reduces the amount of atmosphere your camera looks through.
- Avoid nights with strong wind, humidity, or excessive haze, which degrade sharpness and contrast.
- Consider taking multiple shots to select the clearest frames or use image stacking techniques to improve detail and reduce atmospheric noise.
Monitoring weather conditions and time of night enhances your ability to capture crisp, distortion-free lunar images.
Timing Your Shots: Selecting the Best Lunar Phases
Timing your moon photography around optimal lunar phases maximizes visible surface textures and photographic interest:
- Waxing and waning crescent to first and last quarters provide the best shadow play, highlighting craters and mountains with three-dimensional contrast.
- Gibbous phases also reveal excellent surface detail, though slightly less dramatic than crescents.
- The full Moon, while popular, tends to appear flat and overly bright, washing out fine features due to direct sunlight. If shooting full Moon, precise exposure and histogram checking are essential.
- Pay attention to the lunar libration effect, which slightly changes the visible surface areas over time, offering unique viewing opportunities every month.
By planning your photo sessions around these phases and timing considerations, you ensure your moon images showcase rich, textured landscapes with optimal lighting and minimal atmospheric challenges.
By avoiding blur through stable setups and focused manual techniques, minimizing atmospheric distortion by choosing favorable shooting conditions, and timing your photography around ideal lunar phases, beginners can overcome typical pitfalls. These troubleshooting tips empower you to capture sharp, detailed, and visually compelling Moon shots that truly reflect the grandeur of our nearest celestial neighbor.

Image courtesy of Pixabay