Building an Observatory in Your Backyard: Ultimate Guide
Category: Astrophotography
Unlock the Cosmos: Build Your Own Backyard Observatory
For astronomy enthusiasts, amateur astronomers, and passionate astrophotographers, having a dedicated observatory right in your backyard transforms stargazing into a truly immersive experience. Whether you're looking to deepen your knowledge of planetology, capture stunning astrophotographic images, or experiment with your own custom telescope build, constructing a backyard observatory is a pivotal step in your cosmic journey. Yet, the process can be overwhelming—how to pick the right location, design an effective structure, manage practical constraints like light pollution, and incorporate engineering solutions for smooth telescope operation. This guide demystifies every aspect of building your personal observatory with in-depth, actionable advice you won’t find in generic articles. From choosing materials and designing domes or roll-off roofs to integrating astrophotography equipment and addressing zoning permits, this post meets you at your level of expertise and ambition. We understand your passion and practical challenges, offering a logical step-by-step approach that balances technical precision with user-friendly explanations. Read on to discover how to seamlessly blend your engineering spirit with your love for the stars, turning your backyard into a gateway to the universe.
- Unlock the Cosmos: Build Your Own Backyard Observatory
- Planning Your Backyard Observatory: Selecting the Best Location
- Understanding Local Regulations and Zoning: Navigating Permits, Neighborhood Rules, and Legal Considerations Before Construction
- Design Options for Observatory Structures: Comparing Domes, Roll-Off Roofs, and Prefab Kits to Custom Builds
- Foundation and Structural Considerations: Ensuring Stability, Vibration Isolation, and Environmental Protection
- Choosing and Installing Telescope Mounts and Hardware: Types of Mounts Ideal for Observatories and How to Integrate Them Effectively
- Electrical Setup and Automation: Power Supply, Lighting, Motorized Dome or Roof Controls, and Remote Operation Capabilities
- Optimizing for Astrophotography: Integrating Cameras, Managing Cable Runs, and Reducing Vibration for Clearer Images
- Maintenance and Upgrades: Routine Care, Troubleshooting, and Scalable Improvements for Your Backyard Observatory
Planning Your Backyard Observatory: Selecting the Best Location
Choosing the optimal location for your backyard observatory is a foundational step that directly impacts your stargazing quality, astrophotography results, and overall satisfaction with your setup. When planning, focus primarily on four crucial factors: sky visibility, light pollution, local weather conditions, and ease of accessibility.
-
Maximize Sky Visibility
Ensure your observatory site offers an open, unobstructed view of the sky. Avoid locations surrounded by tall trees, buildings, or other structures that block the horizon or reduce your viewing angle. A clear line of sight toward all directions enables you to observe planets, nebulae, and star clusters across the celestial sphere without limitation. -
Minimize Light Pollution
Light pollution from streetlights, neighbors’ homes, and nearby urban centers can dramatically degrade your telescope’s performance. Aim for spots in your yard that are shielded naturally or artificially from stray light sources. Consider installing light-blocking fencing or planting dense shrubbery. Additionally, use dark-sky compliant outdoor lighting to enhance your night observations and astrophotography. -
Consider Local Weather and Climate
Consistent weather patterns affect the number of clear nights you’ll have. Look for locations with low humidity and minimal fog or dew accumulation, as moisture on optics diminishes clarity. Also factor in wind exposure—high winds can cause vibrations that disrupt telescope stability and image quality. Selecting a slightly sheltered but open area balances protection and sky visibility. -
Ensure Easy Accessibility and Convenience
Your observatory should be conveniently accessible from your home, allowing you to set up and dismantle gear effortlessly. Proximity to power sources for telescope mounts, cameras, and heaters is essential, as is the ability to safely move bulky equipment. Well-designed pathways, stable ground, and secure footing help maintain your operational efficiency and safety during nighttime sessions.
By carefully analyzing these elements, you set the stage for a functional and productive backyard observatory that enhances your astronomical pursuits and sustains your passion for exploring the universe. Prioritizing location planning is a vital investment, saving you time, frustration, and cost as you embark on your cosmic exploration.

Image courtesy of Andrei Nigrin
Understanding Local Regulations and Zoning: Navigating Permits, Neighborhood Rules, and Legal Considerations Before Construction
Before you break ground on your backyard observatory, it’s critical to understand local regulations, zoning laws, and permit requirements that govern outdoor structures in your area. These legal considerations can vary significantly from one municipality to another and may impact everything from the size and height of your observatory dome or shed to its electrical installations and usage restrictions. Failing to comply with these rules can lead to costly fines, forced dismantling, or disputes with neighbors.
Key Legal Steps for Backyard Observatory Construction
-
Research Local Zoning Codes and Ordinances
Start by reviewing your city or county’s zoning regulations regarding accessory buildings, temporary structures, and outdoor construction. Many jurisdictions limit the height and footprint of secondary structures or require a minimum setback distance from property lines. Some may have specific restrictions on roof types or materials which could affect your observatory dome or roll-off roof design. -
Check Neighborhood or Homeowners Association (HOA) Rules
If you live in a community governed by an HOA, consult the association’s guidelines or architectural review board. HOAs often enforce stricter rules than local governments, including aesthetic standards and operational restrictions that impact your observatory’s appearance and lighting setups. -
Obtain Necessary Building Permits
Several elements of an observatory build, such as concrete foundations, electrical wiring for telescope mounts and cameras, or permanent structures exceeding certain dimensions, typically require permits. Apply for these early in the planning process to avoid construction delays. Your local building department can provide application details and required documentation. -
Consider Environmental and Safety Regulations
Depending on your location, environmental factors like protected trees, drainage requirements, or setback distances from water bodies might apply. Additionally, if your observatory will incorporate electrical components or gas heating, ensure compliance with safety codes to protect your equipment and personal safety.
Taking the time to thoroughly navigate these legal and regulatory frameworks not only prevents future headaches but also helps you design an observatory that integrates seamlessly into your neighborhood. This foresight ensures your backyard observatory is not only a stellar platform for exploration but also a legally sound and neighbor-friendly installation.
Image courtesy of Pixabay
Design Options for Observatory Structures: Comparing Domes, Roll-Off Roofs, and Prefab Kits to Custom Builds
When planning your backyard observatory, selecting the right structural design is crucial to optimize telescope operation, weather protection, and ease of use. The three primary observatory designs—domes, roll-off roofs, and prefabricated kits versus custom builds—each come with distinct advantages and trade-offs related to materials, cost, portability, and maintenance. Understanding these options equips you to choose the best structure that aligns with your astronomical needs, budget, and DIY capabilities.
Domes: Classic Elegance with Weather Protection
Domes provide a traditional observatory appearance, featuring a rotating spherical shell and an adjustable slit that opens to the sky. They excel in protecting sensitive optics from wind, moisture, and dust, creating a controlled environment ideal for precision astrophotography and long-exposure imaging.
Pros:
- Excellent weatherproofing and wind shielding
- Facilitate smooth telescope rotation with motorized or manual dome rotation
- Minimize stray light intrusion, improving image contrast
- Durable materials like fiberglass or aluminum enhance longevity
Cons:
- Generally higher construction costs and complexity
- Require precise engineering for dome rotation mechanisms
- Limited interior space affecting larger telescope setups
- Potential heat buildup inside without ventilation
Roll-Off Roofs: Affordability and Simplicity for Flexibility
The roll-off roof observatory consists of a shed-like structure with a roof that slides off on tracks, fully exposing the telescope to the open sky during observation. This design is popular among amateur astronomers favoring cost-effective and easy DIY construction.
Pros:
- Simpler to design and build, making it ideal for custom projects
- Often more affordable than domes, with fewer mechanical complexities
- Provides excellent ventilation, reducing equipment dew and thermal turbulence
- Better interior workspace for larger telescopes or multiple users
Cons:
- Less protection from the elements when open—requires vigilance against weather changes
- May allow more stray light inside when exposed if surrounding light pollution exists
- Moving roof mechanisms need regular maintenance to ensure smooth operation
Prefabricated Kits vs. Custom Builds: Balancing Convenience and Personalization
Prefabricated observatory kits offer ready-made panels, hardware, and detailed instructions, simplifying and speeding up construction for beginners and busy hobbyists. They come mainly in dome or roll-off roof styles and often use materials optimized for durability and weather resistance.
Pros:
- Streamlined assembly with minimal tooling or specialized skills
- Engineered for stability and weatherproofing based on proven designs
- Often includes integrated features such as cable management and mounting plates
Cons:
- Limited flexibility in size and design customization
- Higher upfront cost compared to sourcing local materials
- Shipping and handling of large components can be challenging
On the other hand, custom-built observatories allow full control over dimensions, materials, aesthetics, and specialized features, perfect for enthusiasts with woodworking, metalworking, or engineering expertise who want a tailored solution.
Pros:
- Maximal design flexibility to accommodate unique telescopes and workflows
- Ability to select local, cost-effective materials such as treated wood, steel, or composites
- Opportunity to innovate on ventilation, insulation, and automation systems
Cons:
- Longer build times and potential for higher cumulative costs if materials are not sourced efficiently
- Requires extensive planning and technical skills for structural integrity and weatherproofing
- Increased responsibility for ongoing maintenance and troubleshooting
Choosing the Right Materials for Durability and Performance
Regardless of structure type, the choice of materials dramatically impacts your observatory's lifespan and usability. Common choices include:
- Fiberglass: Lightweight, weather-resistant, ideal for domes but can be expensive
- Aluminum or Steel: Strong and durable, excellent for structural frames and mechanical parts; steel requires rust protection
- Treated Wood: Cost-effective and easy to work with for roll-off roofs or walls, but requires weatherproof finishing
- Composite Panels: Offer insulation and rigidity, good for prefab kits and custom walls
By thoroughly comparing domes vs. roll-off roofs and weighing prefab kits against custom builds, alongside careful material selection, you can create a backyard observatory that perfectly suits your astronomy ambitions—whether for casual stargazing or advanced astrophotography. Prioritize your key needs for weather protection, operational ease, budget constraints, and personal craftsmanship to make an informed design decision that will sustain years of cosmic discovery.

Image courtesy of Kelly
Foundation and Structural Considerations: Ensuring Stability, Vibration Isolation, and Environmental Protection
A solid foundation and structurally sound observatory are crucial for reliable telescope operation, optimal astrophotography results, and long-term durability. The foundation must provide stability to minimize vibrations—whether caused by wind, ground movement, or mechanical operation—which can severely degrade image quality and telescope tracking accuracy. Additionally, your observatory structure should protect sensitive equipment from environmental factors such as moisture, temperature extremes, and pests.
Key Foundation and Structural Elements for Backyard Observatories
-
Stable and Level Foundation
Construct your observatory on a foundation that is flat, rigid, and isolated from ground vibrations. Concrete slabs or reinforced piers are popular for their durability and ability to anchor telescope mounts securely. The foundation should be decoupled as much as possible from the structure itself to prevent transfer of vibrations during operation. -
Vibration Isolation Techniques
To reduce vibration interference, consider: - Using vibration-absorbing pads or specialized mounts beneath the telescope pier.
- Separating the pier foundation physically from the observatory floor to isolate sensitive optics.
-
Building heavier, more massive piers made of concrete or steel to dampen vibrations naturally.
-
Weatherproofing and Environmental Control
Protecting your observatory against rain, humidity, wind, and temperature fluctuations safeguards both your telescopes and electronics. Incorporate: - Waterproof roofing materials and effective drainage to avoid moisture ingress.
- Proper insulation or ventilation systems to regulate internal temperature and reduce dew formation.
-
Durable sealants on doors, windows, and joints to keep out dust, insects, and small animals.
-
Structural Materials and Design for Longevity
Choose materials that withstand your local climate while maintaining rigidity. Treated wood, galvanized steel, or powder-coated aluminum frameworks resist corrosion and decay. Ensure that structural connections are robust, and design observatory walls and roofs to withstand local wind loads and weather extremes.
By prioritizing a strong foundation and structurally resilient observatory design, you create an environment where your telescopes perform at their best, free from disruptive vibrations and protected from the elements. This foundational excellence enables clearer views of planets, stars, and deep-sky objects, making your backyard observatory a truly dependable gateway to the cosmos.
Image courtesy of Michael Goddard
Choosing and Installing Telescope Mounts and Hardware: Types of Mounts Ideal for Observatories and How to Integrate Them Effectively
Selecting the right telescope mount is a critical decision when building a backyard observatory, as it directly impacts your ability to track celestial objects accurately, perform long-exposure astrophotography, and enjoy smooth, stable telescope operation. Observatory mounts differ from portable mounts in robustness, precision, and integration capacity. The two primary mount types favored for observatories are equatorial mounts and alt-azimuth mounts, each offering distinct advantages depending on your observational goals and equipment size.
Types of Telescope Mounts Ideal for Backyard Observatories
-
German Equatorial Mount (GEM)
The GEM is the traditional choice for most observatories and advanced astrophotographers due to its ability to compensate for Earth’s rotation via a polar-aligned right ascension axis. This alignment allows for precise, continuous tracking of stars and deep-sky objects, essential for long exposure imaging. Higher payload GEMs can support large optical tubes, cameras, and autoguiding systems with minimal flex or vibration. -
Fork Mount with Equatorial Wedge
Fork mounts offer stability and easier balancing for large telescopes, especially Schmidt-Cassegrain designs. When combined with an equatorial wedge, they enable accurate polar alignment, improving tracking performance. Fork mounts are appreciated for their rigidity and simpler declination movement, making them effective in permanent observatory setups. -
Alt-Azimuth Mounts with Field De-Rotators
Modern computerized alt-azimuth mounts equipped with field de-rotators have gained popularity in observatories where simplicity and mechanical strength are priorities. While alt-azimuth mounts are easier to set up and maintain, the integration of a field de-rotator helps correct the image rotation that naturally occurs during tracking, enabling precise astrophotography without the complexities of polar alignment.
Integrating Telescope Mounts Effectively in Your Observatory
Proper installation and integration of your telescope mount and hardware are paramount to optimize performance and longevity:
-
Robust Pier Installation: Mount your telescope on a solid, isolated pier separate from the observatory floor to minimize vibrations. Concrete piers with adjustable mount plates provide precision height and leveling options, enhancing tracking accuracy.
-
Power and Control Cable Management: Design your observatory layout with integrated cable trays or conduits to manage power supply, data connections, and autoguiding cables cleanly. Prevent cable snagging and strain on moving parts for uninterrupted operation.
-
Environmental Protection: Use weatherproof covers and dust seals for sensitive electronics on mounts. Incorporate ventilation or internal temperature control to prevent condensation that can damage motors and sensors.
-
Automation and Software Compatibility: Ensure your mount supports contemporary computerized control systems and is compatible with planetarium software or remote observatory operation tools. This integration streamlines alignment, tracking, and data acquisition, making your backyard observatory a high-performance astrophotography hub.
By carefully selecting the mount type that best suits your telescope size and observation style, and integrating the hardware with attention to vibration isolation, power management, and automation, you lay a solid foundation for precision stargazing and astrophotography. Prioritizing these elements transforms your backyard observatory into a finely tuned gateway for exploring the universe’s wonders with stability, accuracy, and ease.

Image courtesy of Lucas Pezeta
Electrical Setup and Automation: Power Supply, Lighting, Motorized Dome or Roof Controls, and Remote Operation Capabilities
Creating a fully functional backyard observatory goes beyond the physical structure and telescope installation; an efficient electrical setup and smart automation systems are essential to enhance usability, protect equipment, and optimize your stargazing and astrophotography sessions. Reliable power supply, well-designed lighting, motorized controls for domes or roll-off roofs, and remote operation capabilities form the backbone of a modern observatory’s operations, allowing seamless, precise control day or night.
Power Supply Considerations for Backyard Observatories
A stable and safe power source is critical to run telescope mounts, cameras, computers, cooling fans, heaters, and dome or roof motors without interruption. Consider the following key aspects:
-
Dedicated Electrical Circuit and Grounding
Ideally, install a dedicated electrical circuit from your home’s circuit breaker panel to the observatory with proper grounding and surge protection. This prevents power fluctuations or interference that could damage sensitive equipment or disrupt tracking accuracy. -
Backup Power and UPS Systems
Incorporate an uninterruptible power supply (UPS) to safeguard against power outages, preventing abrupt shutdowns that could harm electronics or cause tracking errors. For extended remote sessions, consider a battery backup or solar power integration to enhance reliability. -
Cable Management and Weatherproofing
Use outdoor-rated conduit and waterproof connectors to route power cables safely, avoiding trip hazards and exposure to moisture. Ensure that all electrical installations comply with local codes and prioritize safety to protect both equipment and users.
Lighting for Observatory Functionality and Safety
Effective lighting design balances operational needs with preserving dark-sky conditions crucial for astronomy:
- Red LED Lighting: Use dimmable red LED lights inside the observatory and on pathways to maintain night vision without compromising your ability to see controls or instruments.
- Motion-Activated Lights: Install motion-sensor lights for safety around the observatory entrance that turn off automatically to minimize light pollution during observations.
- Adjustable Task Lighting: Flexible, low-glare lighting helps during setup or instrument adjustments without flooding the area with unnecessary brightness.
Motorized Dome and Roll-Off Roof Automation
Automating your dome rotation or roll-off roof elevates the functionality of your observatory by enabling smooth, remote-controlled access to the sky and efficient sheltering of your telescope when not in use:
-
Motorized Dome Rotation Systems: Integrate precision motors with encoders controlled via software or remote interfaces to sync dome orientation precisely with telescope pointing, preventing obstructed views. Reliable rotation mechanisms reduce manual labor and improve the longevity of mechanical parts.
-
Powered Roll-Off Roof Tracks: Use electrically driven actuators or motors to slide the roof open and closed remotely, enabling quick response to sudden weather changes and effortless operation during nighttime sessions.
Remote Operation and Automation Integration
Remote control capabilities and automation systems significantly enhance your backyard observatory’s versatility and user experience:
-
Software-Controlled Telescope and Dome Coordination: Utilize observatory control software that links your telescope mount, dome rotation, and roof movements, automating alignment and tracking tasks. Examples include ASCOM-compatible platforms or dedicated observatory automation suites.
-
Weather Monitoring Integration: Connect weather sensors and automated alerts to your system to close domes or roofs in case of rain, humidity spikes, or high winds, protecting valuable equipment without manual intervention.
-
Remote Access via Network and Mobile Devices: Set up remote desktop or dedicated control applications to operate your observatory from indoors or even miles away, facilitating long sessions of astrophotography or monitoring without exposure to cold or environmental hazards.
By investing in a robust electrical infrastructure paired with sophisticated automation, you transform your backyard observatory into a high-tech, user-friendly environment. This not only boosts your efficiency and safety but also unlocks advanced observational techniques and long-exposure astrophotography capabilities, making your personal observatory truly future-ready for exploring the universe.
Image courtesy of Kelly
Optimizing for Astrophotography: Integrating Cameras, Managing Cable Runs, and Reducing Vibration for Clearer Images
Astrophotography demands meticulous integration of cameras and accessories within your backyard observatory to capture crisp, detailed images of the night sky. Achieving optimal image clarity requires careful attention to camera mounting, efficient cable management, and vibration reduction techniques that collectively minimize disruptions during long exposure sessions.
Seamless Camera Integration and Mounting
To optimize your astrophotography setup, securely attach your imaging cameras—whether DSLRs, dedicated astronomy CCD/CMOS cameras, or guide scopes—directly to your telescope or mount using stable, vibration-resistant adapters. This precise alignment ensures consistent framing during extended tracking. Additionally, consider:
- Employing off-axis guiders (OAGs) for improved autoguiding accuracy without optical flex.
- Selecting rigid field flatteners and focal reducers that match your telescope optics, enhancing image sharpness and correcting distortions.
- Using dovetail plates and secure clamps that allow quick attachment and removal with minimal flex.
Efficient and Safe Cable Management
An organized cable system prevents unexpected equipment strain, data loss, and tracking errors caused by snagging or tangling. Incorporate the following best practices:
- Plan cable routes early in your observatory design, keeping power, data, and control cables separated to reduce electromagnetic interference.
- Use flexible, astronomy-grade cables with sufficient length and shielding to accommodate mount movements.
- Install cable trays, hooks, or spiral wraps along walls or inside mounts to hold cables securely and prevent entanglement.
- Avoid cables crossing moving parts to eliminate tension that could impact telescope pointing accuracy.
Minimizing Vibration for Sharper Astrophotos
Vibrations, even at microscopic levels, can blur images and degrade tracking precision. Implement these vibration mitigation strategies:
- Isolated Telescope Piers: Mount your telescope on independent piers that are physically separated from the observatory floor to prevent floor vibrations caused by footsteps or wind.
- Vibration Dampening Pads: Place anti-vibration pads or materials like Sorbothane beneath cameras and sensitive components.
- Balanced Mount Setup: Ensure your telescope and imaging gear are precisely balanced on the mount to minimize mechanical stress and reduce vibration during tracking.
- Environmental Considerations: Use windbreaks or enclosure insulation to shield your setup from external air currents that cause shake.
By expertly combining rigid camera integration, well-planned cable management, and strategic vibration reduction techniques, your backyard observatory becomes a powerhouse for producing high-quality, noise-free astrophotographs. Implementing these key practices transforms your space into an astrophotography haven where distant galaxies, nebulae, and planetary details emerge with exceptional clarity.
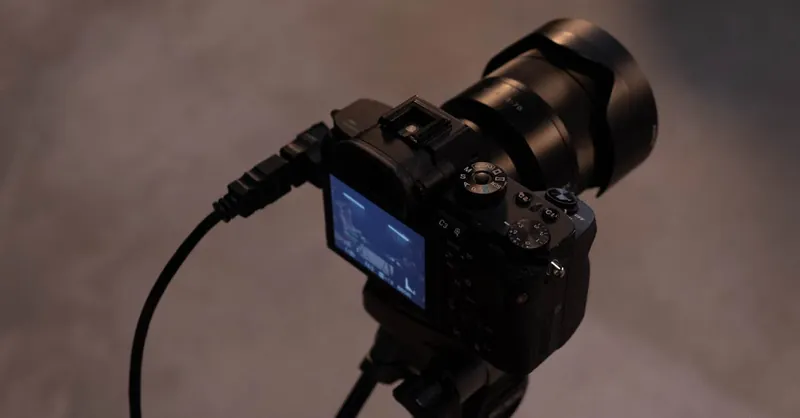
Image courtesy of cottonbro studio
Maintenance and Upgrades: Routine Care, Troubleshooting, and Scalable Improvements for Your Backyard Observatory
Building your backyard observatory is just the beginning of an ongoing journey toward cosmic discovery. Routine maintenance and timely upgrades play a pivotal role in preserving peak performance, extending equipment lifespan, and enhancing your stargazing and astrophotography experience over time. Consistent care keeps your observatory components—such as telescope optics, mounts, mechanical systems, and electrical infrastructure—in optimal condition while minimizing downtime caused by unexpected failures or environmental wear.
Essential Routine Care for Long-Term Observatory Health
-
Regular Cleaning and Inspection
Dust, moisture, and airborne particulates accumulate on optics, dome surfaces, and mechanical parts, degrading image quality and mechanical efficiency. Clean lenses, mirrors, and dome shutters carefully using recommended astro-friendly solutions and soft materials to avoid scratches. Inspect seals, weatherproofing, and mount components routinely to detect corrosion, loose fasteners, or cable wear before they escalate. -
Lubrication and Mechanical Adjustments
Moving parts such as dome rotation gears, roll-off roof tracks, and mount bearings require periodic lubrication with appropriate greases to ensure smooth, noiseless operation. Check alignment and tension of mechanical assemblies to prevent binding and uneven wear, which can impair tracking precision and roof movement. -
Firmware, Software, and Electronic Checks
Update telescope mount firmware, automation system software, and control applications regularly to benefit from bug fixes, feature improvements, and compatibility with newer devices. Monitor power supplies, UPS health, and sensor calibrations to prevent electrical faults or data inaccuracies during remote or automated sessions.
Troubleshooting Common Issues
Address typical problems efficiently by identifying root causes early:
- Tracking Errors: Re-examine polar alignment, balance, and mount backlash. Check for vibration sources such as loose pier anchoring or environmental disturbances.
- Mechanical Sticking or Noise: Clean and lubricate moving parts; verify that motors and belts are tensioned correctly.
- Electrical Failures: Inspect wiring and connectors for corrosion or damage. Reset or recalibrate power supplies and control units as needed.
- Condensation and Dew: Improve ventilation or install dew heaters on optics and electronic components to reduce moisture buildup.
Scalable Upgrades to Enhance Observatory Performance
A backyard observatory should be adaptable to evolving interests and advancements in astronomy technology. Consider progressive enhancements such as:
- Installing higher-resolution cameras or additional guide scopes to expand astrophotography capabilities.
- Upgrading to smart automation systems with weather-triggered safeguards and remote diagnostic tools.
- Incorporating advanced vibration damping solutions like active isolation platforms to further refine image stability.
- Expanding your observatory with modular additions—extra domes, all-sky cameras, or spectrographs—to diversify observational possibilities.
By committing to systematic maintenance and thoughtful upgrades, your backyard observatory will remain a cutting-edge, reliable platform for celestial exploration. This ongoing stewardship maximizes return on your investment and keeps you connected with the ever-expanding universe.
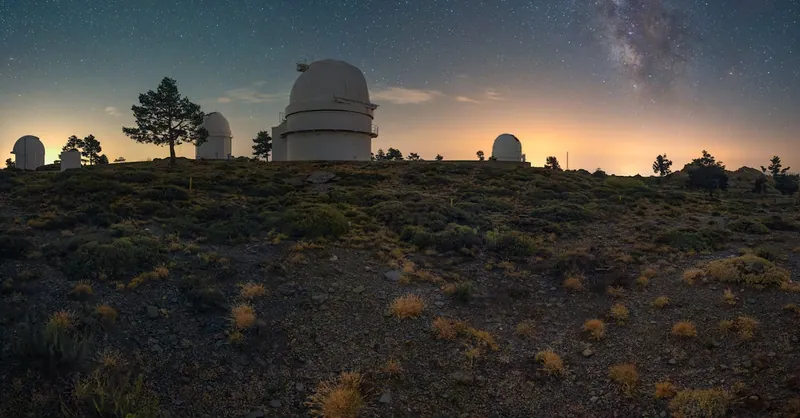
Image courtesy of Horacio Lander