Complete Guide to Using Astrophotography Software
Category: Astrophotography
Unlock the Power of Astrophotography Software for Stunning Space Images
If you're an astronomy enthusiast or an amateur astronomer eager to elevate your astrophotography skills, you've likely faced the challenge of selecting and mastering the right software to process your celestial images. Navigating the myriad of astrophotography software options can be overwhelming—each with a different learning curve, feature set, and specialized tools designed to enhance your space captures. You might have already snapped photos of stars, planets, or nebulae but wonder how to bring out their true beauty and detail through software processing. This guide is crafted precisely for you: whether you're just starting or looking to deepen your existing knowledge, we offer a clear, step-by-step walkthrough on how to use astrophotography software effectively.
Unlike generic software guides, this post delves into specific astrophotography workflows, covering everything from calibration and stacking to advanced image enhancement and astrophotography-specific editing techniques. By the end, you'll not only understand how to pick suitable software but also gain practical insights to unlock stunning results from your raw astronomical images. Our approach combines technical clarity with hands-on tips tailored for hobbyists and aspiring space engineers passionate about capturing the cosmos. Read on to turn your astrophotos into breathtaking cosmic masterpieces.
- Unlock the Power of Astrophotography Software for Stunning Space Images
- Understanding Astrophotography Software
- Choosing the Right Software for Your Needs
- Preparing Your Images: Calibration with Dark, Flat, and Bias Frames
- Calibration and Preprocessing Techniques: Removing Noise, Correcting Optical Errors, and Aligning Images for Stacking
- Stacking Images for Better Quality: Enhancing Signal-to-Noise Ratio with Astrophotography Software
- Post-Processing Fundamentals: Techniques for Enhancing Your Stacked Images
- Advanced Editing Tools and Techniques: Specialized Filters, Local Contrast, and Sharpening for Astrophotography
- Exporting and Sharing Your Images: How to Properly Save Your Processed Images for Printing, Online Sharing, or Further Editing
- Troubleshooting Common Software Issues: Solutions and Tips for Optimization
- Tips and Resources for Continuous Learning: Tutorials, Communities, and Books to Elevate Your Astrophotography Software Skills
Understanding Astrophotography Software
Astrophotography software plays a critical role in transforming raw astronomical images into detailed and visually stunning representations of the cosmos. Unlike typical photo editing tools, astrophotography software is tailored specifically to handle the unique challenges of space imaging—such as noise reduction, calibration inconsistencies, and faint object enhancement. At its core, this software helps to process and refine images captured through telescopes by applying specialized algorithms to improve clarity, contrast, and detail that the naked eye or camera sensor alone cannot reveal.
The Role of Astrophotography Software in Image Processing
The journey from raw capture to a finished astrophotograph involves multiple key steps, and astrophotography software is designed to facilitate each one with precision:
- Calibration – Correcting imperfections like sensor noise, dust motes, and uneven illumination using flat frames, dark frames, and bias frames. Calibration ensures that the resulting image accurately reflects the sky’s true light.
- Stacking – Combining multiple exposures of the same astronomical target to enhance signal-to-noise ratio, making faint stars, nebulae, and galaxies visible while suppressing random noise.
- Editing and Enhancement – Applying contrast adjustments, sharpening, color correction, and other techniques to bring out structural details, vibrant hues, and dramatic features of celestial objects.
Common Types of Astrophotography Software
Astrophotography software generally specializes in one or more of these functions. Some popular categories include:
- Calibration Tools like DeepSkyStacker and PixInsight that automate the correction of raw data.
- Stacking Programs such as Sequator or AstroPixelProcessor that merge multiple frames seamlessly.
- Advanced Editing Suites including Photoshop with astrophotography plugins, StarTools, or GIMP, focusing on creative enhancements without losing scientific accuracy.
Mastering these software types unlocks the full potential of your astrophotography workflow, enabling you to reveal the intricate beauty of planets, stars, and deep-sky objects with professional-grade results. Understanding how each type functions and complements the others is the foundation for producing breathtaking astrophotos that stand out in both scientific value and aesthetic appeal.
Image courtesy of Pixabay
Choosing the Right Software for Your Needs
Selecting the best astrophotography software depends heavily on several key factors specific to your experience, equipment, and imaging objectives. With countless options available, understanding how to match software capabilities to your skill level, camera type, telescope setup, and desired image results will save time and maximize your astrophotography success.
1. Skill Level: Beginner to Advanced
- Beginners benefit from intuitive, user-friendly programs that automate calibration and stacking without overwhelming settings. Tools like DeepSkyStacker and Sequator offer straightforward workflows and preset configurations to help beginners produce impressive images quickly.
- Intermediate users looking for greater control should explore software with customizable parameters and enhanced editing features, such as AstroPixelProcessor or StarTools, which bridge the gap between automation and manual adjustments.
- Advanced astrophotographers and space engineers often require professional-grade software like PixInsight or specialized Photoshop plugins that provide comprehensive image processing suites capable of intricate calibrations, wavelet transformations, and color mapping for scientific and aesthetic precision.
2. Camera Compatibility and Image Format
Astrophotography software varies in terms of supported camera types and raw image formats:
- DSLR and mirrorless cameras commonly output in standard RAW files (.CR2, .NEF, .ARW), widely compatible with most processing tools.
- CCD and CMOS astronomy cameras might produce proprietary file formats (.FIT, .FITS) designed to retain maximum scientific data, thus necessitating software with FITS support, such as PixInsight or AstroImageJ.
- Ensure the software you choose can efficiently handle your camera’s output to maintain image integrity and avoid format conversion losses.
3. Telescope and Mount Setup Considerations
The complexity of your telescope and mount setup influences your software choice:
- For setups using auto-guiding or tracking mounts, software that supports integration with guiding logs and field rotation correction enhances stacking accuracy and reduces star trailing.
- If you use multiple filter wheel systems for narrowband imaging (like Hydrogen-alpha, Oxygen-III, and Sulfur-II filters), prioritize software that can manage multi-band alignment and composite creation.
- Software with plate-solving features can assist in precise frame alignment, crucial for wide-field or mosaic astrophotography projects.
4. Image Goals: Scientific Accuracy vs. Artistic Expression
Understanding whether your goal is predominantly scientific documentation or artistic representation impacts your software preference:
- Software geared toward scientific astrophotography emphasizes quantitative accuracy, noise measurement, and data preservation, ideal for research or publishing. PixInsight and AstroImageJ are popular in this domain.
- For projects focused on creative and visually striking images, programs offering advanced color grading, localized enhancements, and compositing abilities—like Photoshop with astrophotography plugins or StarTools—can bring out the dramatic beauty of nebulae and galaxies while maintaining authenticity.
By carefully evaluating these criteria—skill level, camera compatibility, telescope integration, and imaging objectives—you can select astrophotography software that perfectly aligns with your workflow. Making an informed choice equips you to unlock the full potential of your celestial captures, whether you're capturing the vivid hues of a planetary nebula or charting the intricate textures of lunar craters.
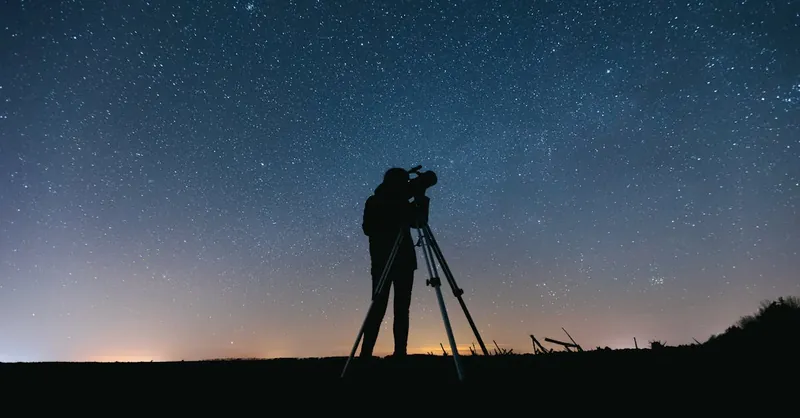
Image courtesy of Thirdman
Preparing Your Images: Calibration with Dark, Flat, and Bias Frames
Before diving into stacking and enhancement, preparing your raw astrophotography files through calibration is a crucial step that ensures your final images are free of sensor artifacts and optical imperfections. Calibration frames—dark, flat, and bias frames—are foundational for correcting noise, vignetting, dust spots, and sensor readout errors inherent in raw captures. Properly applying these frames with your astrophotography software drastically improves image accuracy, contrast, and detail, enabling you to reveal the faintest celestial features.
Understanding Calibration Frames
-
Dark Frames – These are exposures taken with the same camera settings and sensor temperature as your light frames but with the lens cap on. Dark frames measure the thermal noise (hot pixels and sensor noise) specific to your camera and exposure duration, allowing software to subtract this noise from your astrophotos.
-
Flat Frames – Captured by photographing a uniformly illuminated surface (like a white screen or twilight sky), flat frames identify and correct vignetting (uneven illumination) and dust shadows on the sensor or optics. Applying flat frames normalizes brightness across the image, resulting in smooth backgrounds and consistent field illumination.
-
Bias Frames – These are extremely short, zero-second exposures taken with the shutter closed. Bias frames capture the camera’s readout noise and electronic offsets. Incorporating them fine-tunes your calibration by correcting the sensor’s baseline signal, which dark and flat frames alone cannot fully remove.
Why Calibration Matters in Astrophotography Software
Neglecting proper calibration leads to images plagued by noise, uneven backgrounds, and false color gradients that obscure finer celestial details. Your astrophotography software uses these frames during the calibration process to “clean” raw light frames, ensuring that what remains is a true representation of the night sky's photons.
Most calibration-capable software (such as DeepSkyStacker, PixInsight, and AstroPixelProcessor) offers tools to integrate these dark, flat, and bias frames seamlessly. By mastering calibration, you lay a solid foundation for precise stacking and high-quality post-processing—key steps in producing astrophotographs with exceptional clarity and color fidelity.
In sum, investing time in capturing and applying calibration frames is indispensable for any serious astrophotographer seeking to convert raw telescope captures into breathtaking images of stars, galaxies, and nebulae. Proper image preparation maximizes your equipment’s potential, reduces noise, and preserves scientifically valuable data, setting the stage for the transformative power of stacking and editing workflows.
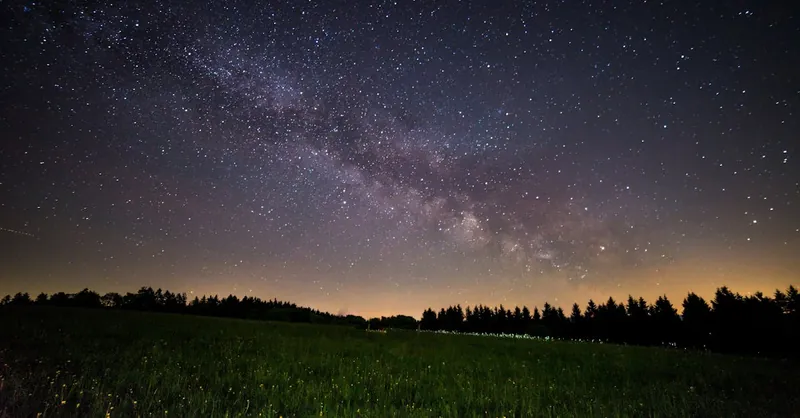
Image courtesy of Pixabay
Calibration and Preprocessing Techniques: Removing Noise, Correcting Optical Errors, and Aligning Images for Stacking
After capturing and calibrating your raw astrophotography data, the next essential step is preprocessing—a meticulous sequence that prepares your images for stacking by removing unwanted noise, correcting optical distortions, and accurately aligning frames. This phase is critical because it directly impacts the clarity, detail, and overall quality of your final astrophotograph.
Noise Reduction: Eliminating Unwanted Sensor Artifacts
Even after applying dark, flat, and bias frames, residual noise such as hot pixels, read noise, and random fluctuations can persist. Astrophotography software incorporates advanced algorithms like median filtering, sigma clipping, and cosmetic correction to detect and suppress these imperfections while preserving fine star details and faint nebular structures. Performing thorough noise reduction during preprocessing not only enhances signal fidelity but also facilitates more precise stacking results by minimizing misleading data.
Optical Error Correction: Addressing Vignetting and Distortion
Some optical imperfections are inherent to telescope and camera systems, including:
- Vignetting: Darkened corners caused by lens or sensor limitations.
- Field Curvature: Gradual focus drop-off from center to edges.
- Chromatic Aberration: Color fringing around bright stars.
Preprocessing tools utilize your captured flat frames to digitally flatten illumination and sometimes employ deconvolution processes or distortion models to reduce such effects. Correcting these errors before stacking ensures a uniform background and sharper star images, vital for professional-quality astrophotography.
Image Alignment: Precision Registration for Effective Stacking
When stacking multiple exposures, precise alignment (also called registration) of images is fundamental to avoid blurred or elongated stars. Astronomy software uses star-detection algorithms to calculate shifts, rotations, and scale differences between frames, compensating for mount tracking errors, atmospheric distortion, and slight focal adjustments during imaging sessions. Accurate image registration synchronizes each pixel across frames, allowing stacking algorithms to combine signals coherently while further suppressing random noise and enhancing faint details.
Together, these calibration and preprocessing techniques lay the groundwork for successful stacking, which amplifies signal strength and reveals the subtleties of distant galaxies, nebulas, and star clusters. By mastering noise elimination, optical error correction, and precise image alignment through your chosen astrophotography software, you unlock the potential to convert raw captures into stunningly detailed and scientifically valuable cosmic portraits.
Image courtesy of lil artsy
Stacking Images for Better Quality: Enhancing Signal-to-Noise Ratio with Astrophotography Software
One of the most powerful techniques in astrophotography software is image stacking, a process that combines multiple exposures of the same celestial object to significantly improve image quality. By merging several frames, stacking increases the signal-to-noise ratio (SNR), enhancing faint details such as distant stars, subtle nebulae structures, and galactic features that are often lost in single exposures due to sensor noise and atmospheric interference.
Why Stacking Improves Signal-to-Noise Ratio
Each raw astrophotography frame contains both the desired signal—light from stars and deep-sky objects—and various sources of noise, including thermal sensor noise, atmospheric turbulence, and light pollution. When you stack multiple images:
- Signal Reinforcement – The consistent astrophysical signal (actual photons from the object) accumulates linearly across frames, effectively increasing the brightness of real features.
- Noise Suppression – Random noise differs between exposures and tends to cancel out statistically, except for fixed-pattern noise that calibration tackles separately.
- Improved Dynamic Range – Stacking expands the dynamic range, making it possible to reveal faint structures without overexposing bright areas.
The result is a cleaner, sharper image with richer detail and better contrast, enabling astrophotographers to visualize faint cosmic phenomena that would otherwise remain invisible.
Best Practices for Stacking with Popular Software
To maximize the benefits of stacking, follow these best practices when using popular astrophotography software such as DeepSkyStacker, AstroPixelProcessor, PixInsight, or Sequator:
- Use a large number of quality light frames: The more images you stack (typically 20–50 or more), the better the noise reduction and detail enhancement.
- Apply calibration frames first: Ensure all light frames are properly calibrated with darks, flats, and bias frames before stacking to minimize sensor artifacts and vignetting effects.
- Align images precisely: Most stacking software includes automatic registration tools that align stars perfectly, compensating for small tracking errors and field rotation.
- Choose the right stacking method: Different algorithms like average, median, or sigma-clipping can be selected depending on your image set and the presence of outliers such as satellite trails or airplane flashes.
- Save intermediate results: Always save the stacked image in a high dynamic range format (e.g., TIFF or FITS) to preserve details for subsequent editing and enhancement.
Employing these techniques within your chosen astrophotography software significantly elevates your astrophotographs from noisy raw captures to vibrant, detailed cosmic scenes. Mastering stacking not only unlocks the intrinsic brightness and texture of astronomical objects but also forms a cornerstone skill that enhances every subsequent phase of image processing.
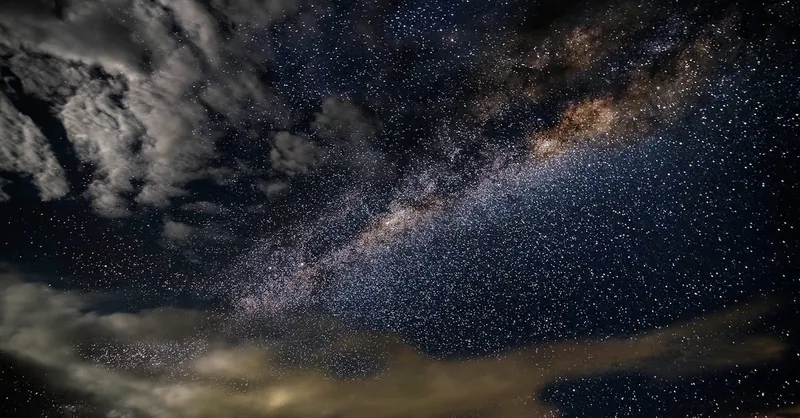
Image courtesy of Arnie Chou
Post-Processing Fundamentals: Techniques for Enhancing Your Stacked Images
Once you've successfully calibrated, aligned, and stacked your astrophotography images, the next crucial phase is post-processing—where your cosmic captures truly come to life. This stage involves refining your image's dynamic range, colors, and noise levels to reveal the intricate beauty of celestial objects. Mastering post-processing techniques such as stretching histograms, color balancing, and noise reduction is essential for transforming a stacked image into a stunning astrophotograph that showcases vivid stars, nebulae, and galaxies with clarity and depth.
Stretching Histograms: Unlocking Faint Details
Stacked images often appear flat or dark due to the limited dynamic range of sensors and initial linearity of data. Histogram stretching is a foundational technique used to enhance contrast by redistributing pixel brightness values. This process intensifies faint nebulosity and subtle star fields without blowing out bright stars or losing detail.
Key principles include:
- Non-linear stretching: Apply curves or S-shaped levels adjustments that increase mid-tone contrast while preserving highlights and shadows.
- Avoid clipping: Monitor histogram endpoints to prevent loss of detail in shadows (black clipping) or highlights (white clipping).
- Use iterative stretching: Gradually increase contrast in multiple small steps rather than a single drastic edit to retain image integrity.
Astrophotography software such as PixInsight offers powerful histogram tools specifically designed for astronomical images, while Photoshop or GIMP can also be used with astrophotography-focused workflow plugins.
Color Balancing: Bringing Realistic Celestial Hues
Accurate color balancing is vital to reproduce the true colors of stars and nebulae or to artistically enhance your image while preserving scientific integrity. Many space objects emit specific wavelengths, like the red glow of Hydrogen-alpha (Hα) or the greenish tint of Oxygen-III (OIII), which post-processing must highlight correctly.
Best practices include:
- White balance calibration: Adjust global color temperature to neutralize unwanted color casts caused by light pollution or camera sensor bias.
- Selective color adjustment: Target specific color ranges (reds, blues, greens) to enhance nebula emissions or star colors without oversaturating the entire image.
- Use color calibration tools: Software like PixInsight provides calibration scripts to normalize star colors based on catalog references, increasing visual accuracy.
Noise Reduction: Refining Image Cleanliness Without Detail Loss
Despite stacking and calibration, residual noise can still impact image sharpness and clarity, particularly in deep-sky astrophotography. Effective noise reduction helps smooth background grain and sensor noise while maintaining the fine structure of stars and nebular filaments.
Key noise reduction strategies include:
- Multiscale or wavelet filtering: Separates image details by scale to denoise smooth background areas without blurring small stars or texture.
- Noise masks: Apply noise reduction selectively using masks to protect high-detail zones like star edges and bright regions.
- Balancing denoising with sharpening: Combine noise reduction with careful sharpening to enhance star crispness and detail without amplifying noise.
Popular software tools such as StarTools, PixInsight, and Photoshop plugins provide advanced noise reduction algorithms tailored for astrophotography, enabling you to achieve a clean yet richly detailed final image.
By incorporating these post-processing fundamentals—stretching histograms to unlock hidden detail, balancing colors to reveal authentic celestial hues, and reducing noise without compromising sharpness—you elevate your astrophotography from raw stacked data to breathtaking cosmic artistry. Consistent practice of these techniques will enhance both the visual impact and scientific value of your astronomical images, setting you on the path to mastering advanced astrophotography software workflows.

Image courtesy of Frank Cone
Advanced Editing Tools and Techniques: Specialized Filters, Local Contrast, and Sharpening for Astrophotography
Taking your astrophotography to the next level involves more than basic stacking and color balance—it means leveraging advanced editing tools and techniques tailored specifically for celestial imaging. Specialized filters like Hydrogen-alpha (Hα) and Oxygen-III (OIII) enable precise enhancement of nebulae emissions, helping isolate distinct ionized gases and reveal vibrant cosmic structures invisible to the naked eye. These narrowband filters, when integrated during post-processing, improve contrast by emphasizing specific wavelengths, dramatically enhancing the clarity and color differentiation of deep-sky objects.
Equally important is the use of local contrast enhancement, a technique that boosts the difference between adjacent pixels in specific image regions without affecting the overall brightness. This method is crucial for highlighting fine-scale details such as star clusters, nebular filaments, and planetary surface textures. Unlike global contrast adjustments, local contrast selectively sharpens subtle structures, preventing the image from looking flat or washed out.
Complementing these tools is detail sharpening, which focuses on enhancing edge definition and texture within astrophotographs. Effective sharpening techniques must be carefully applied to avoid amplifying noise, typically by using masks or wavelet transformations that target only certain spatial frequency ranges. Software like PixInsight and StarTools excel in multiscale sharpening, enabling astrophotographers to bring out crisp star points and intricate nebular details while maintaining smooth, noise-free backgrounds.
By mastering these advanced editing techniques—utilizing narrowband filters, applying local contrast selectively, and implementing precise sharpening—you transform raw and stacked astrophotos into vivid, richly detailed cosmic portraits that capture the awe-inspiring complexity of the universe with professional-grade finesse.
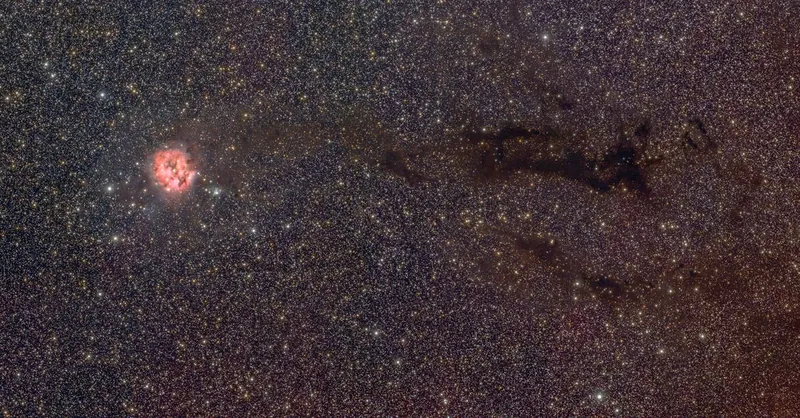
Image courtesy of Scott Lord
Exporting and Sharing Your Images: How to Properly Save Your Processed Images for Printing, Online Sharing, or Further Editing
After meticulously processing your astrophotographs through calibration, stacking, and advanced editing, the final crucial step is exporting and sharing your images in the optimal formats that preserve quality and flexibility. Properly saving your processed images ensures that the vibrant details, accurate colors, and subtle nuances you’ve enhanced are maintained whether you plan to create large prints, share online, or continue refining your work in photo editors.
Best Practices for Exporting Astrophotography Images
- Choose the Right File Format:
- For archiving and further editing, export your images in lossless formats such as TIFF (.tif) or FITS (.fits). These formats retain maximum image data, including high dynamic range and color depth, allowing future adjustments without degradation.
- When preparing files for online sharing, convert to high-quality JPEG (.jpg) or PNG (.png) formats with minimal compression. This ensures faster loading times while preserving visual fidelity on websites and social media platforms.
-
For printing, use TIFF in 16-bit color depth if possible, as it supports wide color gamuts and smooth gradients necessary for large format or gallery-quality prints.
-
Maintain Color Space Consistency:
Astrophotography images are often processed in scientific color spaces like Adobe RGB or ProPhoto RGB to capture richer hues. However, for web and general printing: - Convert your images to sRGB color space before sharing online to ensure consistent color display across devices and browsers.
-
For professional printing, confirm with your print lab which color profile they support to avoid unexpected color shifts.
-
Optimize Image Resolution and Size:
Export your astrophotos at resolutions appropriate to the usage context: - High-resolution exports (300 dpi or higher) for printing to retain crisp details.
- Medium resolution with optimized file size for faster web loading without sacrificing sharpness.
Tips for Sharing Your Astrophotography Online
- Watermark Your Images subtly to protect your work while ensuring the watermark doesn’t detract from the viewing experience.
- Use descriptive filenames and metadata tags (such as object name, exposure details, and processing software used) to improve SEO and help astronomy communities find your images easily.
- Share on dedicated astrophotography forums, social media platforms like Instagram or Flickr, and update your own astronomy blog with detailed posts explaining your processing techniques to engage fellow enthusiasts.
By following these exporting and sharing best practices, you preserve the integrity and impact of your astrophotographs across different mediums while expanding your reach within the astronomy and astrophotography communities. Properly managing your final image files not only showcases your skillful processing but also ensures your cosmic creations inspire others with clarity and brilliance.

Image courtesy of George Milton
Troubleshooting Common Software Issues: Solutions and Tips for Optimization
Astrophotography software, while powerful, can sometimes present challenges that disrupt your workflow or affect the quality of your final images. Common issues include software crashes, slow processing speeds, misalignment in stacking, and unexpected color artifacts during post-processing. Understanding how to troubleshoot these problems efficiently not only saves time but also ensures you achieve optimal results consistently.
Frequent Problems and Their Solutions
- Software Crashes or Freezes
- Ensure your computer meets the recommended hardware specifications, including sufficient RAM and a capable GPU.
- Regularly update your software and graphics drivers to the latest versions for compatibility and improved stability.
- When handling large datasets, close unnecessary background applications to free system resources.
-
Use smaller batch sizes for stacking or break down processing steps into manageable parts to avoid overload.
-
Inaccurate Image Alignment or Registration Failures
- Verify that your captured frames have sufficient stars or recognizable reference points for the software to detect during registration.
- Check for issues like inconsistent image scales, rotation, or field distortion; using calibration frames helps mitigate this.
- Utilize plate-solving features when available, as they improve precision by matching star patterns against celestial databases.
-
Manually adjust alignment parameters if automatic registration fails, especially in images with low star density.
-
Color Artifacts and Banding
- Confirm proper color calibration and white balance before applying aggressive color enhancements.
- Use 16-bit or higher bit-depth workflows to reduce posterization and banding caused by limited color ranges.
- Avoid over-stretching histograms in a single step; instead, use multiple incremental adjustments to preserve color fidelity.
-
If banding occurs, apply subtle noise or dithering filters designed to smooth gradients without compromising detail.
-
Slow Processing or Long Render Times
- Optimize processing by disabling unnecessary features during calibration or stacking phases.
- Take advantage of multi-threading or GPU acceleration options available in software like PixInsight or AstroPixelProcessor.
- Organize your image files efficiently and pre-process calibration frames to reduce runtime calculations.
- Upgrade hardware components such as solid-state drives (SSD) and increase RAM to facilitate faster data handling.
Tips for Optimizing Astrophotography Software Performance
- Keep your software updated to benefit from bug fixes, performance improvements, and new features that enhance processing efficiency.
- Create organized project folders with clearly labeled calibration and light frames to streamline batch processing and avoid input errors.
- Learn keyboard shortcuts and custom presets where possible to accelerate repetitive tasks and maintain consistent processing workflows.
- Regularly back up your processing settings and intermediate files, allowing quick restoration in case of unexpected crashes or errors.
By proactively addressing these common software issues and following best practices for optimization, astrophotographers can ensure smoother image processing workflows, reduce frustration, and consistently produce high-quality astrophotos that highlight the breathtaking beauty of the cosmos.

Image courtesy of George Milton
Tips and Resources for Continuous Learning: Tutorials, Communities, and Books to Elevate Your Astrophotography Software Skills
Mastering astrophotography software is an evolving journey that requires consistent practice and continuous learning to keep up with new techniques and tools. To advance beyond the basics and refine your image processing skills, leveraging high-quality tutorials, engaging with active astronomy communities, and studying authoritative books are invaluable strategies. These resources not only deepen your understanding of software workflows but also connect you with fellow enthusiasts and experts who share insights, troubleshooting advice, and creative inspiration.
Recommended Tutorials and Online Learning Platforms
- YouTube Channels: Channels like Astrobackyard, PixInsight Tutorials, and DeepSkyStacker Guides provide detailed walkthroughs on specific software, from calibration to advanced post-processing techniques. Their visual format helps beginners and seasoned users alike grasp complex concepts easily.
- Official Software Documentation and Tutorials: Utilize the comprehensive guides available on developers’ websites, including PixInsight’s Astroimaging Tutorials and StarTools’ official lessons. These step-by-step resources cover essential features and advanced workflows directly applicable to your projects.
- Udemy and Coursera Courses: Platforms offering structured astrophotography courses that include modules on image processing software, best practices, and troubleshooting, providing a practical approach to mastering each stage of astrophotography editing.
Engage with Online Communities and Forums
Joining active astrophotography and astronomy forums helps you stay updated on the latest software updates, processing tricks, and equipment reviews. Consider:
- Cloudy Nights Forum: A comprehensive platform for astrophotography discussions, where users exchange tips on software usage, debate techniques, and showcase their processed images.
- AstroBin and Reddit’s r/astrophotography: These communities provide a space to share your images, solicit feedback, and learn about innovative software approaches directly from peers around the world.
- Discord Servers and Facebook Groups: Many specialized groups focus on software like PixInsight or Photoshop for astrophotography, offering real-time help, workflows, and advice tailored to your skill level.
Essential Books to Deepen Software and Astrophotography Knowledge
- “Digital Astrophotography: The State of the Art” by David Ratledge offers an in-depth exploration of image processing techniques and practical software guides.
- “The Deep-sky Imaging Primer” by Charles Bracken provides a beginner-friendly yet comprehensive take on both capturing and processing astrophotography images.
- “Astrophotography” by Thierry Legault combines technical insight with artistic perspectives, including detailed discussions on calibration, stacking, and advanced post-processing.
By actively engaging with these tutorials, communities, and literature, you ensure your astrophotography software skills evolve alongside technological advancements. Continuous learning empowers you to extract ever finer details from celestial images, pushing your astrophotography from stunning visuals toward professional-grade mastery.

Image courtesy of Ravi Kant