
How to Create Star Maps for Beginner Astronomers
Category: Astrophotography
Unlock the Night Sky: How to Create Star Maps for Beginners
If you've ever looked up at the stars and wondered how to chart their wondrous arrangement, you're not alone. As a beginner astronomer eager to explore the cosmos, creating your own star maps can transform your stargazing sessions, making the night sky more accessible and exciting. You might have tried generic star charts that feel overwhelming or too complex—and that's where this guide steps in. We'll break down the essentials of creating personalized star maps tailored for beginners, guiding you through the tools, techniques, and tips that clear the haze of celestial navigation. Whether you’re aiming to build physical star maps, delve into digital tools, or learn the basics of constellations and positioning, this article is designed with your level and ambitions in mind. You'll discover step-by-step instructions and practical advice that respects your beginner status but empowers you toward mastery. Unlike other guides that skim the surface or flood you with jargon, this post offers clear, actionable knowledge so you can confidently create and use star maps for your astronomy adventures. Let’s embark on this fascinating journey together, unlocking the night sky one star map at a time.
- Unlock the Night Sky: How to Create Star Maps for Beginners
- Understanding the Basics: What Are Star Maps and Why Are They Useful for Beginners?
- Essential Astronomy Concepts to Know Before Creating Star Maps
- Tools and Materials Needed for Creating Physical Star Maps
- Step-by-Step Guide to Drawing Your Own Star Map
- Using Digital Tools and Software for Star Map Creation
- Tips for Customizing Star Maps Based on Location and Observation Time
- Incorporating Deep Sky Objects and Planetary Positions into Your Maps
- Practical Applications: How to Use Your Star Maps for Night Sky Observation and Astrophotography
- Common Mistakes Beginners Make When Creating Star Maps and How to Avoid Them
- Advanced Next Steps: Transitioning From Basic Star Maps to More Complex Celestial Charts
Understanding the Basics: What Are Star Maps and Why Are They Useful for Beginners?
At its core, a star map is a graphical representation of the night sky—depicting stars, constellations, and other celestial objects as seen from Earth at a specific time and location. For beginner astronomers, star maps serve as invaluable tools to bridge the gap between curiosity and confident sky navigation. By providing a clear layout of the stars and their relative positions, star maps help novices identify constellations, track celestial events, and plan observing sessions.
There are several types of star maps tailored to different needs and learning stages:
- Planispheres – These are circular, adjustable star charts that rotate to show the visible stars for any given date and time. Their tactile and interactive nature makes them a favorite among beginners for quick reference.
- Printed Star Maps – These traditional charts are often designed for specific seasons or months, offering detailed snapshots of the night sky that can be carried outdoors and used with binoculars or telescopes.
- Digital Star Maps – Available as mobile apps or computer programs, digital versions provide dynamic, real-time sky simulations. They often include zoom features, object information, and even augmented reality overlays, enhancing the learning experience.
Utilizing star maps teaches beginners how to orient themselves under the stars, recognize patterns, and distinguish between planets, stars, and deep-sky objects. This foundational skill is crucial for anyone aiming to deepen their understanding of astronomy, pursue astrophotography, or even design their own telescopes. Ultimately, star maps transform the vast, seemingly chaotic night sky into an accessible cosmic roadmap, empowering beginner astronomers to explore with confidence and curiosity.
Image courtesy of Thirdman
Essential Astronomy Concepts to Know Before Creating Star Maps
Before diving into crafting your own star maps, it's crucial to familiarize yourself with some key astronomy concepts that form the foundation of celestial navigation. Understanding these basics will help you interpret star positions correctly and create maps tailored to your observing location and time.
Celestial Coordinates: Navigating the Sky's Grid System
Just like we use latitude and longitude on Earth, astronomers use the celestial coordinate system to pinpoint objects in the sky. Two primary coordinates are essential:
- Right Ascension (RA) – Similar to longitude, RA measures the east-west position of stars, expressed in hours, minutes, and seconds.
- Declination (Dec) – Equivalent to latitude, Declination measures the north-south angle from the celestial equator, expressed in degrees.
Grasping RA and Dec allows you to accurately locate stars and plot them on your star maps, ensuring your representations match the real sky.
The Ecliptic and Celestial Equator: Understanding Sky Reference Lines
- The Ecliptic is the apparent path the Sun follows through the sky over a year. It also approximates the plane of Earth's orbit and is key in locating the zodiac constellations and planets.
- The Celestial Equator is the projection of Earth's equator onto the sky, dividing it into northern and southern hemispheres. This imaginary line helps determine which stars are visible from your latitude.
Knowing where the ecliptic and celestial equator lie relative to your observing position guides you in plotting the paths of planets and seasonal constellations on your star maps.
Constellations: Your Sky’s Storybook
Constellations are groups of stars forming recognizable patterns, historically rooted in mythology. For beginners, recognizing constellations is a fundamental step to orienting oneself in the night sky. When creating star maps, including constellation boundaries and line art aids memorization and navigation. Focus initially on major constellations visible from your location and season; these landmarks serve as celestial guideposts.
How Time and Date Affect Star Visibility
The night sky changes continually:
- The Date determines which stars and constellations are above the horizon at night. As Earth orbits the Sun, different portions of the sky become visible.
- The Time of Night influences which stars are visible as the sky rotates westward each night.
- Your Geographic Location affects which stars rise above the horizon — observers near the equator see different skies than those near the poles.
When preparing star maps, accurately inputting the date, time, and observer’s latitude and longitude ensures your map displays the correct star field for your intended observation session.
Mastering these essential concepts will make creating and using star maps intuitive and precise, setting a strong foundation for your astronomy journey. Next, we’ll explore how to gather the right tools and datasets to start drafting your own star maps.

Image courtesy of Thirdman
Tools and Materials Needed for Creating Physical Star Maps
Creating your own physical star maps is a rewarding hands-on process that requires the right tools and materials to ensure accuracy and ease of use. For beginner astronomers, assembling a straightforward yet effective toolkit will make the mapping both fun and educational.
Essential Paper Types for Star Maps
- Graph Paper – Ideal for plotting star positions because its grid lines help maintain accurate spacing and scale. Choose graph paper with fine grids (e.g., 1mm or 5mm squares) to allow precise plotting.
- Heavyweight Paper or Cardstock – Ensures your final star map is durable and suitable for outdoor use during stargazing sessions.
- Tracing Paper or Vellum – Useful if you plan to layer details, such as constellation lines or coordinate grids, on top of your star plots.
Key Tools: Grids, Protractors, and Drawing Instruments
- Transparent Protractor – An essential tool for measuring angular distances between stars, particularly when plotting Right Ascension and Declination manually.
- Ruler or Straightedge – Helps in drawing constellation lines and grid overlays with precision.
- Fine-Tip Pens and Pencils – Use pencils for initial plotting and corrections, and fine-tip archival pens (black or colored) for final outlines. Waterproof and fade-resistant pens are highly recommended for longevity.
- Compass (for circles) – If you want to draw circular planisphere layouts or declination circles, a drawing compass is invaluable.
Recommended Star Map Templates and Grid Systems
Starting with a template eases the learning curve. Consider templates that include:
- Celestial Coordinate Grids – RA and Dec grids marked clearly help guide where to plot stars.
- Ecliptic and Celestial Equator Lines – Including these references aids in understanding the relationship between star positions and Earth's orbit.
- Constellation Boundaries and Line Art – Pre-drawn constellation outlines assist in quickly identifying stellar patterns.
Templates can be found online or created by overlaying grids on printed star charts. Many astronomers recommend transparent overlays so you can add and modify details without redrawing from scratch.
Top Star Catalog Sources for Manual Mapping
To populate your star maps accurately, reliable star catalogs are essential sources of data:
- The Yale Bright Star Catalog (BSC) – Lists stars brighter than magnitude 6.5, perfect for beginner maps focused on easily visible stars.
- SIMBAD Astronomical Database – Offers comprehensive star data and coordinates that can be cross-referenced.
- Tycho Catalog – A good resource for moderately bright stars, useful when you want to include fainter points.
- Online Planetarium Software (for reference) – Apps like Stellarium allow you to print coordinate grids and star positions to use as guides on your manual maps.
Using these catalogs ensures that your star map reflects the real sky, enhancing both its educational value and practical use during observing sessions.
By gathering quality paper, measurement tools, and accurate star data, you lay the groundwork for creating precise, functional physical star maps that will deepen your engagement with astronomy and improve your ability to navigate the night sky confidently.

Image courtesy of Tima Miroshnichenko
Step-by-Step Guide to Drawing Your Own Star Map
Creating your own star map may seem daunting at first, but by following these clear, beginner-friendly steps, you can plot stars, connect constellations, and mark notable celestial objects with confidence and accuracy. This hands-on approach deepens your understanding of the night sky and transforms abstract cosmic patterns into a personalized visual guide tailored to your location and observing needs.
1. Choose Your Observation Date, Time, and Location
Start by selecting the specific date, time, and geographic coordinates (latitude and longitude) for when and where you plan to observe. Since the night sky changes hourly and seasonally, these details ensure your star map reflects the actual sky visible at that moment. You can use online tools or apps like Stellarium to generate a reference star field based on these parameters.
2. Prepare Your Drawing Base and Grid
Using graph paper or a printed celestial grid template, draw a coordinate system based on Right Ascension (RA) and Declination (Dec). Mark the axes clearly—RA typically runs horizontally (in hours), and Dec vertically (in degrees). If desired, include essential reference lines such as the celestial equator and the ecliptic to help position planets and zodiac constellations later.
3. Plot Bright Stars Using Accurate Coordinates
Consult reliable star catalogs (e.g., Yale Bright Star Catalog) or digital star maps to note the RA and Dec coordinates of stars visible in your sky during your chosen time. Begin by plotting bright stars first — those with lower magnitude values — as they serve as the foundation for constellation outlines. Use a sharp pencil to place precise dots corresponding to each star’s position on your grid, scaling declination degrees and right ascension hours proportionally to your paper.
4. Connect the Stars to Form Constellations
Once the stars are positioned, lightly sketch lines connecting stars within well-known constellations. Refer to constellation charts to ensure accuracy. Drawing constellation lines helps in visually grouping stars, making it easier to recognize patterns in the sky. Use thin, fine-tip pens for these lines so they remain clear but don’t overpower the star dots.
5. Mark Notable Deep-Sky Objects and Nebulae
After the stars and constellations are established, identify and mark notable deep-sky objects such as nebulae, star clusters, or galaxies visible within your map’s field. You can use symbols or small shaded areas to denote these objects. Adding labels with common names or catalog numbers increases the star map’s usefulness during observing sessions.
6. Adjust Scale and Add Labels for Clarity
Ensure that your star map maintains accurate scaling—for example, 1 cm on your paper could represent 5 degrees in the sky. Consistent scaling preserves positional relationships among stars and deep-sky objects. Finally, add labels for stars of interest, constellation names, cardinal directions (N, S, E, W), and your observation date/time. Include a legend explaining symbols used for nebulae or clusters.
By carefully following this step-by-step method, even beginners can create highly functional and visually appealing star maps that serve as reliable guides for nighttime skywatching. The process develops your skills in celestial navigation, enhances your observational accuracy, and brings a personal connection to the stars overhead. Drawing your own star maps also lays a solid foundation for more advanced astronomy pursuits like astrophotography and telescope targeting.

Image courtesy of Paulo Santos
Using Digital Tools and Software for Star Map Creation
For beginner astronomers seeking an intuitive and dynamic way to create and customize star maps, digital tools and software offer a powerful alternative to manual charting. These applications provide real-time sky simulations based on your location and time, interactive constellation guides, and easy options to print personalized star maps tailored to your observing goals. Leveraging such software can dramatically enhance your learning curve and stargazing experience.
Top Beginner-Friendly Apps and Software for Star Maps
-
Stellarium
Widely acclaimed for its realistic, 3D planetary and star renderings, Stellarium is perfect for beginners. It allows precise input of your observing location, date, and time to display an accurate star map on your computer or mobile device. You can zoom in on objects, toggle constellation lines and names, and explore celestial phenomena like meteor showers and planetary alignments. Stellarium’s user-friendly interface and detailed customization make it an excellent starting point for star map creation. -
SkySafari
This mobile-friendly app offers a rich star catalog and augmented reality (AR) features, making it simple to identify stars and constellations just by pointing your phone at the sky. SkySafari allows you to generate and save star maps for specific dates and locations, which can be exported or printed for offline use. Its interactive tools also include telescope control capabilities for more advanced astronomy engagement. -
Cartes du Ciel (Sky Charts)
For those interested in more detailed star plotting, Cartes du Ciel provides advanced customization of star maps, including the ability to add deep-sky objects, customize magnitude limits, and display coordinate grids. While slightly more complex, its free and open-source nature makes it a popular choice for beginners progressing to intermediate levels.
How to Customize and Print Your Star Maps
Most digital star map software share similar features that streamline map creation:
- Set Your Location and Time: Input your geographic coordinates and the specific date and time you plan to observe. This ensures that the star map reflects the accurate night sky you’ll see.
- Adjust Display Settings: Customize constellation lines, star labels, grid overlays (RA/Dec), and the visibility of planets or deep-sky objects according to your preference.
- Choose Map Projection: Select the type of projection (e.g., azimuthal, cylindrical) that best suits your observing style or map format.
- Export and Print Options: Generate high-resolution images or PDFs of your customized star maps. Many apps allow you to print directly or save files to print later, enabling physical guides for your stargazing sessions.
Using digital tools not only saves time but also provides dynamic star maps that can be updated instantly as celestial conditions change, helping beginners plan and maximize their astronomy observations. Incorporating these apps into your star map creation process bridges the gap between traditional methods and modern astronomical technology, enhancing your engagement and confidence under the night sky.

Image courtesy of Mikhail Nilov
Tips for Customizing Star Maps Based on Location and Observation Time
Creating star maps that accurately reflect your local night sky requires understanding how geographic location and observation timing influence the stars you see. Adjusting your star maps for latitude, current date and time, and seasonal shifts will make your stargazing more precise and enjoyable.
Adjusting Star Maps for Latitude
Your latitude determines which portion of the celestial sphere is visible above your horizon. Observers near the equator can see stars from both the northern and southern celestial hemispheres, while those closer to the poles have a more limited, region-specific view:
- Northern Hemisphere observers will have constellations like Ursa Major and Cassiopeia prominent, but southern constellations may never rise above the horizon.
- Southern Hemisphere viewers will see iconic southern constellations such as the Southern Cross, while northern constellations stay below the horizon line.
When creating star maps, input your exact latitude into mapping tools or apply a horizon cutoff based on your latitude to ensure your map excludes stars never visible from your location. This step helps avoid confusion and ensures your map is a realistic guide for your sky.
Incorporating Current Date and Time for Accuracy
Because Earth orbits the Sun, the visible stars shift gradually night-to-night and drastically across seasons. Your star map should always be tied to a specific date and time to show the correct section of the sky:
- Date: Controls the seasonal position of stars — for example, Orion dominates the winter sky in the Northern Hemisphere but is absent in summer.
- Time of Night: Because Earth rotates approximately 15° per hour, the sky changes hourly. Setting the exact time you will observe ensures your star map corresponds to the stars' positions at that moment, especially important for spotting planets or transient objects.
By entering accurate date and time data into digital tools or manually adjusting your star map grids, you tailor the star map to your observing session, maximizing usability.
Creating Seasonal Star Maps to Reflect Changing Skies
Seasonal star maps allow beginner astronomers to anticipate which constellations and celestial objects will be visible throughout the year. To build these:
- Prepare separate star maps for each season (spring, summer, fall, winter) or for specific monthly windows.
- Highlight constellations and bright stars that dominate each season’s nighttime sky.
- Include the ecliptic path to track zodiacal constellations and planetary movements that vary seasonally.
Seasonal customization not only improves your ability to plan observing sessions but also deepens your understanding of the celestial mechanics driving sky shifts—an essential skill for progressing from beginner stargazer to confident astronomer.
By mastering these customization techniques—adjusting for latitude, date, time, and seasons—you create highly accurate, personal star maps that reflect the dynamic nature of the night sky, empowering your exploration and discovery of the cosmos no matter where and when you look up.

Image courtesy of Thirdman
Incorporating Deep Sky Objects and Planetary Positions into Your Maps
Enhancing your star maps by adding deep sky objects (DSOs) like nebulae, star clusters, and galaxies, alongside accurate planetary positions, significantly enriches your astronomical learning experience. These objects offer fascinating targets beyond individual stars and constellations, helping beginner astronomers deepen their understanding of celestial diversity and dynamics.
Adding Nebulae, Star Clusters, and Galaxies to Your Star Maps
To include deep sky objects effectively:
-
Identify Suitable Objects for Your Location and Time: Use catalogs such as the Messier Catalog or the New General Catalog (NGC) to select prominent nebulae, star clusters, and galaxies visible from your observing latitude during the chosen night. Common beginner-friendly targets include the Orion Nebula (M42), the Pleiades star cluster (M45), and the Andromeda Galaxy (M31).
-
Use Distinct Symbols or Shading: Represent different types of DSOs on your map using unique symbols—circles for star clusters, diffuse oval shapes for nebulae, and faint smudges for galaxies. This visual differentiation makes your map easy to interpret during observation.
-
Label with Names or Catalog Numbers: Adding the common names and catalog designations helps you correlate your map with star charts and guides, making locating DSOs more intuitive.
Incorporating DSOs in your star maps not only diversifies your observing list but also familiarizes you with the structure and scale of our galaxy and beyond, fueling curiosity and advancing your astronomical skills.
Tracking and Mapping Planetary Positions
Planets differ from stars by their relative brightness and movement along the ecliptic path, making it essential to track and plot their positions accurately on your star maps:
-
Understand Planetary Motion: Planets change positions relative to the background stars nightly, so your star map’s date and time must be precise to reflect current planetary locations.
-
Utilize Planetary Ephemerides: Reference accurate ephemeris data from reliable sources like NASA’s JPL Horizons system, astronomy almanacs, or planetarium apps to determine the RA and Dec of planets for your observation time.
-
Mark Planets Clearly on Your Map: Use distinct symbols—such as small filled circles or star shapes—and differentiate planets by color or size to highlight their distinction from fixed stars.
-
Plot Along the Ecliptic Line: Since planets orbit close to the ecliptic, plotting or overlaying the ecliptic line on your star map helps to anticipate planetary paths and conjunctions with constellations or DSOs.
By integrating planetary positions in your star maps, you gain practical experience in celestial mechanics and improve your ability to identify these dynamic wanderers during your observational sessions.
Together, embedding deep sky objects and planetary data elevates your star maps from basic navigational tools to comprehensive guides, making your beginner astronomy journey more engaging and fruitful.
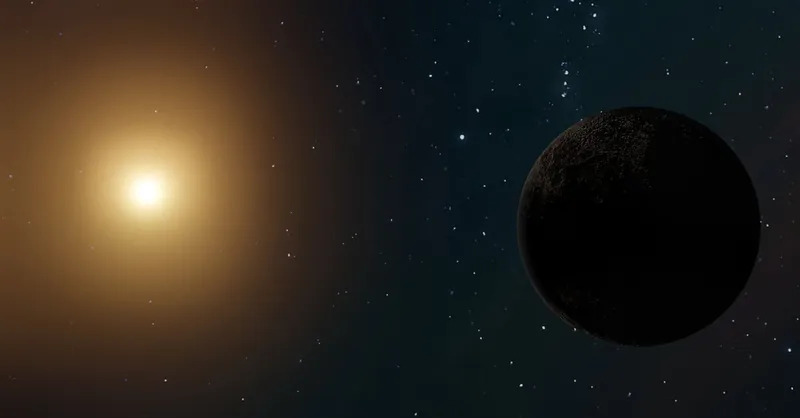
Image courtesy of Zelch Csaba
Practical Applications: How to Use Your Star Maps for Night Sky Observation and Astrophotography
Creating detailed star maps is only the first step on your journey as a beginner astronomer. To fully harness their power, you need to know how to apply these maps during night sky observation and astrophotography sessions. Proper planning and effective use of star maps will elevate your stargazing experience, helping you identify celestial objects quickly, optimize telescope alignment, and frame breathtaking astrophotography shots with precision.
Planning Your Observation Sessions with Star Maps
Before heading outdoors, consult your star map to plan the best time and location for viewing specific constellations, planets, or deep-sky objects. Star maps allow you to:
- Identify the optimal viewing window by pinpointing when desired stars or DSOs rise above the horizon.
- Determine the direction (azimuth) and altitude of key objects, making it easier to orient yourself in the field.
- Anticipate celestial events such as conjunctions, eclipses, or meteor showers by marking their positions on your map.
Using star maps as a pre-observation tool ensures you spend more time observing and less time searching blindly, making your astronomical outings more rewarding.
Aligning Your Telescope Using Star Maps
Accurate telescope alignment dramatically improves your ability to locate and track celestial targets. Here's how star maps facilitate this process:
- Manual Finding and Centering: Use your star map to pre-select bright alignment stars visible in your sky. Locate these stars visually, then point your telescope to these reference points.
- Star Hopping: Once aligned, star maps guide you through “star hopping” techniques—jumping from one known star to another to reach fainter or more distant objects not easily found directly.
- Setting GoTo Telescopes: For digitally controlled telescopes, use star maps to input coordinates or confirm positions of objects to program your telescope accurately.
By integrating star maps into your alignment routine, you minimize frustration, sharpen your observational skills, and enhance your chances of successfully viewing elusive targets.
Using Star Maps for Astrophotography Framing and Composition
Astrophotography demands careful framing to capture stunning images of the night sky. Star maps serve as an essential compositional aid:
- Plan your shot by identifying prominent stars and constellations that will act as landmarks or focal points in your images.
- Determine the field of view (FOV) of your camera and telescope or lens setup by comparing your star map’s scale to the sensor size and focal length, ensuring the desired objects fit perfectly within the frame.
- Time your exposures to match star positions and celestial movements, tracking star rotation as indicated on your star map to avoid motion blur.
- Create multi-exposure sequences by marking different targets on your star map, facilitating advanced techniques like panorama stitching or object stacking.
By using your star maps as a compositional roadmap, you increase your astrophotography success rate, producing clearer, more compelling images that highlight the beauty of the cosmos.
Mastering the practical applications of star maps transforms them from static charts into dynamic tools that directly enhance your night sky adventures. Whether you’re observing through binoculars, aiming your homemade telescope, or capturing long-exposure photographs, star maps guide your eyes and equipment precisely where the universe’s wonders await.

Image courtesy of Thirdman
Common Mistakes Beginners Make When Creating Star Maps and How to Avoid Them
Creating accurate and useful star maps is a rewarding skill, but beginner astronomers often stumble over a few common pitfalls that can lead to confusion or frustration. Recognizing these mistakes early and knowing how to avoid them ensures your star maps serve as reliable guides rather than sources of error.
1. Misalignment Between Coordinate Grids and Star Positions
One of the most frequent mistakes is improper alignment of the Right Ascension (RA) and Declination (Dec) grids on the map with the actual star coordinates. Beginners sometimes:
- Use inconsistent scales for RA and Dec axes, warping star positions.
- Forget to adjust for precession or seasonal sky shifts, causing charts to be outdated.
- Neglect to align the coordinate system orientation with the observation time and location.
How to avoid it: Always double-check your scale ratios and grid placement. Use trusted star catalogs or digital tools that apply current celestial coordinates, and verify your map’s reference frame matches your observing conditions.
2. Inaccurate Scaling and Distances Between Stars
Star maps require precise scaling to represent angular distances correctly. Beginners often underestimate the complexity of translating celestial coordinates into proportional distances on flat paper or screen:
- Using arbitrary or inconsistent scales that distort the star field.
- Compressing large areas leading to overlapping stars or confusing spatial relationships.
- Ignoring map projection effects that impact how the curved sky is displayed in two dimensions.
How to avoid it: Choose an appropriate map projection (e.g., azimuthal or stereographic) best suited for your observing area. Maintain consistent units (degrees, minutes) when scaling and use graph paper or software grid overlays to preserve accurate star spacing.
3. Misunderstanding Celestial Movement Over Time
A crucial challenge is grasping how the night sky rotates and shifts over hours and across seasons. Common misunderstandings include:
- Assuming star maps are static and represent the sky for all times, which leads to difficulty locating stars during observation.
- Overlooking the Earth’s rotation causing stars to move roughly 15° per hour westward.
- Neglecting the effect of the observer’s geographic latitude on visible constellations and star paths.
How to avoid it: Always specify and input your exact observing date, time, and location when creating star maps. Use planispheres or digital tools with adjustable time settings to visualize sky movement, and prepare seasonal star maps to track changes throughout the year.
4. Overcrowding Maps with Excessive Detail
Beginners sometimes attempt to include too many stars or objects at once, cluttering their maps and making them hard to read or use in the field. This is especially common when trying to represent stars beyond naked-eye visibility or labeling numerous deep-sky objects indiscriminately.
How to avoid it: Focus on stars brighter than about magnitude 6 for beginner maps, and prioritize major constellations and key celestial objects relevant to your observing session. Leave space for clear constellation lines, labels, and directional markers to maintain clarity and usability.
By paying careful attention to alignment, scaling, timing, and content clarity, beginner astronomers can avoid these common errors and create star maps that are both accurate and user-friendly. This solid foundation will significantly enhance your ability to navigate the night sky confidently and make your stargazing sessions more enjoyable and successful.
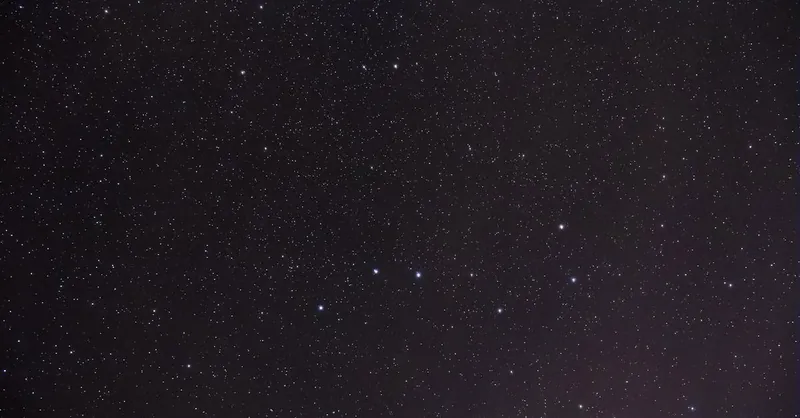
Image courtesy of Free Nature Stock
Advanced Next Steps: Transitioning From Basic Star Maps to More Complex Celestial Charts
As you become comfortable creating and using basic star maps, the next exciting phase in your astronomy journey involves exploring more complex celestial charts that reveal deeper cosmic insights and enhance observational precision. Expanding your star mapping skills to include detailed star atlases, variable star mapping, and integrating star maps with space engineering projects will elevate your understanding and engagement with the night sky beyond the beginner level.
Exploring Star Atlases for In-Depth Celestial Navigation
Star atlases are comprehensive collections of detailed sky charts that cover wider celestial regions with higher resolution and greater object density than basic star maps. These atlases are invaluable for amateur astronomers interested in:
- Navigating faint stars and variable stars: Atlases provide stellar positions down to magnitude 10 or fainter, allowing you to track subtle luminosity changes and stellar variability.
- Identifying complex deep-sky regions: With extensive coverage of nebulae, galaxies, and star clusters, atlases help pinpoint lesser-known but fascinating celestial targets.
- Planning long-term observation projects: Detailed overlays facilitate studying star fields for astrophotography or scientific monitoring.
Popular star atlases suitable for advancing beginners include the Sky Atlas 2000.0 and Uranometria 2000.0, both well-respected for their blend of precision and accessibility. Engaging with these detailed celestial charts enhances your star mapping expertise by fostering familiarity with intricate sky layouts and professional-level charting standards.
Mapping Variable Stars to Track Stellar Changes
Variable star mapping is a rewarding skill that bridges amateur astronomy with scientific contribution by monitoring stars whose brightness fluctuates over time. Incorporating variable star data into your star maps involves:
- Selecting target stars from catalogs like the AAVSO (American Association of Variable Star Observers).
- Plotting exact positions using RA/Dec coordinates.
- Recording brightness changes systematically during observing sessions.
Tracking variables sharpens your abilities in precise star identification and time-based sky monitoring, key competencies for advancing astronomical research or personal observations.
Integrating Star Maps with Engineering and Telescope Projects
Amateur astronomers interested in astronomical engineering can leverage their star maps for practical applications such as:
- Designing custom telescope mounts aligned to celestial coordinates for enhanced tracking accuracy.
- Programming automated GoTo telescope systems by inputting star map coordinate data to improve object acquisition.
- Developing astrophotography rigs that synchronize with star charts for accurate framing and tracking.
Merging celestial charting with engineering projects transforms abstract star maps into tangible tools that directly improve your observational capabilities and scientific experimentation potential.
By embracing advanced mapping techniques, exploring detailed star atlases, engaging in variable star tracking, and applying your star maps to engineering challenges, you propel your astronomy skills from foundational knowledge to comprehensive celestial mastery. This progression not only boosts your stargazing confidence but also deepens your connection to the cosmos through scientifically meaningful and innovative pursuits.

Image courtesy of Thirdman