How to Photograph Nebulae with a DSLR: A Step-by-Step Guide
Category: Astrophotography
Master Nebula Photography with Your DSLR
Capturing the ethereal beauty of nebulae with a DSLR is a thrilling challenge for astronomy enthusiasts, amateur astronomers, and astrophotography learners alike. If you’ve landed here, you’re likely seeking practical guidance to produce stunning, high-quality images of deep-sky objects without investing in specialized astrophotography gear. Whether you're struggling with long exposure settings, tracking, or post-processing low light images, this guide is designed to walk you through every crucial step—starting from choosing the right equipment to processing your final shots. Our approach focuses on maximizing the potential of your DSLR alongside accessible telescopes and mounts, addressing pain points such as light pollution, focusing, and star trailing that frequently discourage beginners.
Unlike generic photography tutorials, this blog post distills insights from the top expert resources and synthesizes them into a logically flowing, in-depth tutorial tailored to those eager to elevate their astrophotography skills. Whether you’re building your first DIY telescope or refining your dark-sky imaging techniques, reading on will empower you with clear methods, troubleshooting tips, and essential settings to capture nebulae in glory. Ready your camera and telescope—let’s unveil the cosmos in your own frame.
- Master Nebula Photography with Your DSLR
- Essential Equipment for Photographing Nebulae with a DSLR
- Understanding Nebulae and Choosing Optimal Targets
- Setting Up Your DSLR and Telescope Mount: Balancing and Polar Aligning for Accurate Tracking
- Camera Settings Explained: ISO, Aperture, Exposure Time, and Focusing Techniques for Nebula Photography with a DSLR
- Techniques for Capturing Multiple Exposures and Utilizing Stacking to Enhance Nebula Details
- Using Narrowband Filters (H-alpha, OIII, SII) to Enhance Nebula Visibility and Color Fidelity
- Post-Processing Workflow for Nebula Images Captured with a DSLR
- Troubleshooting Common Challenges in DSLR Nebula Photography
- Advanced Techniques and Creative Ideas: DIY Telescope Modifications, Custom Tracking Mounts, and Integrating Space Engineering Concepts into Your Astrophotography Setup
Essential Equipment for Photographing Nebulae with a DSLR
To successfully photograph nebulae with your DSLR, selecting the right gear is crucial. The combination of a capable camera body, suitable lenses, and an appropriate telescope will determine the quality and detail of your astrophotography results. Here’s a breakdown of essential equipment tailored for beginners and intermediate astronomers diving into deep-sky imaging.
DSLR Camera Body Recommendations
Choosing a DSLR that excels in low-light performance and noise control is fundamental. Cameras with large APS-C or full-frame sensors provide better sensitivity to faint nebula details. Popular models preferred by astrophotographers include:
- Canon EOS 6D Mark II – A full-frame DSLR with excellent high ISO capabilities and good dynamic range, ideal for capturing dim deep-sky objects.
- Nikon D7500 – Offers a balance of affordability and advanced sensor technology with ISO performance suited for long exposures.
- Canon EOS Rebel T8i / 850D – A versatile entry-level option with useful astrophotography features and easy manual control.
- Sony A7 III – Although technically a mirrorless camera, its full-frame sensor and low noise performance make it a favorite for nebula imaging.
Ideal Lenses for Nebula Photography
For wide-field shots, a fast prime lens with a wide aperture (f/2.8 or wider) is essential to gather ample light from faint nebulae. Recommended lenses include:
- Canon EF 50mm f/1.8 STM – Affordable and sharp, suitable for wide-field nebula shots.
- Rokinon/Samyang 14mm f/2.8 – Popular manual focus lens with ultra-wide field, great for capturing expansive nebulae and Milky Way context.
- Sigma 18-35mm f/1.8 Art – Offers flexibility in framing with superb aperture for brighter nebula images.
When paired with tracking mounts or telescopes, prime lenses allow for shorter focal lengths that minimize star trailing during long exposures.
Telescope Options for Beginners and Intermediates
While DSLR lenses work well for wide-field nebula photography, telescopes enable more detailed, close-up imaging of these deep-sky objects. For those starting out or expanding their gear, consider these beginner-friendly telescopes optimized for astrophotography:
- Orion ED80 Refractor – A lightweight, apochromatic refractor telescope offering sharp, chromatic aberration-free images with a moderate focal length (~600mm) suited for nebulae.
- Sky-Watcher 8" Dobsonian Reflector (with tracking mount upgrade) – Provides larger aperture for better light gathering, though requires tracking for longer exposures.
- Celestron NexStar 6SE – A computerized Schmidt-Cassegrain with moderate focal length (~1500mm), excellent for intermediate users wanting detail and automation.
For intermediate astrophotographers, equatorial mounts with reliable tracking mechanisms are indispensable to avoid star trails and achieve pinpoint stars during long exposure nebula captures. Combining your DSLR with these telescope options and mounts will unlock stunning deep-sky astrophotography potential, making nebulae come alive in your images.
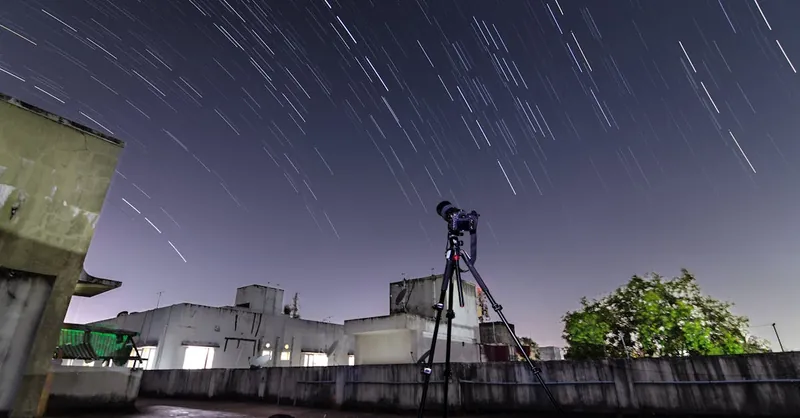
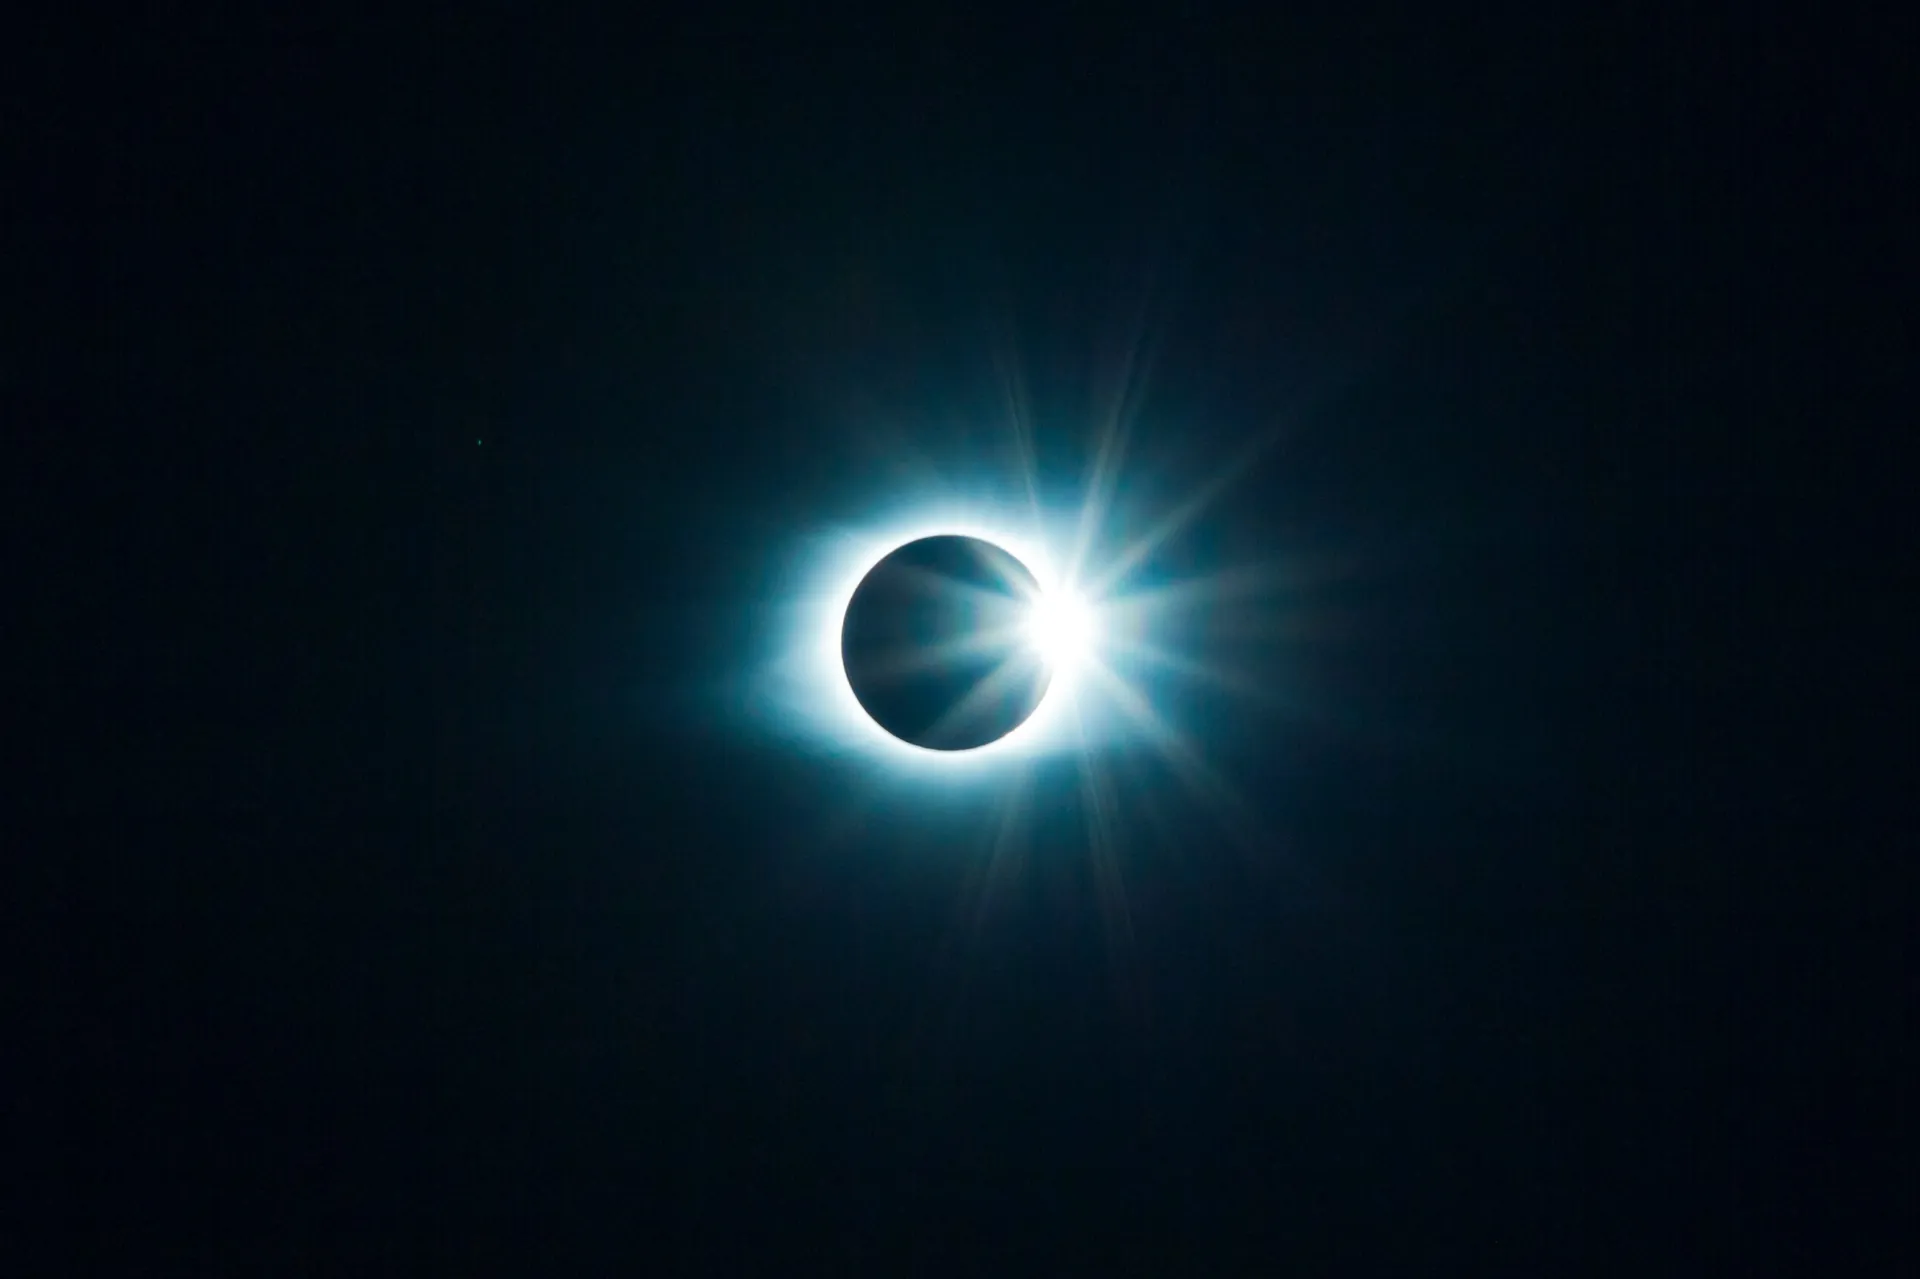
Image courtesy of Rohit Narayanan
Understanding Nebulae and Choosing Optimal Targets
Before venturing into photographing nebulae with your DSLR, gaining a solid understanding of what nebulae are and how to select the best targets based on your location, camera capabilities, and sky conditions is essential. Nebulae are vast clouds of gas and dust, often exhibiting faint glow or emission lines that require careful planning to capture effectively. Their visibility depends heavily on factors such as altitude above the horizon, light pollution levels, and local weather patterns.
Factors to Consider When Selecting Nebula Targets
-
Your Geographic Location
The celestial objects visible vary drastically depending on your latitude. For example, observers in the Northern Hemisphere have easy access to iconic nebulae like the Orion Nebula (M42) and the North America Nebula (NGC 7000). Meanwhile, Southern Hemisphere astronomers can prioritize targets such as the Carina Nebula or the Coal Sack Nebula. Use planetarium apps or star charts tailored for your location to identify high-elevation nebulae that avoid atmospheric distortion and maximize contrast. -
Camera and Lens/Telescope Limitations
Your DSLR’s sensor sensitivity, focal length, and aperture size directly impact which nebulae are practical to image. Wide-field lenses paired with tracking mounts perform well for large, bright nebulae spans, while longer focal length telescopes can capture intricate details but require precise tracking and longer exposures. Matching your target’s angular size to your equipment’s field of view ensures the nebula fills the frame without losing detail. -
Current Sky Conditions
Light pollution levels, atmospheric transparency, and moon phase significantly influence nebula visibility. Aim to shoot during new moon windows to reduce sky brightness, and select nights with low humidity and stable atmospheric conditions. Utilize light pollution maps to find dark sky sites within reachable distance, or consider narrowband filters for your DSLR to enhance nebula contrast by isolating emission lines like H-alpha.
By carefully assessing these variables, you ensure your imaging session focuses on attainable targets that align with your equipment strengths and environmental conditions, dramatically increasing your chances of capturing stunning nebula photographs. This strategic approach to target selection sets a solid foundation for successful astrophotography of deep-sky objects with your DSLR.
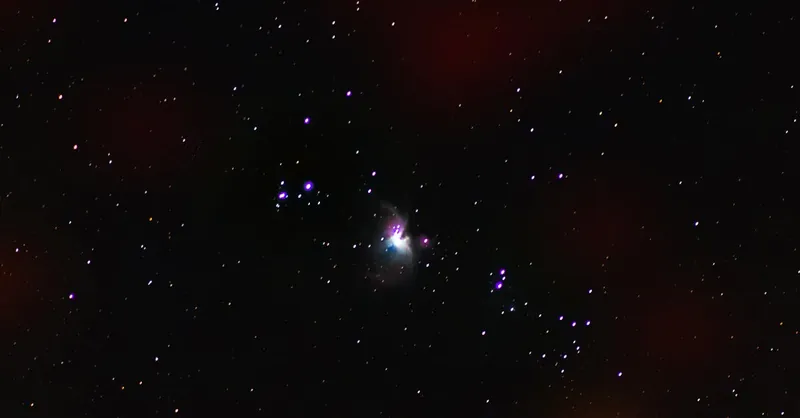
Image courtesy of Alexandre P. Junior
Setting Up Your DSLR and Telescope Mount: Balancing and Polar Aligning for Accurate Tracking
Achieving sharp, trail-free nebula images hinges on the precise setup of your DSLR and telescope mount. Properly balancing your equipment and accurately polar aligning your equatorial mount are critical steps that enable smooth and stable tracking during long exposure sessions, which greatly reduces star trailing and blurring.
Balancing Your DSLR and Telescope for Stability
Before polar alignment, ensure that your DSLR and telescope are perfectly balanced on the mount. An unbalanced setup can cause the mount motor to strain, leading to vibrations, tracking errors, and ultimately, degraded image quality. To balance your rig effectively:
- Mount your DSLR and telescope securely on the equatorial mount’s dovetail or mounting plate.
- Adjust the telescope’s position forward or backward until it is centrally balanced horizontally. The scope should stay still when you let go without tipping.
- Balance the setup on the mount’s declination axis by shifting the telescope counterweights along the shaft until the system remains stationary when unlocked.
- Fine-tune the right ascension axis balance by sliding the counterweight bar until the rig remains motionless when released.
Taking the time to achieve perfect balance reduces motor load, enabling smoother drive and longer, error-free exposures essential for capturing faint nebula details.
Polar Aligning for Precise Sky Tracking
Polar alignment is a fundamental process aligning the mount’s rotational axis with the Earth’s celestial pole, allowing the telescope to track stars as Earth rotates. A poorly aligned mount results in star trailing, especially in long exposures common in nebula imaging. To polar align your mount accurately:
- Use the built-in polar scope or electronic polar alignment tools on computerized mounts to center Polaris (Northern Hemisphere) or Sigma Octantis (Southern Hemisphere) correctly in the reticle.
- For enhanced precision, employ software-assisted methods such as PoleMaster, SharpCap’s polar alignment tool, or astrophotography guiding software that iteratively refines alignment.
- Confirm polar alignment by performing a drift alignment test, observing star drift near the celestial equator and adjusting mount altitude and azimuth accordingly.
Consuming the extra time to balance your setup and conduct a meticulous polar alignment pays off exponentially by enabling your DSLR and telescope mount to track nebulae faithfully throughout long exposures. This foundation minimizes star trailing, yielding crisp, detailed nebula images that highlight the cosmic splendor captured with your DSLR.
Image courtesy of Rohit Narayanan
Camera Settings Explained: ISO, Aperture, Exposure Time, and Focusing Techniques for Nebula Photography with a DSLR
To capture the faint glow and intricate details of nebulae, optimizing your DSLR’s camera settings is paramount. Unlike daytime photography, astrophotography demands a careful balancing act between sensitivity, noise management, and exposure duration to reveal these deep-sky wonders clearly and vividly.
ISO: Finding the Sweet Spot Between Sensitivity and Noise
In nebula photography, a higher ISO increases your camera sensor’s sensitivity to light, enabling you to capture faint nebula emissions. However, excessive ISO settings lead to digital noise, which degrades image quality and obscures subtle nebula structures.
- Aim to use an ISO range between 800 and 1600 for most DSLR cameras, striking a good balance between sensitivity and manageable noise levels.
- Modern full-frame DSLRs with good low-light performance, like the Canon EOS 6D Mark II, can sometimes handle ISO values up to 3200 without excessive noise, but always test your camera's limits in practice.
- Use image stacking techniques during post-processing to reduce noise effectively when shooting at higher ISO settings.
Aperture: Maximizing Light Gathering with Wide Open Lenses or Telescopes
The aperture setting controls how much light your DSLR sensor receives per exposure. In nebula astrophotography, a wider aperture (lower f-number) is advantageous because nebulae are faint and require maximum incoming light.
- When using DSLR lenses, select fast prime lenses with apertures of f/2.8 or wider to capture more detail and reduce required exposure times.
- If using a telescope, the aperture is fixed by the telescope’s design, but using apochromatic refractors or fast astrographs with low focal ratios (f/4–f/6) helps gather light more efficiently.
- Avoid stopping down the aperture excessively, as it decreases light input and may increase diffraction, softening stars and nebula details.
Exposure Time: Balancing Nebula Brightness and Star Trailing
Exposure time dictates how long your DSLR sensor collects light for each shot. Longer exposures reveal more nebula structure but increase the risk of star trailing if your mount tracking isn’t accurate.
- Begin with exposures of 60 to 180 seconds, depending on your mount’s tracking precision and the focal length of your lens or telescope.
- For wide-field lenses (short focal length), longer exposures are often possible (3 minutes or more) without noticeable star trailing.
- With higher focal length telescopes (600mm+), reduce exposure times accordingly or employ autoguiding systems to maintain sharp stars and avoid trailing.
- Capture multiple exposures to stack later, which improves detail and lowers noise without star trailing artifacts.
Focusing Techniques: Achieving Pinpoint Stars for Crisp Nebula Detail
Precise focus is essential in nebula imaging, as even slight misfocus blurs faint details. Manual focusing is generally preferred for astrophotography.
- Use live view mode at maximum magnification on a bright star near your target to manually fine-tune focus until stars appear as sharp pinpoints.
- Employ a Bahtinov mask, a diffraction-focused tool placed over your telescope or lens front, to achieve precise focus quickly and confidently.
- Recheck focus periodically during your imaging session, as temperature changes can cause focus shift.
By mastering these DSLR camera settings—ISO, aperture, exposure time, and focusing methods—you empower your astrophotography setup to capture nebulae with sharpness, detail, and balanced brightness. These settings form the backbone of successful deep-sky imaging, creating the foundation from which stunning, high-quality nebula photographs emerge.
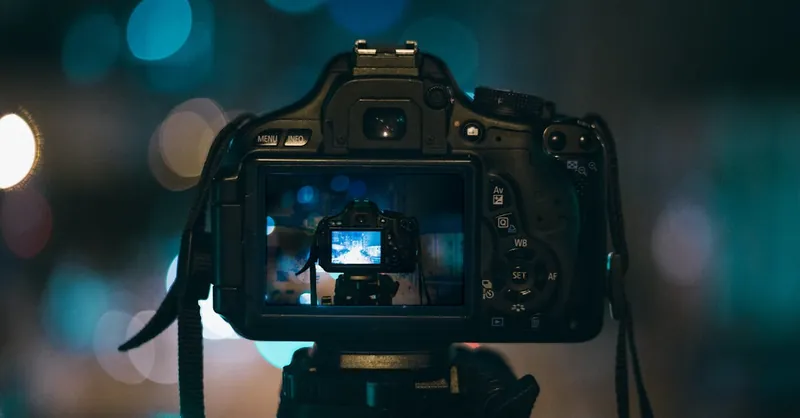
Image courtesy of Kaique Rocha
Techniques for Capturing Multiple Exposures and Utilizing Stacking to Enhance Nebula Details
One of the most effective strategies to increase the signal-to-noise ratio (SNR) and reveal faint nebula details in DSLR astrophotography is to capture multiple exposures of the same target and combine them through image stacking. This technique leverages the principle that noise is random across frames, whereas the true nebula signal remains consistent, allowing stacking software to emphasize real structures while minimizing noise and artifacts.
Why Multiple Exposures Matter in Nebula Photography
Nebulae are intrinsically dim objects that require long exposure times to collect enough photons for a detailed image. However, single long exposures can suffer from noise, thermal effects, and tracking imperfections. Instead of relying on one extended exposure, astrophotographers take multiple shorter exposures—called subframes—which collectively gather more light without excessive noise buildup or star trailing.
Best Practices for Capturing and Managing Multiple Exposures
- Capture a Series of Identical Exposures (Subframes):
- Use consistent camera settings (ISO, aperture, exposure time) for each frame.
-
Aim for at least 20 to 50 subframes to improve the final image quality significantly. More frames yield better noise reduction.
-
Maintain Stable Tracking:
- Ensure your mount is precisely polar aligned and balanced to keep stars sharp across all exposures.
-
Use autoguiding if available to reduce any drift or star elongation over longer sessions.
-
Include Calibration Frames:
- Dark frames: Shots taken with the lens cap on to record sensor noise and thermal patterns.
- Flat frames: Images of a uniformly illuminated surface to correct vignetting and dust spots.
- Bias frames: Very short exposures to capture the camera’s read noise.
Including these calibration frames during stacking improves image quality by correcting sensor artifacts and optical inconsistencies.
The Power of Image Stacking Software
After capturing your subframes, use dedicated astrophotography stacking software like DeepSkyStacker, Sequator, or PixInsight. These tools align each exposure precisely, compensate for slight tracking errors, and average the pixel information to suppress noise effectively.
- The stacking process significantly boosts the signal-to-noise ratio, making faint nebulosity and intricate details more visible.
- Stacking allows you to safely use higher ISO settings and moderate exposure times without losing image quality.
- Combined with post-processing techniques (such as noise reduction and contrast stretching), stacking brings out colors and subtle structures invisible in single frames.
In summary, mastering multiple exposure capture and stacking is indispensable for DSLR astrophotographers aiming to produce crisp, high-fidelity images of nebulae. By systematically acquiring numerous calibrated frames and harnessing powerful stacking algorithms, you can transcend the limitations of individual exposures and reveal the true cosmic grandeur hidden within these celestial clouds.
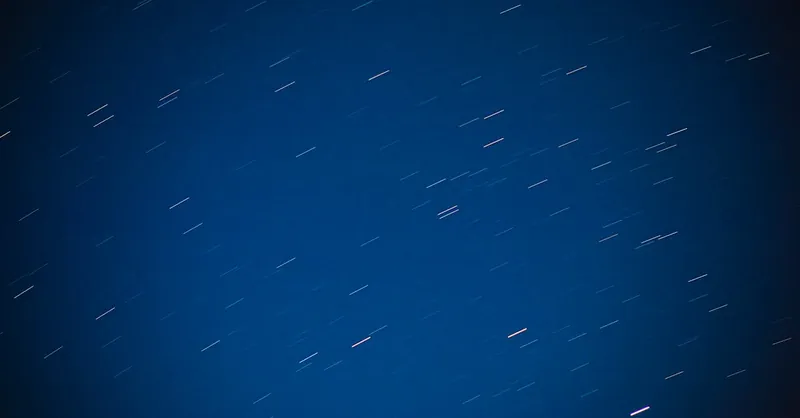
Image courtesy of Nothing Ahead
Using Narrowband Filters (H-alpha, OIII, SII) to Enhance Nebula Visibility and Color Fidelity
One of the most powerful methods to boost nebula contrast and color in DSLR astrophotography is by incorporating narrowband filters that isolate specific emission lines. Nebulae often glow strongly in certain wavelengths—primarily Hydrogen-alpha (Hα), Oxygen-III (OIII), and Sulfur-II (SII)—which are characteristically faint and easily overwhelmed by light pollution and broadband light pollution sources. These filters selectively transmit light from these emission lines while blocking much of the unwanted background sky glow and artificial light, dramatically improving the signal-to-noise ratio and revealing intricate nebular structures with vivid colors.
When and How to Use Narrowband Filters with Your DSLR
- Choose Filters Compatible with Your DSLR:
- For color DSLRs, single-band narrowband filters can be used in combination or individually. Popular options include 7nm bandwidth H-alpha, OIII, and SII filters tailored to common emission lines.
-
Use clip-in filter holders designed for your camera model or adapters for attaching filters in front of your telescope or lens.
-
Optimal Conditions for Narrowband Imaging:
- Narrowband filters excel under moderately light-polluted skies, allowing urban or suburban astrophotographers to capture nebulae that are otherwise washed out in broadband light.
-
These filters are especially impactful when shooting emission nebulae like the Orion Nebula, Lagoon Nebula (M8), or Heart and Soul Nebulae, which emit strongly in H-alpha and other emission lines.
-
Shooting Strategy:
- Capture separate image sequences for each filter (Hα, OIII, SII), keeping exposure times sufficiently long to bring out the nebula but balanced to avoid saturating bright stars.
- Typical exposure times range from 3 to 10 minutes per frame depending on target brightness and equipment capability.
-
After capturing individual filter sets, combine them during post-processing to produce stunning, color-enhanced nebula composites (often mapping SII to red, Hα to green, and OIII to blue channels in synthetic color images).
-
Benefits Over Broadband Imaging:
- Significantly reduces light pollution and moonlight interference by isolating narrow wavelengths.
- Enhances color fidelity and contrast of emission nebulae, revealing subtle details invisible under broad-spectrum light.
- Enables imaging from less-than-ideal locations without expensive light pollution mitigation.
By effectively applying narrowband filters such as H-alpha, OIII, and SII in your DSLR astrophotography workflow, you open a gateway to capturing spectacularly detailed, colorful nebula images even with modest equipment and challenging skies. These filters elevate your nebula photography from basic broadband snapshots to professional-quality astrophotography, showcasing the universe’s glowing gas clouds in unprecedented clarity and vibrance.
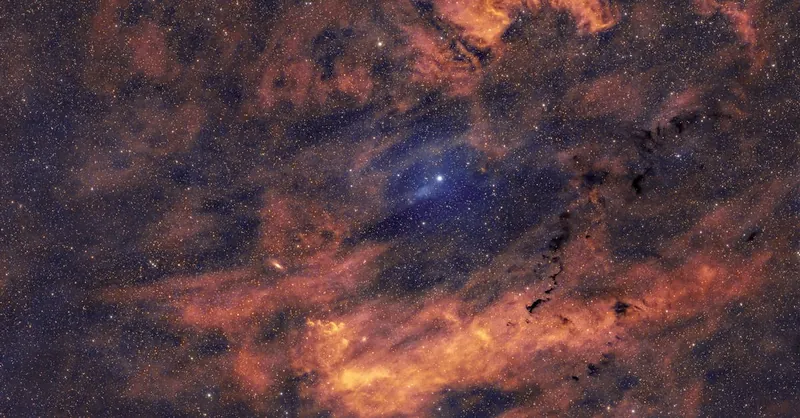
Image courtesy of Scott Lord
Post-Processing Workflow for Nebula Images Captured with a DSLR
Capturing nebulae with your DSLR is only half the journey; post-processing is where your raw data transforms into captivating, detailed images that reveal the subtle beauty of these deep-sky objects. An efficient, methodical workflow incorporating calibration, stacking, noise reduction, and color adjustment is essential to maximize image quality and bring out the rich details and vivid colors of nebulae. Selecting the right software and applying step-by-step techniques will enable you to overcome common challenges such as sensor noise, uneven illumination, and color imbalance inherent in astrophotography.
Recommended Software for Nebula Image Processing
For beginners and intermediate astrophotographers, several robust and accessible tools stand out for DSLR nebula image processing:
- DeepSkyStacker (DSS): Free and user-friendly, ideal for calibration and stacking of multiple exposures alongside dark, flat, and bias frames.
- Sequator: Another free software offering streamlined stacking with effective light pollution suppression.
- PixInsight: A professional-grade, comprehensive solution favored for advanced calibration, precise stacking, and highly customizable post-processing but with a steeper learning curve.
- Adobe Photoshop with Astronomy Plugins: Widely used for detailed noise reduction, color grading, and final adjustments, especially when combined with astrophotography-specific plugins like GradientXTerminator or NoiseNinja.
Step-by-Step Post-Processing Tips
-
Calibration: Correct Sensor and Optical Artifacts
Start by applying dark frames to remove thermal noise and hot pixels, flat frames to correct vignetting and dust shadows, and bias frames to compensate for read noise. Calibration ensures that imperfections and background inconsistencies are minimized, providing a clean foundation for stacking. -
Image Alignment and Stacking
Use your preferred software to precisely align all subframes despite minor tracking or framing deviations. Aligning ensures stars and nebula details overlap perfectly. Then, stack the frames using averaging or median combine methods to significantly boost the signal-to-noise ratio (SNR), which sharpens nebula structures and suppresses random noise. -
Noise Reduction
After stacking, apply noise reduction techniques carefully to smooth background noise without erasing faint nebula details. Tools like wavelet transforms (PixInsight) or selective noise reduction brush tools in Photoshop can be effective. Avoid over-smoothing which may degrade fine structures in the nebula. -
Color Calibration and Adjustment
Nebulae often have characteristic emission colors (reds from H-alpha, greens from OIII); therefore, accurate color calibration using white balance and color curves is crucial. Adjust color balance to neutralize any color cast from light pollution or sensor bias, then enhance saturation and contrast to bring out the nebula’s natural hues vividly. -
Contrast Enhancement and Sharpening
Use techniques such as curves adjustment, histogram stretching, and local contrast enhancement to emphasize nebular features and cosmic textures. Unsharp mask or deconvolution sharpening can further define subtle filaments and edges within the nebula.
By following this structured post-processing workflow, you can elevate your DSLR nebula images from raw, noisy captures to stunning astronomical portraits that rival professional deep-sky photographs. The key lies in patience and methodical refinement at each stage—calibration sets the foundation, stacking amplifies signal, and thoughtful adjustments reveal the true cosmic artistry hidden in your data.
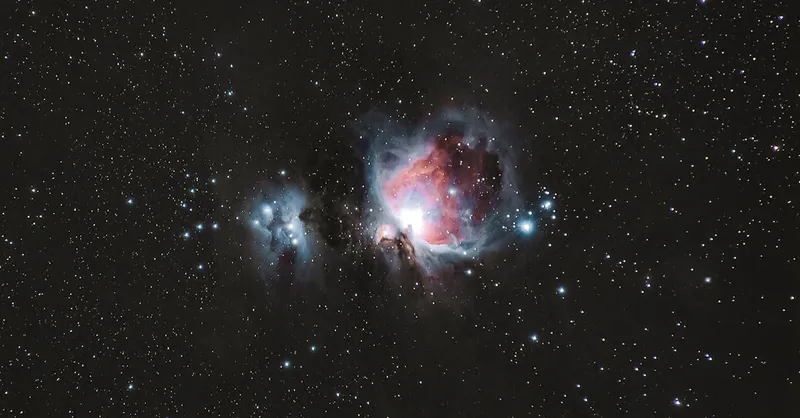
Image courtesy of Alex Andrews
Troubleshooting Common Challenges in DSLR Nebula Photography
Astrophotography of nebulae with a DSLR, while rewarding, presents several common challenges that can impede image quality if not properly addressed. From the pervasive effects of light pollution to technical hurdles such as star trailing, focus issues, and equipment limitations, understanding how to diagnose and resolve these obstacles is critical to capturing crisp, vibrant nebula images.
Tackling Light Pollution Effects
Light pollution is one of the biggest adversaries for deep-sky imaging, especially for astrophotographers using DSLRs from suburban or urban areas. It washes out faint nebulae and reduces contrast, making subtle details nearly invisible.
- Use light pollution filters or narrowband filters (H-alpha, OIII, SII) to selectively block artificial lighting wavelengths while transmitting nebula emission lines.
- Plan your sessions during the new moon phase and target nebulae that rise high above the horizon, where atmospheric interference and light glow are minimized.
- Incorporate dark sky calibration frames and apply post-processing techniques such as gradient removal and background neutralization to mitigate residual light pollution artifacts.
Preventing Star Trailing and Tracking Errors
Star trailing blurs fine nebula detail, often caused by inadequate mount tracking or imprecise polar alignment.
- Ensure your equatorial mount is accurately polar aligned using drift alignment or electronic aids before each session.
- Properly balance your DSLR and telescope setup to reduce motor strain and improve tracking smoothness.
- Limit exposure times according to your focal length and mount tracking performance—longer focal lengths require shorter exposures or autoguiding support.
- Consider investing in autoguiding systems that provide real-time corrections during exposures for pinpoint star sharpness.
Overcoming Focus Challenges
Achieving exact focus on distant stars is vital; an out-of-focus image blurs nebula edges and reduces clarity.
- Use a Bahtinov mask for precise manual focusing by examining the diffraction patterns on a bright star near your target.
- Utilize your DSLR’s live view at maximum magnification to fine-tune focus.
- Account for potential focus shifts due to temperature changes during the night by periodically checking and adjusting focus.
Dealing with Equipment Limitations
Beginners often encounter hardware constraints such as limited mount tracking accuracy, camera sensor noise, or optics not suited for deep-sky imaging.
- Start with shorter exposures and multiple frame stacking to compensate for sensor noise and tracking imperfections.
- Upgrade gradually to better mounts with refined tracking or add guiding accessories as your experience progresses.
- Choose fast, high-quality lenses or apochromatic refractor telescopes to minimize chromatic aberration and improve image sharpness.
- Regularly maintain your equipment—clean lenses, check mount balance, and update camera firmware to ensure optimal performance.
By proactively troubleshooting these typical issues—light pollution interference, star trailing, focusing difficulties, and equipment shortcomings—you position yourself to consistently capture stunning nebula photographs with your DSLR. Mastery of these solutions not only enhances your astrophotography results but also deepens your engagement with the cosmic artistry unfolding in your frames.
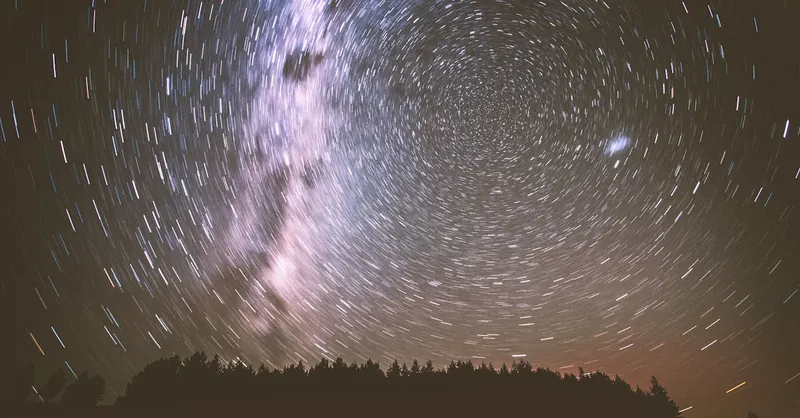
Image courtesy of Marek Piwnicki
Advanced Techniques and Creative Ideas: DIY Telescope Modifications, Custom Tracking Mounts, and Integrating Space Engineering Concepts into Your Astrophotography Setup
Elevating your DSLR nebula photography beyond the basics often requires innovative DIY modifications and the integration of space engineering principles into your equipment setup. Customizing your telescope and mount not only enhances tracking accuracy and image quality but also deepens your engagement with astrophotography as a hands-on scientific and engineering pursuit.
DIY Telescope Enhancements to Improve Optical Performance
Many astrophotographers improve their nebula imaging by modifying their telescopes to optimize light gathering and reduce optical aberrations. Consider the following DIY upgrades:
- Collimation Adjustments
-
Regularly fine-tune your reflector or Schmidt-Cassegrain telescope’s primary and secondary mirrors to ensure precise alignment, which is critical for sharp star images and nebula detail.
-
Thermal Management Solutions
-
Attach cooling fans or passive heat sinks to your telescope tube to reduce thermal currents and improve image stability during long exposures, an often overlooked but impactful enhancement.
-
Custom Dew Shields and Light Baffles
- Fabricate or adapt your own dew shields to prevent moisture build-up, and create custom light baffles inside your optical tube to minimize stray light intrusion, which can degrade contrast when capturing faint nebulae.
Building and Tuning Custom Tracking Mounts for Superior Precision
High-quality equatorial mounts with reliable tracking are essential for long-exposure nebula photography. For enthusiasts with engineering skills, designing or upgrading your own tracking mount brings significant benefits:
-
Microcontroller-Controlled Stepper Motors
Use Arduino or Raspberry Pi microcontrollers to fine-tune stepper motor drives, enabling highly customizable tracking rates and smooth sidereal motion that accommodates different celestial targets. -
Feedback Systems and Autoguiding Integration
Incorporate optical encoders or GPS data feeds to improve tracking accuracy. DIY autoguiding solutions using webcam-based guide scopes can dynamically correct mount drift, minimizing star trailing in long exposures. -
Lightweight and Modular Designs
By engineering lightweight mount components with materials like carbon fiber and aluminum, you can improve portability without sacrificing mechanical stability, ideal for astrophotographers who travel to dark sky sites.
Applying Space Engineering Concepts to Optimize Your Astrophotography Workflow
Integrating principles from space engineering enhances not only your hardware but also your overall imaging strategy:
-
Vibration Dampening Inspired by Satellite Design
Implement vibration isolation using elastomer mounts or passive dampers modeled on those in spacecraft payloads to lessen mechanical oscillations in your telescope setup during exposure sequences. -
Thermal Expansion Compensation
Account for structural material expansion and contraction caused by temperature fluctuations at night by selecting components with matched coefficients of thermal expansion or by designing adjustable focus and collimation mechanisms. -
Power Management and Automation
Employ solar-powered battery systems or programmable power controllers to extend unattended imaging sessions, similar to spacecraft power regulation, enabling remote or automated nebula photography operations.
By embracing these advanced techniques—including DIY optical improvements, custom precision mounts, and space engineering-inspired innovations—you transform your DSLR astrophotography setup into a versatile, high-performance platform. This fusion of astronomy, engineering, and creativity not only magnifies your ability to capture breathtaking nebula images but also cultivates a deeper appreciation for the intricate mechanics behind celestial observation and imaging.
Image courtesy of Pixabay