How to Photograph the Milky Way Galaxy: Ultimate Guide
Category: Astrophotography
Capture the Milky Way Like a Pro: A Guide for Astronomy Enthusiasts
Photographing the Milky Way galaxy is one of the most rewarding experiences for astronomy enthusiasts, amateur astronomers, and astrophotography learners alike. If you’ve ever stood under a clear, dark night sky and wished you could capture that breathtaking band of stars and cosmic dust, this guide is tailored precisely for you. You’re likely familiar with basic photography but find yourself overwhelmed by the technical challenges unique to astrophotography: long exposures, star movement, low light conditions, and the right gear setup. Perhaps you’ve struggled with noisy images, unclear star details, or unsure how to plan your shoot around moon phases and weather.
You came here seeking a comprehensive, step-by-step walkthrough that goes beyond generic tips — one that addresses technical settings, equipment choices, shooting locations, and post-processing tailored to the Milky Way. Unlike other articles, this post combines practical telescope-building insights, astrophotography techniques, and planetology context, appealing to your deep interest in space engineering and cosmic exploration. Whether you want to capture Milky Way panoramas or detailed star fields, this guide empowers you with the knowledge to elevate your night sky photography from basic snapshots to stunning cosmic art. Read on to unlock the secrets to photographing the Milky Way galaxy with confidence and creativity.
- Capture the Milky Way Like a Pro: A Guide for Astronomy Enthusiasts
- Understanding the Milky Way Galaxy: Structure, Visibility, and Best Times to Shoot
- Choosing the Right Camera and Lenses for Milky Way Photography
- Essential Equipment: Tripods, Remote Shutters, and Tracking Mounts
- Planning Your Shoot: Location Scouting, Moon Phases, and Weather Considerations
- Camera Settings Explained: ISO, Aperture, Shutter Speed, and Focus for Night Sky
- Techniques for Reducing Noise and Star Trails in Long Exposure Shots
- Composing Your Milky Way Shot: Foreground Elements and Framing Tips
- Post-Processing Workflow: Image Stacking, Color Correction, and Enhancing Details
- Advanced Tips: Using Telescope Attachments and Filters for Enhanced Astrophotography
- Troubleshooting Common Challenges and Improving Your Milky Way Shots Over Time
Understanding the Milky Way Galaxy: Structure, Visibility, and Best Times to Shoot
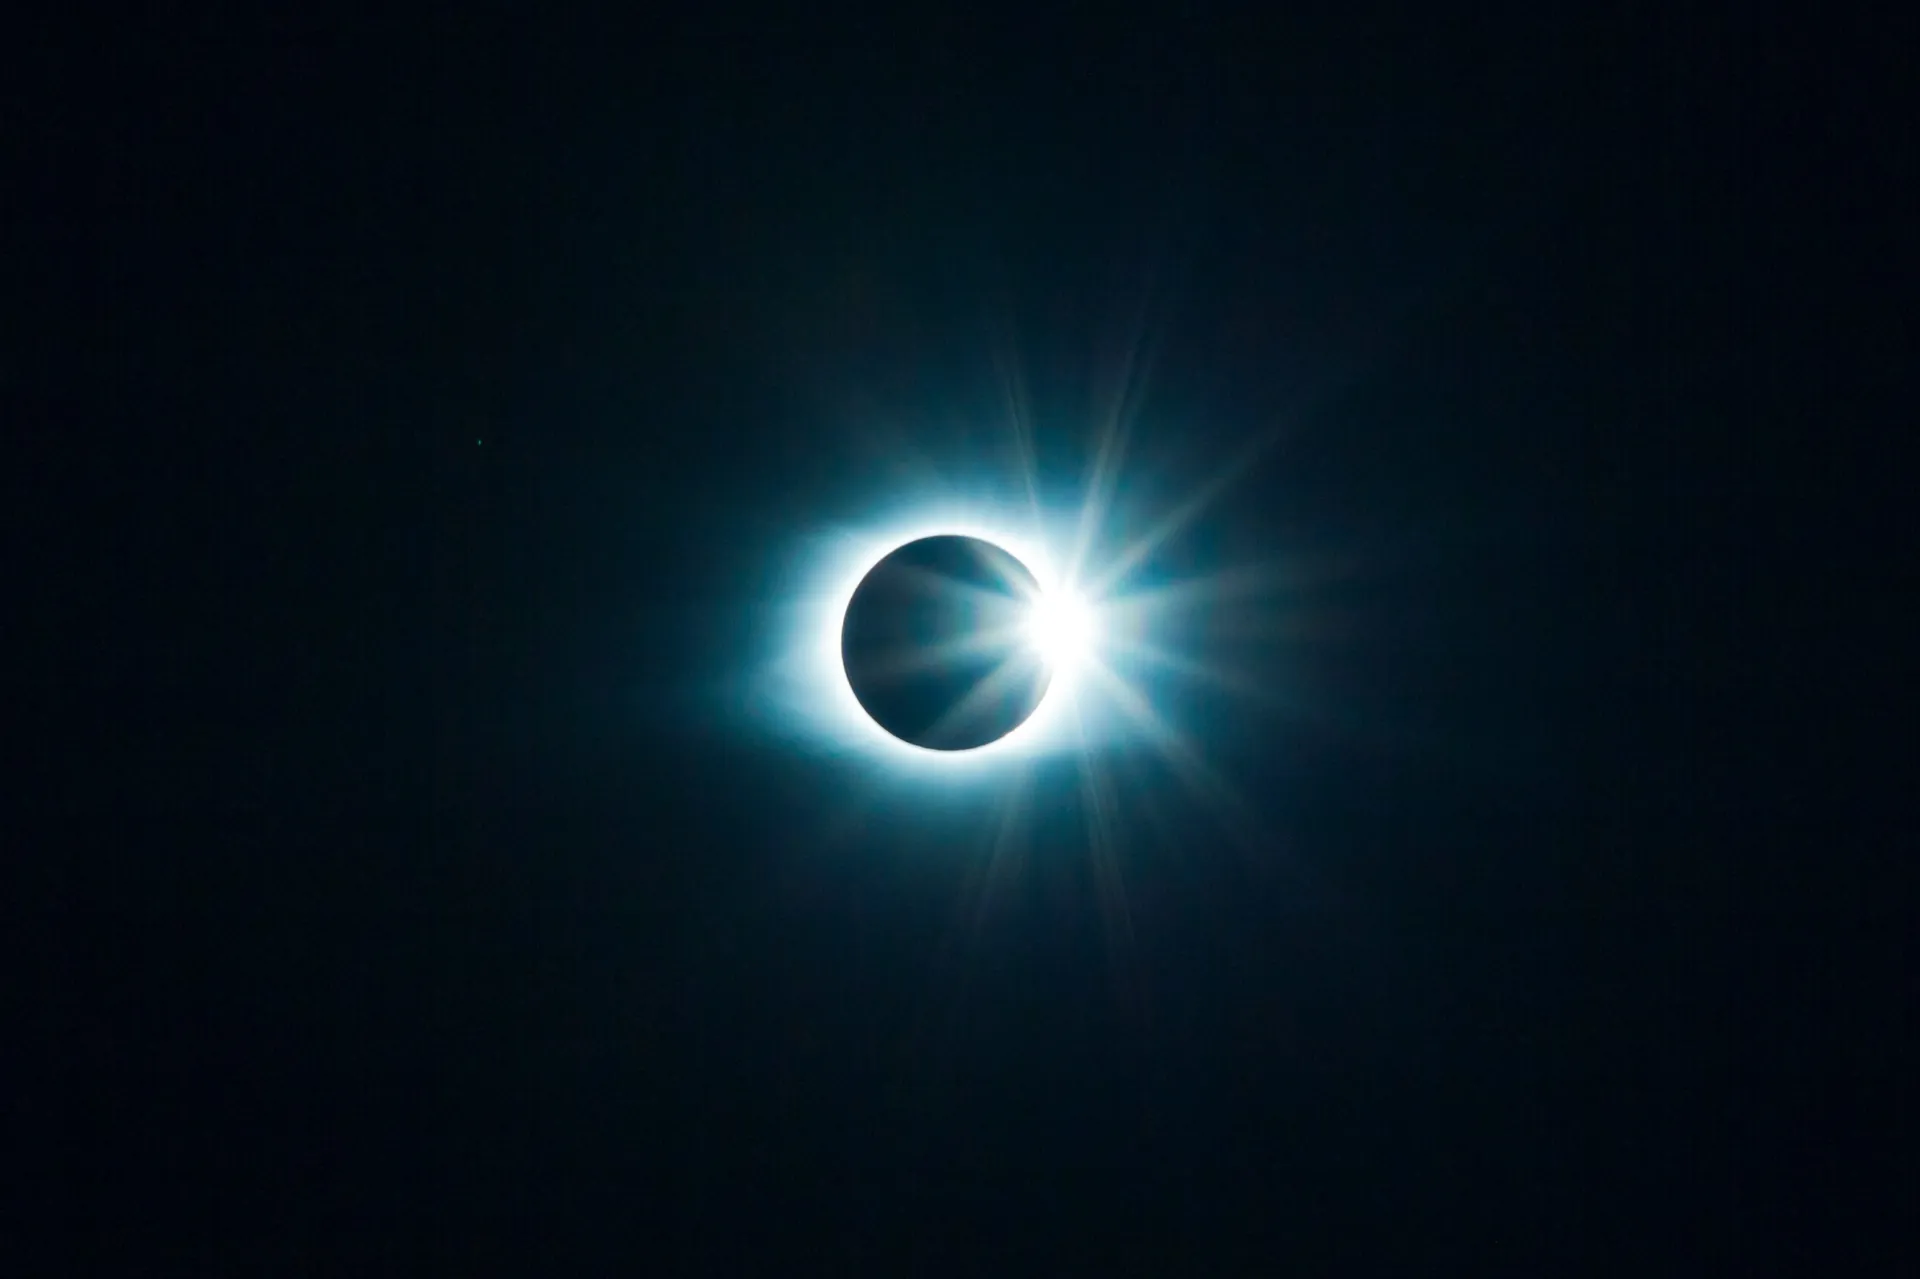
To master photographing the Milky Way, it’s essential to first understand its structure and visibility, along with the optimal times for shooting. The Milky Way is a barred spiral galaxy, with a dense core packed with billions of stars surrounded by sprawling arms of stars, gas, and dust. What you see in the night sky is the galaxy’s bright central bulge and the dark, intricate lanes of interstellar dust that create its iconic band-like appearance. This structure influences the composition and framing of your astrophotography shots, especially when aiming to capture the glowing galactic core in rich detail.
Visibility and Galactic Core Position
The Milky Way is best visible in areas with minimal light pollution, far from urban centers. The galactic core—the brightest and most photogenic part—is usually visible from late spring to early fall in the Northern Hemisphere, peaking around June to August. In the Southern Hemisphere, the visibility window is longer and often brighter due to a clearer view of the core region. To optimize your shoot:
- Check the Milky Way’s position using astronomy apps and star charts, noting how it shifts throughout the night and season.
- Avoid nights with a bright moon, as moonlight significantly diminishes faint stars and detail.
- Plan shoots during the new moon or within a few days before and after it for the darkest skies.
Best Times and Conditions for Shooting
For breathtaking Milky Way photography, the key is shooting during astronomical twilight, the phase when the sun is between 12° and 18° below the horizon, and the sky is darkest. This period typically occurs about 1.5 to 2 hours after sunset or before sunrise, depending on your location and time of year. Clear, dry weather conditions without cloud cover or atmospheric haze are crucial to reveal the galaxy's fine details.
Tip: Use light pollution maps (such as Dark Sky Finder) to locate ideal shooting sites and plan around seasonal weather patterns for crystal-clear skies. By understanding when and where the Milky Way reveals its full splendor, you maximize your chances of capturing stunning, high-quality images that showcase the galaxy’s intricate beauty.

Image courtesy of Vladyslav Huivyk
Choosing the Right Camera and Lenses for Milky Way Photography
Selecting the appropriate camera and lenses is a crucial step toward capturing breathtaking images of the Milky Way galaxy. Because astrophotography involves shooting in extremely low-light conditions with long exposures, your gear must excel in sensitivity, sharpness, and minimal noise performance. The ideal setup balances affordability, portability, and technical capability to render the Milky Way’s intricate star fields and galactic core with clarity and depth.
Camera Features to Prioritize
When choosing a camera, consider the following key features that directly impact Milky Way photography quality:
- Sensor Size: Full-frame sensors outperform crop sensors in gathering light, producing clearer, less noisy images critical for night sky clarity.
- High ISO Performance: A camera that maintains low noise at high ISO settings (ISO 1600 to 6400) will allow you to capture faint stars without excessive graininess.
- Manual Control and RAW Output: Full manual controls let you fine-tune exposure, aperture, and focus; shooting in RAW preserves maximum image data for post-processing.
- Low Thermal Noise: Cameras with effective noise reduction and cooling technologies help during long-exposure captures to keep grain under control.
Popular choices among astrophotographers include mirrorless models from Sony’s Alpha series, Nikon’s full-frame DSLRs, and Canon’s EOS R lineup, all known for excellent night-sky performance.
Optimal Lens Characteristics for Milky Way Shots
The lens you pair with your camera is equally important. Since the Milky Way spans wide sections of the sky, your lens must strike a balance between wide field of view and light-gathering ability:
- Wide-Angle Lens: Lenses with focal lengths between 14mm and 24mm (for full-frame sensors) best capture expansive portions of the Milky Way and landscape foregrounds.
- Large Maximum Aperture: Fast lenses with apertures of f/2.8 or wider gather more light, enabling shorter exposure times and sharper star points by minimizing star trailing.
- Low Distortion and Sharpness: Select lenses with minimal barrel distortion and high edge-to-edge sharpness to preserve the galaxy’s fine structural details across the frame.
Prime lenses with fixed focal lengths generally offer superior optics over zooms, but high-quality wide-angle zoom lenses provide versatility for varying compositions.
By carefully choosing a high-sensitivity camera body matched with a wide-aperture wide-angle lens, you build the foundation for capturing Milky Way photographs that are both technically excellent and artistically compelling. This harmonious gear combination allows you to push your astrophotography skills beyond the basics and truly reveal our galaxy’s luminous beauty.
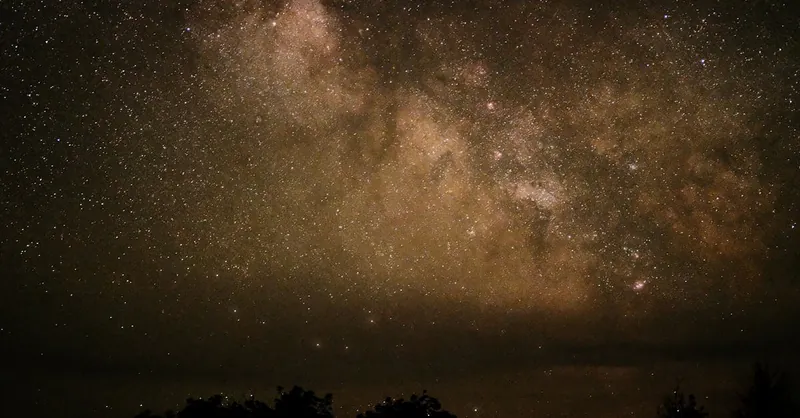
Image courtesy of Vladyslav Huivyk
Essential Equipment: Tripods, Remote Shutters, and Tracking Mounts
Once you have selected the ideal camera and lens for Milky Way photography, the next critical step is assembling the essential supporting equipment that ensures sharp, clear, and well-exposed night sky images. Because photographing the Milky Way involves long exposure times—often ranging from 15 to 30 seconds or more—any slight movement can cause star trails, blurring, or loss of detail. Investing in the right gear not only stabilizes your setup but also enhances your control over the shooting process, reducing vibrations and enabling longer exposures with precision.
Tripods: The Foundation for Stability
A sturdy, high-quality tripod is indispensable for Milky Way astrophotography. Unlike casual photography, even minimal shake during long exposures can degrade image sharpness. When choosing a tripod, prioritize the following features:
- Build Quality and Stability: Aluminum or carbon fiber tripods provide strong support with minimal vibration. Carbon fiber can offer lighter weight and better vibration damping for field mobility.
- Adjustable Leg Angles and Height: Flexible legs help set up on uneven terrain, common in natural dark sky locations.
- Secure Head with Quick Release: A solid ball head or pan-tilt head allows precise framing and easy camera adjustment without loosening the setup.
Using a tripod designed to remain rock-solid during exposure ensures crisp star points and sharp galaxy details, laying the groundwork for professional astrophotography.
Remote Shutters and Intervalometers: Minimizing Camera Shake
Pressing the camera shutter button manually can introduce subtle shakes, compromising Milky Way image quality. To eliminate this problem, use a remote shutter release or an intervalometer. These tools enable triggering the shutter without touching the camera body, drastically reducing vibration. Key benefits include:
- Vibration-Free Shots: Activate exposures remotely to prevent shake.
- Time-Lapse and Interval Shooting: Automate multiple exposures for stacking or night-lapse sequences.
- Bulb Mode Control: Maintain exposure times beyond the camera’s maximum preset with precise timing.
Wireless remotes or tethering your camera to a smartphone app can also improve convenience and flexibility, especially when shooting in difficult-to-reach locations.
Tracking Mounts: Following the Stars for Longer Exposures
While tripods keep your camera stable relative to the ground, the Earth’s rotation causes stars to shift position across the sky during longer exposures, resulting in unwanted star trails. To counteract this, consider using an equatorial tracking mount or star tracker. These devices slowly rotate your camera to follow the stars’ movement, enabling exposure times of several minutes without trailing. Advantages of tracking mounts include:
- Sharper Star Detail: Maintain pinpoint stars rather than arcs.
- Improved Signal-to-Noise Ratio: Longer exposures capture more light, revealing fainter galactic features.
- Flexibility in Composition: Combine tracking with wide-angle lenses or telephoto lenses for varied Milky Way perspectives.
Popular beginner-friendly star trackers like the Sky-Watcher Star Adventurer or the iOptron SkyTracker are highly portable and compatible with DSLR and mirrorless cameras. Pairing a tracking mount with your tripod and remote shutter transforms your Milky Way photography, pushing the boundaries of exposure time and image clarity.
By integrating these essential tools—tripod, remote shutter, and tracking mount—you establish a solid technical foundation to photograph the Milky Way with professional precision and creativity. This equipment synergy not only enhances image quality but also expands your astrophotography capabilities, allowing you to capture the galaxy’s breathtaking splendor in unprecedented detail.
Image courtesy of Thirdman
Planning Your Shoot: Location Scouting, Moon Phases, and Weather Considerations
Successful Milky Way photography begins long before you press the shutter button. Planning your shoot meticulously by scouting the right location, understanding moon phases, and monitoring weather conditions is critical to capturing crisp, vibrant images of our galaxy’s luminous band. Each factor dramatically impacts the visibility and clarity of the Milky Way, and integrating them into your workflow will maximize your chances of a stellar astrophotography session.
Location Scouting for Dark Skies and Composition
Finding an optimal shooting site is arguably the most important step in your planning process. Aim for areas with minimal light pollution, which drastically improves your ability to capture faint stars and the galactic core's subtle details. Use tools such as light pollution maps (e.g., Dark Sky Finder or Light Pollution Map) to identify dark sky reserves, remote parks, or rural locations far from city lights. Beyond darkness, consider:
- Natural Landmarks and Foreground Elements: Unique foregrounds like mountains, trees, or ancient ruins can anchor your Milky Way shots, adding depth and storytelling to your images.
- Accessibility and Safety: Ensure your location is reachable after dark and safe for nighttime stays.
- Horizon Visibility: Check for unobstructed views toward the galactic core’s rising and setting points.
Visiting your chosen site during daylight helps plan compositions and identify terrain challenges, ultimately saving valuable shooting time at night.
Moon Phases: Timing Your Shoot for Optimal Darkness
The moon’s brightness profoundly affects the visibility of the Milky Way. Even a half or gibbous moon can wash out stars and the galactic core with its reflected sunlight, reducing contrast and detail. To optimize your shoot:
- Schedule your session during the new moon phase, when the moon is absent from the night sky.
- Alternatively, shoot a few days before or after the new moon, when the moon’s illumination is minimal.
- Use moon phase calendars and astronomy apps (like Stellarium or Sky Guide) to plan night shoots around the moonrise and moonset times, ensuring the moon is below the horizon during your exposures.
By aligning your Milky Way photography with the darkest nights, you harness the best natural conditions to reveal the galaxy’s intricate structure.
Weather Considerations: Clear Skies and Atmospheric Stability
Clear, stable atmospheric conditions are essential for capturing sharp Milky Way images. Clouds, haze, humidity, and atmospheric turbulence scatter and absorb starlight, degrading image quality. Prioritize:
- Clear, cloudless nights: Even thin cirrus clouds can blur star details.
- Low humidity: Dry air enhances transparency and reduces optical distortion.
- Stable air conditions: Calm nights without strong winds or turbulence minimize star scintillation and camera shake.
Check reliable weather forecasts focused on astronomy-friendly parameters, such as the Clear Sky Chart or specialized apps providing cloud cover predictions, transparency, and seeing forecasts. Monitoring local microclimates is especially important in mountainous or coastal regions where weather changes rapidly.
Combining strategic location scouting, moon phase timing, and weather analysis forms the backbone of effective Milky Way shoot planning. This comprehensive approach ensures your astrophotography sessions capitalize on dark, clear skies with ideal galactic core visibility to produce stunning, high-contrast images of our cosmic neighborhood.

Image courtesy of Vikash Singh
Camera Settings Explained: ISO, Aperture, Shutter Speed, and Focus for Night Sky
Mastering your camera settings is fundamental to capturing the Milky Way galaxy in all its celestial glory. Because astrophotography involves shooting in extremely low-light conditions, understanding how ISO, aperture, shutter speed, and focus interplay will empower you to optimize exposure, maximize detail, and minimize noise—key challenges unique to night sky photography.
ISO: Balancing Light Sensitivity and Noise
The ISO setting controls your camera sensor’s sensitivity to light. For Milky Way photography, higher ISO values—typically between 1600 and 6400—are necessary to detect faint stars and galactic dust. However, increasing ISO also amplifies digital noise, which can obscure fine celestial details and degrade image quality. To achieve the best balance:
- Start with ISO 3200 as a baseline for full-frame cameras.
- Adjust upward if the image appears too dark, but beware of excessive grain, especially with smaller sensors.
- Use cameras renowned for excellent high-ISO performance to maintain star sharpness while reducing noise.
Aperture: Maximizing Light Through Your Lens
Your lens’ aperture—measured in f-stops—dictates how much light reaches the sensor. For astrophotography, select lenses with a wide maximum aperture of f/2.8 or faster to capture as much light as possible during short exposure windows. Using a large aperture reduces the need to lengthen exposure time excessively, which can introduce star trailing due to Earth’s rotation. Key tips:
- Shoot at the lens’s widest aperture setting to gather maximum photons.
- Be mindful of optical aberrations like coma, which may increase at the widest apertures; test your lens beforehand to find the sharpest aperture point.
Shutter Speed: Capturing Sharp Stars Without Trailing
Determining the correct shutter speed is crucial to prevent star trails caused by the Earth’s rotation. The general guideline is referred to as the “500 Rule” or more precise formulas based on sensor size:
[ \text{Maximum Shutter Speed (seconds)} = \frac{500}{\text{Focal Length (mm)} \times \text{Crop Factor}} ]
For example, with a 20mm lens on a full-frame camera (crop factor 1), your maximum shutter speed is about 25 seconds before star trailing becomes noticeable. Shorter exposures preserve pinpoint stars, but may require higher ISO or wider apertures to compensate for reduced light capture. When using a tracking mount, shutter speed can be extended significantly without trailing, enabling deeper images.
Focus: Achieving Pinpoint Sharpness in the Dark
Achieving accurate focus on stars at night is one of the trickiest aspects of Milky Way photography. Autofocus systems often fail under low light, so manual focus is preferred:
- Switch your lens to manual focus mode.
- Use your camera’s live view at maximum digital zoom on a bright star or distant light to fine-tune focus.
- Set focus at or near infinity, but confirm with live view for precise calibration since optical infinity may differ.
- Consider using focusing aids like a Bahtinov mask or focus peaking (if available) to enhance accuracy.
By meticulously adjusting ISO, aperture, shutter speed, and focus, astrophotographers unlock the technical potential of their gear to reveal the Milky Way’s intricate structure with both clarity and contrast. These foundational settings serve as your starting point to creating awe-inspiring images of our galaxy’s luminous heart in the vast night sky.
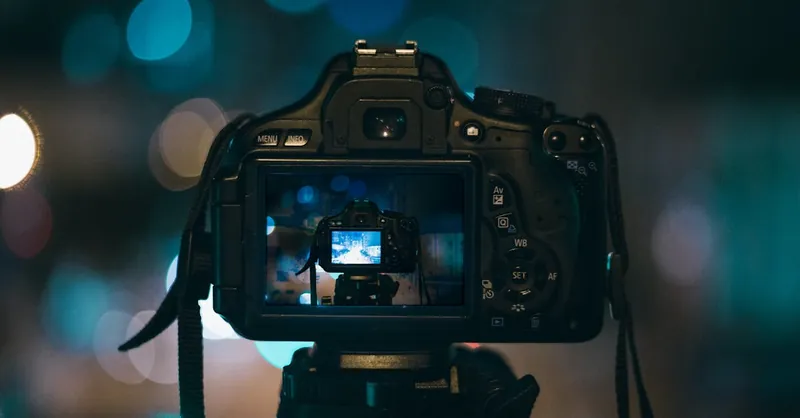
Image courtesy of Kaique Rocha
Techniques for Reducing Noise and Star Trails in Long Exposure Shots
Long exposure photography is essential to capture the faint light of the Milky Way, but it introduces two common challenges: image noise and star trails. Efficiently managing these issues is critical to produce crisp, high-quality Milky Way photos that showcase the galaxy’s intricate details without distracting artifacts.
Reducing Noise in Milky Way Astrophotography
Noise appears as random grain or color speckles caused by high ISO settings, long exposures, and sensor heat. To minimize noise while preserving faint celestial structures, apply these key techniques:
- Use the Lowest Acceptable ISO: Start with ISO settings between 1600 and 3200, increasing only if necessary. Cameras with larger full-frame sensors often maintain lower noise at higher ISOs.
- Optimize Exposure Time: Balance shutter speed and aperture to avoid excessively long exposures, which increase thermal noise.
- Enable Long Exposure Noise Reduction (LENR): Many cameras offer LENR, which takes a “dark frame” immediately after your exposure to subtract sensor noise. However, this doubles shot time, so use it based on your workflow.
- Stack Multiple Exposures: Capture several shorter exposures and combine them in post-processing using software like DeepSkyStacker or Sequator. Stacking averages out random noise and enhances signal-to-noise ratio, revealing more Milky Way detail.
- Shoot in RAW Format: RAW files retain maximum image data, allowing more effective noise reduction during post-processing without loss of detail.
- Keep Your Camera Cool: Sensor heat contributes to noise; avoid shooting after prolonged use and allow your camera to cool between sessions for cleaner captures.
Preventing Star Trails While Maximizing Exposure
Star trails occur when Earth’s rotation causes stars to move during an exposure, resulting in blurred or arced star images rather than sharp points. To prevent unwanted star trails:
- Follow the 500 Rule: Calculate the maximum exposure duration based on your lens focal length and crop factor to keep stars pinpoint sharp.
- Use a Star Tracker or Equatorial Mount: Tracking equipment compensates for Earth’s rotation by moving your camera synchronously, enabling much longer exposures without trailing.
- Choose Wide-Angle Fast Lenses: Fast lenses with apertures wider than f/2.8 allow shorter shutter speeds that capture enough light without trailing.
- Use High ISO Combined with Fast Aperture: This combination reduces the need for longer exposures, minimizing motion blur.
- Consider Pixel Peeping Post-Shoot: Zoom into your preview images on-camera to detect star elongation and adjust settings accordingly before extensive shooting.
By integrating noise reduction strategies and precise exposure management, astrophotographers ensure their Milky Way images boast sharp, clean stars and vivid galactic textures. Mastery over these techniques elevates your night sky photography, transforming raw captures into stunning cosmic portraits that vividly reveal our galaxy’s celestial splendor.
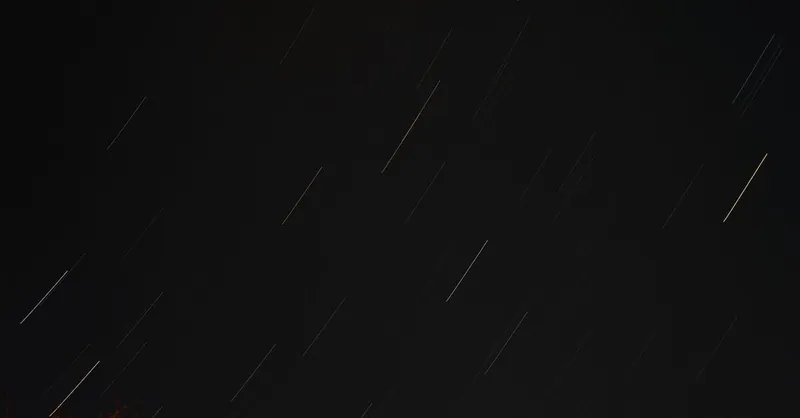
Image courtesy of Alican Helik
Composing Your Milky Way Shot: Foreground Elements and Framing Tips
Capturing the Milky Way galaxy is not just about focusing on the stars; integrating compelling foreground elements and mastering your framing techniques elevate your astrophotography from simple sky shots to mesmerizing cosmic landscapes. Thoughtful composition creates visual depth, narrative, and interest, guiding viewers’ eyes through the celestial display while grounding them in earthly context.
Selecting Meaningful Foreground Elements
Including natural or man-made foreground subjects provides scale and storytelling to your Milky Way images. Consider these tips for choosing effective foregrounds:
- Contrast and Shape: Look for silhouettes such as trees, mountains, rock formations, or historic structures that contrast sharply against the night sky, emphasizing the galaxy’s brightness.
- Balance and Symmetry: Position foreground elements to lead the viewer’s eye toward the galactic core or along the Milky Way’s arc, maintaining balance and harmonious visual flow.
- Texture and Detail: When possible, softly illuminate foreground features using low-level light painting or ambient moonlight to reveal texture without overpowering the stars.
- Avoid Clutter: Keep the scene simple to prevent distraction from the Milky Way, focusing on a single strong element or a minimal arrangement that complements the sky.
Framing Tips for Stunning Milky Way Photography
Excellent framing highlights the Milky Way’s grandeur and enhances its impact:
- Use the Rule of Thirds: Align the galactic core or horizon along the thirds to create dynamic, pleasing compositions.
- Incorporate Leading Lines: Natural lines like paths, fences, or rivers draw viewers’ attention into the scene and up toward the Milky Way.
- Explore Vertical and Panoramic Formats: Vertical framing can emphasize towering foreground objects beneath the Milky Way, while panoramic stitching captures expansive sky vistas.
- Account for Sky Rotation: Plan your composition based on the Milky Way’s orientation during your shoot, as it arcs across the sky differently through the night and seasons.
By thoughtfully combining captivating foreground elements with deliberate framing strategies, you ensure your Milky Way photographs are not only technically sound but also artistically compelling. This holistic approach enhances image storytelling, improves viewer engagement, and boosts your astrophotography portfolio’s visual impact—key factors that search engines favor for ranking high-quality Milky Way content.
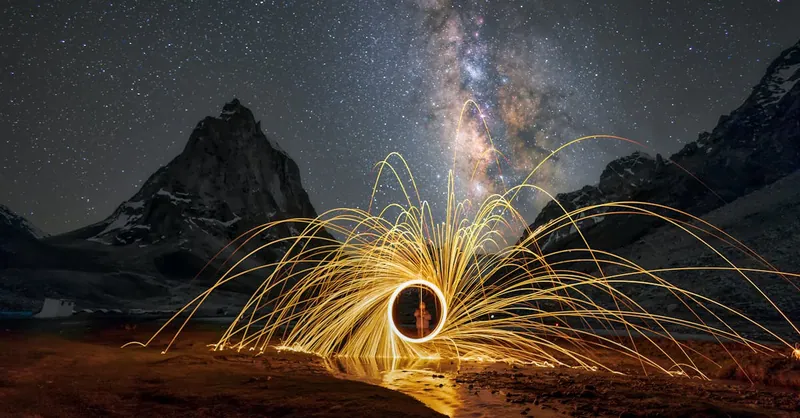
Image courtesy of Vikash Singh
Post-Processing Workflow: Image Stacking, Color Correction, and Enhancing Details
After capturing your raw Milky Way images, post-processing is where your astrophotography truly comes to life. The workflow typically involves image stacking, color correction, and detail enhancement to reduce noise, boost clarity, and reveal the subtle beauty of our galaxy that is often invisible to the naked eye or single exposures. Mastering these techniques not only improves the visual appeal of your photos but also maximizes the scientific and artistic value, key to high-ranking Milky Way astrophotography content.
Image Stacking: Amplifying Signal, Reducing Noise
Image stacking is a foundational technique in astrophotography that combines multiple exposures of the same scene to increase the signal-to-noise ratio. This process averages out random noise while reinforcing consistent features such as stars and galactic structures. To stack images effectively:
- Shoot a series of identical exposures using consistent settings.
- Use dedicated software like DeepSkyStacker, Sequator, or PixInsight to align and merge your images precisely.
- Stacking can improve faint star visibility and preserve color gradients in the Milky Way’s dust lanes.
- Incorporate dark frames, flat frames, and bias frames to calibrate sensor artifacts and vignetting during stacking.
This step is crucial for producing clean, vibrant Milky Way images free from the excessive noise that plagues single long exposures.
Color Correction: Restoring Natural Galactic Hues
Raw astrophotography images usually require color correction to reveal the Milky Way’s true palette, which includes warm yellow cores, bluish star fields, and reddish nebulae. Proper color balancing conveys realism and enhances viewer engagement:
- Adjust white balance during processing to mitigate unnatural color casts caused by ambient light pollution or sensor biases.
- Use selective color adjustments to emphasize distinct regions—warm tones for the galactic center and cooler tones for star clusters and dark dust.
- Apply subtle vibrance and saturation boosts carefully to highlight cosmic color without introducing oversaturation or banding.
Correct color rendering maintains both aesthetic appeal and scientific relevance, making your images stand out among astrophotography portfolios online.
Enhancing Details: Sharpening and Contrast Optimization
Bringing out intricate Milky Way features requires targeted detail enhancement and contrast control, highlighting the galaxy’s glowing core, dust lanes, and star clusters:
- Use noise reduction brushes or masks to smooth sky noise while preserving star sharpness.
- Apply local contrast enhancement or clarity adjustments to deepen the definition between bright stars and dark interstellar dust.
- Sharpen stars selectively, avoiding halo effects or unnatural artifacts.
- Employ curves or levels adjustments to enhance the dynamic range, bringing out faint structures without clipping bright areas.
This balanced approach to detail enhancement refines your image’s texture and depth, elevating it to professional standards prized by astrophotography communities and search engines alike.
By integrating these post-processing techniques—stacking for noise reduction, precise color correction, and meticulous detail enhancement—you transform initial captures into compelling Milky Way masterpieces. This optimized workflow not only enriches your astrophotography’s visual impact but also boosts the discoverability and authority of your content within the competitive space of astronomy-related online resources.

Image courtesy of Eclipse Chasers
Advanced Tips: Using Telescope Attachments and Filters for Enhanced Astrophotography
To take your Milky Way photography beyond wide-angle shots and reveal even finer cosmic details, integrating telescope attachments and specialized filters can dramatically amplify image quality and depth. These advanced tools help isolate celestial features, manage light pollution, and extend your focal length capabilities—key factors in producing richly detailed, high-contrast Milky Way images that stand out in both artistic and scientific contexts.
Telescope Attachments: Unlocking Greater Magnification and Detail
Attaching your camera to a refractor or reflector telescope transforms your setup for deep-sky astrophotography, allowing access to narrower fields and enhanced resolution of galactic structures, star clusters, and nebulae within the Milky Way. Key considerations for using telescope attachments include:
- T-ring and T-adapter: Essential for mounting DSLR or mirrorless cameras to telescopes, these adapters ensure secure, precise connection and sensor alignment.
- Prime Focus Photography: Eliminates the telescope eyepiece by using the telescope as a long focal length lens, capturing high-detail images of Milky Way features like nebulae embedded in the galactic plane.
- Field Flatteners: Attach these optical elements to correct curvature and aberrations inherent in fast focal ratio telescopes, delivering sharp stars across the entire frame.
- Focal Reducers: Decrease the effective focal length to widen the field of view, ideal for framing larger sections of the Milky Way while maintaining brightness and sharpness.
Using telescopes with appropriate attachments enables astrophotographers to explore detailed planetary nebulae, dark dust clouds, and star-forming regions within the Milky Way, complementing wide-field shots with spectacular close-ups.
Filters: Enhancing Contrast and Mitigating Light Pollution
Light pollution and atmospheric conditions often obscure the subtle hues and intricate structures of the Milky Way. Employing filters tailored for astrophotography boosts contrast, suppresses unwanted light, and reveals faint cosmic features with greater clarity:
- Light Pollution Filters: Designed to selectively block common urban light wavelengths (e.g., sodium and mercury vapor lamps), these filters improve signal-to-noise by darkening the sky background without muting star colors.
- Narrowband Filters: Target specific emission lines such as Hydrogen-alpha (Hα), Oxygen-III (OIII), or Sulfur-II (SII), isolating glowing nebulae within the Milky Way's star clouds for vivid, detailed imaging—especially effective when paired with monochrome cameras.
- UV/IR Cut Filters: Block out-of-band ultraviolet and infrared light that can cause image blur and chromatic aberrations in DSLR and mirrorless sensors, resulting in crisper star points.
- Polarizing Filters: Although less common, these can reduce atmospheric reflections or mild moonlight haze, subtly improving contrast in milky or hazy conditions.
Practical Tips for Using Attachments and Filters
- Always perform test shots to evaluate how filters affect exposure and color balance, adjusting your camera settings accordingly.
- Combine filters when appropriate—e.g., stacking a light pollution filter with a UV/IR cut filter—but be mindful of potential vignetting or reduced light transmission.
- Use guide scopes and autoguiders with telescopes for precise tracking during long exposures to maximize image sharpness.
- When using telescopes, consider collimation and focusing tools to maintain peak optical performance critical for capturing the fine Milky Way details.
By incorporating telescope attachments and specialized astrophotography filters into your Milky Way imaging setup, you unlock powerful new dimensions of depth, clarity, and contrast. These advanced techniques not only elevate the scientific value of your photographs but also deliver awe-inspiring images that highlight intricate structures hidden within our galaxy’s luminous heart, significantly enhancing your astrophotography portfolio’s impact and search engine relevance.
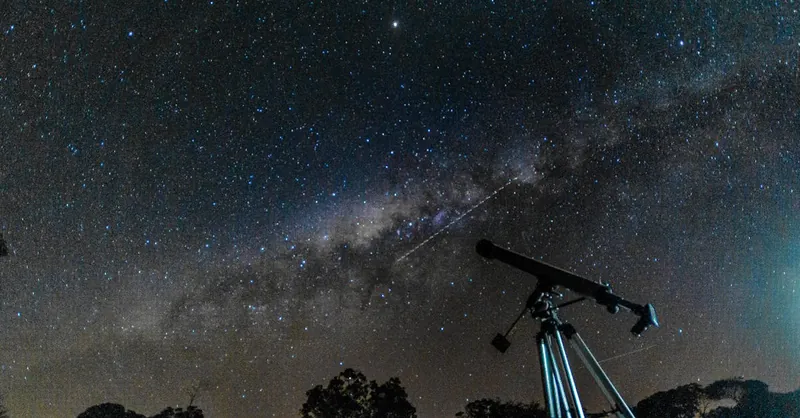
Image courtesy of Lucas Pezeta
Troubleshooting Common Challenges and Improving Your Milky Way Shots Over Time
Even with the best preparation and equipment, photographing the Milky Way presents unique challenges that can affect image quality and require ongoing troubleshooting. Addressing issues such as focus inaccuracies, excessive noise, star trailing, and composition difficulties is essential for consistently capturing breathtaking Milky Way photos. As you gain experience, refining your techniques through careful analysis and incremental improvements will significantly elevate your astrophotography results.
Common Challenges and How to Overcome Them
-
Out-of-Focus Stars: One of the most frequent problems for beginners is achieving accurate focus on distant stars. Use your camera’s live view with maximum zoom on bright stars during shooting to fine-tune manual focus. Investing in a Bahtinov mask can greatly simplify precise focusing, improving star sharpness dramatically.
-
Excessive Image Noise: Noise often results from pushing ISO too high or using overly long exposures without stacking. To combat this, shoot multiple shorter exposures and apply stacking software like DeepSkyStacker. Additionally, utilizing cameras with superior high-ISO performance and enabling in-camera noise reduction can minimize grain.
-
Star Trails When Not Intended: If stars appear as streaks instead of pinpoints, revisit your shutter speed calculations using the 500 Rule, incorporating sensor crop factors. For longer exposures, utilizing a star tracker is the most effective solution. Fine-tune polar alignment of your tracking mount to prevent elongation and maintain sharp stars.
-
Light Pollution and Haze: Unwanted artificial light and atmospheric conditions can wash out Milky Way details. Scout darker locations with minimal light pollution and use appropriate light pollution filters combined with post-processing masking techniques to restore contrast.
-
Poor Composition or Foreground Lighting: If foreground elements are underexposed or distract from the Milky Way, experiment with subtle light painting or use natural moonlight selectively. Plan your framing during daylight hours to align your scene with the galaxy’s position, ensuring balanced and compelling compositions.
Continuous Improvement Through Analysis and Adaptation
Improving Milky Way photography is an iterative process—each shoot provides valuable feedback. After your session:
- Review images critically on a large monitor, zooming in to evaluate star sharpness, noise levels, and foreground detail.
- Take detailed notes on camera settings, location conditions, and timing to identify what worked and what needs adjustment.
- Experiment with different ISO/aperture/shutter speed combinations and post-processing workflows to find the best balance for your gear and environment.
- Join astrophotography communities and forums for constructive critiques and tips from experienced photographers.
- Consider advanced tutorials and workshops focused on astrophotography techniques or telescope usage to deepen your knowledge.
By systematically troubleshooting issues and embracing a mindset of continuous learning, you will progressively refine your technical skills and artistic vision, transforming your Milky Way photographs into stunning, high-impact images that capture the galaxy’s sublime beauty with exceptional clarity and creativity. This dedication not only enhances your personal portfolio but also increases your content’s visibility and authority in search engines, establishing your site as a trusted resource for comprehensive Milky Way astrophotography guidance.

Image courtesy of Marek Piwnicki