Mastering Nebula Photography with Narrowband Filters
Category: Astrophotography
Unlock Stunning Nebula Images with Narrowband Filters
If you're an astronomy enthusiast or an aspiring astrophotographer eager to capture breathtaking images of nebulae, you've likely discovered the challenges posed by light pollution and atmospheric interference. Perhaps you've tried broadband imaging and felt frustrated by washed-out colors or the inability to capture fine nebula details. Nebula photography with narrowband filters offers a powerful solution by isolating specific emission lines, dramatically improving contrast and revealing unseen cosmic structures. This post is tailored specifically for amateurs and hobbyists who seek not only the theory but also actionable guidance to elevate their imaging results. We'll walk you through essential concepts, filter types, equipment integration, image acquisition strategies, and advanced processing techniques. Unlike generalized guides, this post delves deeply into practical advice shaped by analyzing top-ranking resources, providing a roadmap designed to shorten your learning curve and help you confidently produce stunning narrowband nebula images. No matter if you’re using a DSLR, dedicated astronomy camera, or building your own telescope setup, the insights shared here will enhance your nebula photography journey. Let’s explore the secrets behind narrowband filters and how they transform your astrophotography experience.
- Unlock Stunning Nebula Images with Narrowband Filters
- Understanding Narrowband Filters
- Types of Narrowband Filters
- Selecting the Right Equipment for Narrowband Nebula Imaging
- Setup and Calibration for Narrowband Nebula Imaging
- Acquisition Techniques for Nebula Imaging
- Image Processing Essentials: Workflow for Preprocessing, Noise Reduction, Channel Mapping, and Combining Narrowband Data
- Advanced Processing Tips: Unlocking Fine Nebula Details with Synthetic Color Mapping, Deconvolution, and Contrast Enhancement
- Troubleshooting Common Challenges in Narrowband Nebula Photography
- Integrating Narrowband with Broadband Data: How to Blend Narrowband Images with Broadband Captures
- Future Trends in Nebula Narrowband Imaging
Understanding Narrowband Filters
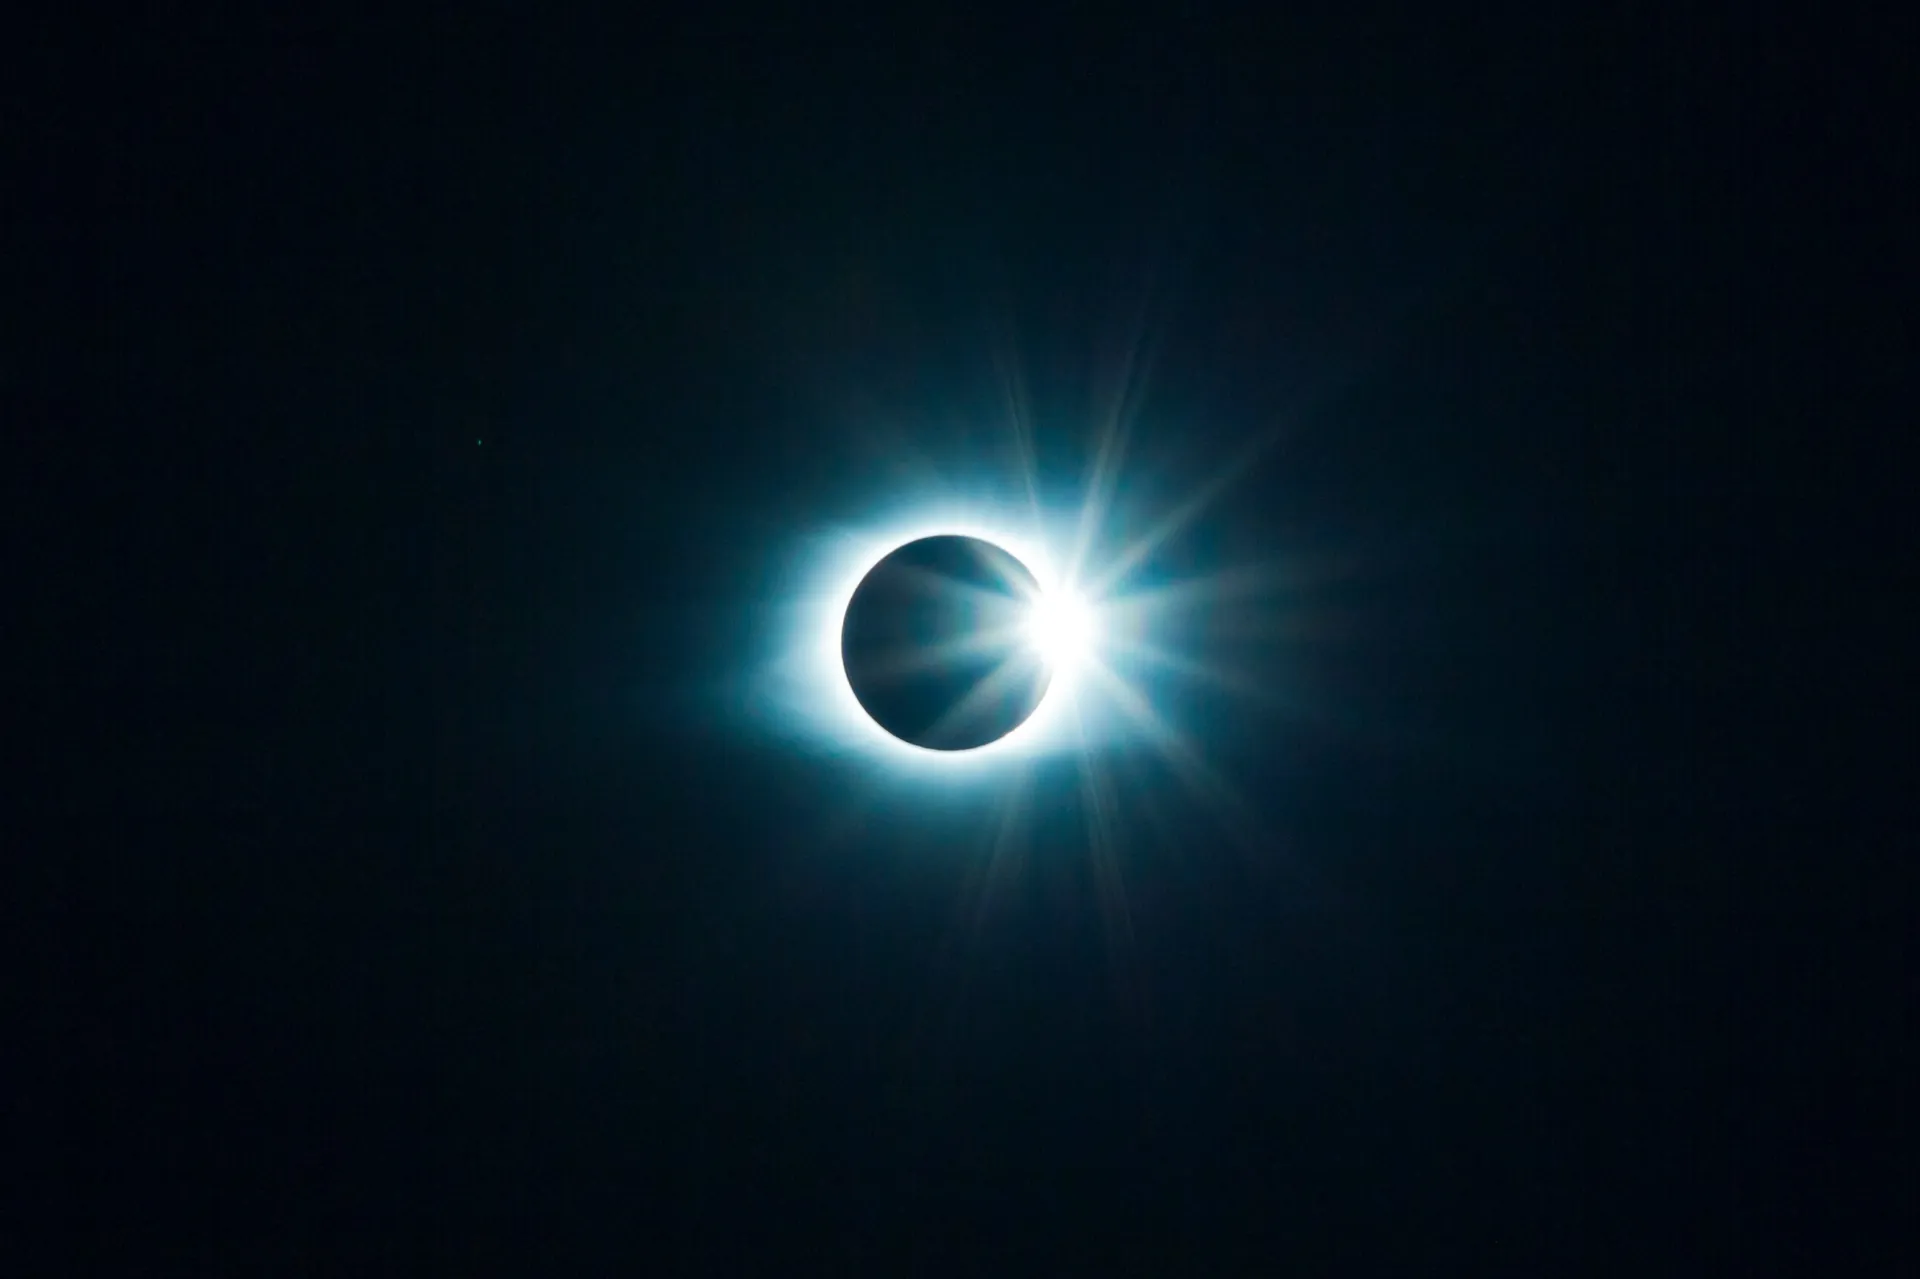
Narrowband filters are specialized optical filters designed to selectively transmit very narrow ranges of wavelengths of light, typically just a few nanometers wide, while blocking out nearly all other light. This precise wavelength isolation enables astrophotographers to capture the faint glow of specific emission lines emitted by ionized gases in nebulae, such as hydrogen-alpha (Hα), oxygen-III (OIII), and sulfur-II (SII). By isolating these emission lines, narrowband filters dramatically enhance the contrast between the nebula and the surrounding sky, even in areas affected by severe light pollution.
How Narrowband Filters Work
Narrowband filters work by allowing only photons within a narrow spectral band to reach the camera sensor, effectively cutting out unwanted light pollution, moonlight, and atmospheric haze. This selective transmission is crucial because nebulae often emit light at very specific wavelengths, notably:
- Hydrogen-alpha (Hα) at 656.3 nm – the dominant red emission from ionized hydrogen gas.
- Oxygen-III (OIII) at 500.7 nm – a bright greenish-blue emission from doubly ionized oxygen.
- Sulfur-II (SII) at 672.4 nm – a deep red emission similar to Hα but from ionized sulfur.
By focusing on these lines, narrowband filters suppress broadband and artificial light pollution sources, such as sodium and mercury vapor streetlights, which emit primarily at different wavelengths. This capability means you can shoot from urban or suburban locations while still producing stunning, high-contrast nebula images that would otherwise require dark sky sites to capture effectively.
Why Narrowband Filters Are Vital for Nebula Photography
- Enhanced Signal-to-Noise Ratio (SNR): By isolating emission lines, narrowband filters reduce background sky brightness, allowing longer exposures with better nebula detail and less noise.
- Light Pollution Rejection: These filters block much of the unwanted light pollution spectrum, making them indispensable in light-polluted areas.
- Improved Color and Detail: Narrowband imaging captures unique structural details and colors of nebulae that are often washed out in broadband images.
- Versatility: Narrowband filters enable imaging of nebulae throughout the lunar cycle because they reject moonlight, which can overwhelm broadband exposures.
For astrophotographers aiming to push the boundaries of nebula imaging, understanding and incorporating narrowband filters into your workflow is not just beneficial, it’s transformative. Whether you shoot with a monochrome CCD or a one-shot color camera, these filters provide the precision and clarity needed for truly spectacular and scientifically valuable nebula images.
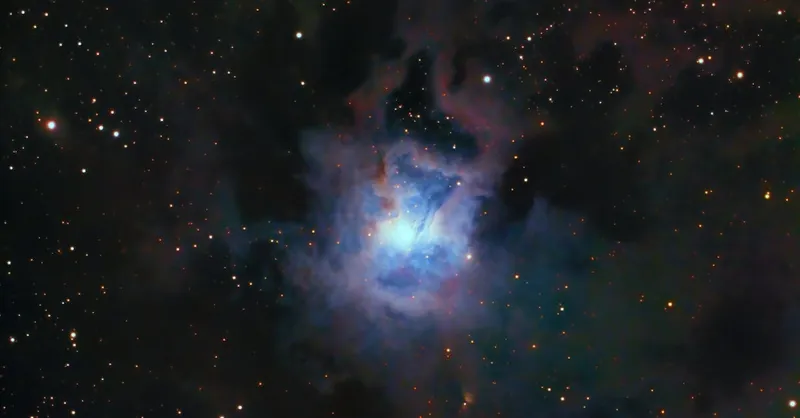
Image courtesy of Daniel Cid
Types of Narrowband Filters
Narrowband filters are primarily categorized based on the specific emission lines they target within nebulae, each revealing distinct cosmic elements and structures. The three most common and widely used narrowband filters are Hydrogen-alpha (Hα), Oxygen-III (OIII), and Sulfur-II (SII). Understanding their spectral targets and contributions to your images is fundamental to mastering nebula photography and achieving vivid, scientifically insightful results.
Hydrogen-alpha (Hα) Filter
- Wavelength Targeted: Approximately 656.3 nm (deep red)
- Emitted By: Ionized hydrogen gas, the most abundant element in nebulae
- Image Impact: Hα filters capture the dominant red glow in emission nebulae, highlighting regions where intense star formation ionizes surrounding hydrogen clouds. This filter reveals intricate details of gaseous filaments, shock fronts, and dense star-forming regions that often appear washed out in broadband images. Because hydrogen is the primary constituent of most nebulae, the Hα filter is often the backbone of narrowband imaging, providing high signal strength and robust contrast, especially effective even under moderate light pollution.
Oxygen-III (OIII) Filter
- Wavelength Targeted: Approximately 500.7 nm (greenish-blue)
- Emitted By: Doubly ionized oxygen atoms, often found in planetary nebulae and supernova remnants
- Image Impact: The OIII filter isolates sharp, vibrant green-blue light emitted by oxygen-rich regions, adding complementary detail and contrast to nebula images. This filter is instrumental in revealing structures like bubble-shaped shells, high-energy ionization fronts, and complex filamentary patterns that Hα alone may not display. OIII generally produces a cooler color channel in narrowband compositions and helps balance the red dominance of Hα, resulting in more dynamic, true-to-life color renditions.
Sulfur-II (SII) Filter
- Wavelength Targeted: Approximately 672.4 nm (deep red, slightly offset from Hα)
- Emitted By: Ionized sulfur atoms present in star-forming regions and nebula outskirts
- Image Impact: The SII filter isolates the deeper red wavelengths emitted by ionized sulfur, which often traces different physical processes compared to hydrogen emissions. It brings out faint outer shells, shockwaves, and extended nebulosity that can be subtle or invisible with Hα and OIII filters. In traditional Hubble palette imaging, SII data is mapped to the red channel, contributing a more detailed and scientifically rich perspective on the nebula’s chemical composition and energy dynamics.
Combining Narrowband Filters for Enhanced Nebula Imaging
Using these filters in combination—either individually for monochrome cameras or through sequential exposures with filter wheels—enables astrophotographers to build multi-channel narrowband images. This approach not only maximizes the detection of faint nebular structures but also allows for creative color mapping techniques such as the popular Hubble Palette (SII = Red, Hα = Green, OIII = Blue). The synergistic effect of these filters enhances image contrast, reveals diverse ionization zones, and empowers you to produce breathtaking, scientifically relevant astrophotographs from even light-polluted backyards.
Harnessing the unique spectral signatures isolated by Hα, OIII, and SII filters is the key to unlocking the full visual and scientific potential of nebula photography. Choosing the right combination tailored to your target nebula and camera system is your next step toward spectacular deep-sky imaging success.
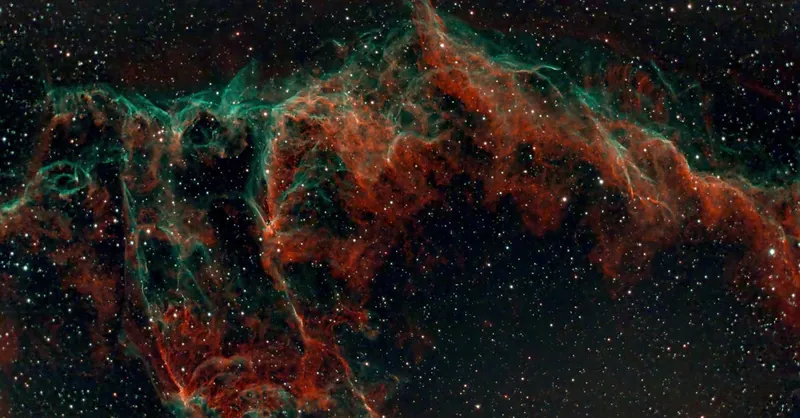
Image courtesy of Daniel Cid
Selecting the Right Equipment for Narrowband Nebula Imaging
Choosing the appropriate camera, telescope, and mounting system is critical to harnessing the full potential of narrowband filters in nebula photography. Because narrowband imaging demands capturing faint emission lines with high precision and often requires long exposure times, the compatibility and optimization of your gear significantly impact image quality and ease of workflow.
Cameras Optimized for Narrowband Imaging
For narrowband astrophotography, monochrome cameras are widely preferred due to their superior sensitivity and flexibility. Monochrome CCD or CMOS cameras paired with narrowband filters collect more signal since every pixel is dedicated to a single wavelength range, unlike color (one-shot) cameras that use Bayer filters which reduce throughput.
Key camera considerations include:
- Monochrome vs. Color: Monochrome cameras combined with filter wheels deliver higher signal-to-noise ratio (SNR) and exceptional detail in narrowband channels. However, modern one-shot color cameras with narrowband filters can still perform well for beginners or casual imagers.
- Sensor Size and Resolution: Larger sensors capture more of the nebula's field but require larger, more advanced telescopes and mounts. High-resolution sensors offer fine detail but increase data size and tracking demands.
- Cooling: Cameras with active cooling reduce thermal noise during long exposures, which is critical for capturing faint narrowband emissions.
Telescopes Tailored for Narrowband Imaging
The telescope must provide sharp optics, a flat field, and appropriate focal length to resolve detailed nebular structures without excessive exposure times. Narrowband filters work best with telescopes optimized for deep-sky imaging, such as:
- Apochromatic Refractors: These offer excellent color correction, low distortion, and sharp stars across the field, ideal for capturing crisp nebula details.
- Reflectors (e.g., Newtonians or Ritchey-Chrétien): Provide larger apertures at a lower cost, enabling shorter exposure times but may require additional field-flattening accessories.
- Focal Ratio: A focal ratio between f/4 and f/7 is generally optimal. Faster scopes (f/4–f/5) deliver shorter exposures but may introduce some field curvature that can be mitigated with flatteners.
Mountings for Precision Tracking
Accurate tracking is essential when exposing for extended periods required in narrowband imaging. Even slight tracking errors can blur delicate nebular features and degrade the fine contrast enhanced by narrowband filters.
To ensure stable, precise imaging:
- Use a high-quality equatorial mount with robust periodic error correction and good payload capacity relative to your setup.
- Implement autoguiding systems to correct small tracking deviations during exposures, enabling longer integration times.
- Opt for mounts with software integration that supports advanced pointing models and alignment routines, smooth guiding, and remote operation.
Additional Considerations
- Filter Wheels: Automated filter wheels compatible with your camera simplify switching between Hα, OIII, and SII filters during a session, increasing efficiency.
- Focusers: Motorized focusers improve precision and prevent shifting focus when changing filters or temperature fluctuations.
- Connectivity and Software: Ensure your equipment supports the astrophotography software tools required for capturing integrated narrowband datasets.
By carefully selecting cameras with high sensitivity and cooling, telescopes delivering sharp optics and appropriate focal length, and stable mounts with advanced tracking capabilities, you create a synergy that maximizes the narrowband filter advantages. This alignment reduces common issues like star trailing, low contrast, and noise, helping you capture breathtaking nebula images packed with detail and clarity—even from light-polluted locations.
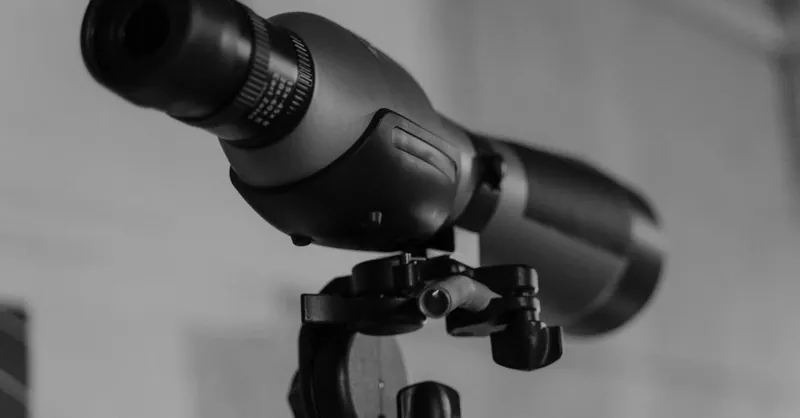
Image courtesy of Tima Miroshnichenko
Setup and Calibration for Narrowband Nebula Imaging
Achieving spectacular narrowband nebula images hinges not only on choosing the right equipment but also on precise setup and meticulous calibration of your imaging system. Proper installation of narrowband filters, accurate focusing, and careful calibration are crucial steps to maximize throughput, optimize image sharpness, and ensure clean data acquisition free from optical artifacts.
Installing Narrowband Filters
- Mount Filters Securely: Whether using a single narrowband filter or a full set in a motorized filter wheel, ensure the filters are tightly and correctly seated to avoid light leaks or tilted positioning that can degrade image quality.
- Match Filter Size to Optical Train: Use filters that fit properly within your camera's optical path—common options include 1.25” or 2” threaded filters or square filters for filter wheels. Compatibility with your telescope’s backfocus and optical configuration is vital to avoid vignetting or image distortion.
- Consider Filter Stack-Up: Narrowband filters have precise bandpasses, so avoid stacking additional filters unless necessary, as this can reduce light transmission and affect wavelength purity.
Achieving Precise Focus with Narrowband Filters
Narrowband filters can slightly shift the focal plane compared to broadband setups due to their unique optical coatings and thickness. To optimize focus:
- Use a Motorized or Fine-Adjustment Focuser: Implement focusers that allow sub-micron precision, enabling adjustments when switching filters or as temperature changes affect the optics.
- Focus on Bright Stars Using Focus Assist Tools: Utilize autofocus or focus-peaking software designed for astrophotography to lock in the sharpest star images in narrowband wavelengths. Since these filters let through limited light, increasing exposure or gain during focusing helps achieve accurate results.
- Refocus When Changing Filters: Because Hα, OIII, and SII filters have different optical thicknesses, refocusing after every filter switch with your filter wheel is essential.
Calibration Frames for Clean Narrowband Data Acquisition
Systematic calibration eliminates sensor artifacts and enhances the signal-to-noise ratio, making your narrowband images cleaner and more scientifically useful. Key calibration frames include:
- Dark Frames: Capture darks at the same exposure time and temperature as your light frames to remove sensor thermal noise.
- Flat Frames: Use sky flats or panel flats through each narrowband filter to correct for vignetting, dust, and pixel sensitivity variations unique to each filter's optical characteristics.
- Bias Frames: Record bias frames to remove the readout noise inherent in your camera sensor.
Additional Calibration Tips
- Filter Wheel Synchronization: Ensure your imaging software properly recognizes filter wheel positions and triggers refocusing or calibration on filter changes.
- Temperature Stability: Narrowband filters can exhibit slight shifts in transmission characteristics with temperature; operating your system in a stable thermal environment improves reproducibility.
A well-calibrated and precisely focused narrowband setup forms the foundation for successful nebula imaging, directly impacting image clarity, contrast, and detail. Following these step-by-step installation and calibration guidelines allows you to fully harness the power of narrowband filters and capture stunning, high-fidelity nebula images that stand out even under challenging sky conditions.
Image courtesy of lil artsy
Acquisition Techniques for Nebula Imaging
Capturing stunning nebula images with narrowband filters goes beyond equipment choice—it requires precise imaging acquisition strategies tailored to the unique demands of faint emission line photography. Optimizing exposure settings, guiding accuracy, stacking protocols, and addressing ambient light contamination are key to maximizing image quality, contrast, and scientific detail in your final results.
Best Practices for Exposure Settings
Narrowband imaging typically demands longer total integration times due to the narrow spectral bandwidth and relatively faint emission signals. However, balancing individual exposure length with noise reduction is critical:
- Set Exposure Lengths Between 5 to 20 Minutes: Longer sub-exposures improve signal-to-noise ratio (SNR) by collecting more photons but increase the risk of tracking errors or saturation of bright stars. For most amateur setups, 600–900 seconds is a good starting point for Hα, while OIII and SII may require similar or slightly longer exposures depending on target brightness and filter throughput.
- Avoid Excessive Sub-Exposure Times: Overly long exposures risk increased sky background noise from ambient light changes or thermal sensor noise, especially in light-polluted environments.
- Adjust ISO or Gain Strategically: For DSLR or CMOS cameras, use moderate to high ISO/gain settings that optimize dynamic range without introducing excessive read noise. Test your camera's linear response range under narrowband conditions.
- Record Multiple Sub-Exposures: Accumulating dozens or even hundreds of shorter exposures optimizes the total signal while minimizing the impact of individual frames affected by tracking errors or atmospheric variability.
Guiding for Pinpoint Tracking
Precise autoguiding is indispensable when capturing the long exposures needed for narrowband nebula imaging:
- Use a separate guide scope with a sensitive guide camera or an off-axis guider to continuously monitor and correct minute tracking deviations.
- Employ software capable of real-time corrections with minimal backlash or oscillation to prevent trailing of faint nebular structures.
- Conduct thorough polar alignment and periodic error correction (PEC) training on your mount before imaging sessions to reduce cumulative drift.
A well-tuned guiding setup ensures sharp, round stars and crisp nebula detail, significantly enhancing the effectiveness of narrowband filters in separating nebular emissions from sky background.
Effective Stacking Strategies
Stacking is the cornerstone of increasing SNR and revealing faint nebula details in narrowband imaging:
- Use High-Quality Image Calibration: Integrate darks, flats, and bias frames specific to each filter and exposure length before stacking to remove noise and optical artifacts.
- Stack Each Filter Separately: Combine sub-exposures taken with Hα, OIII, and SII independently to maximize SNR within each spectral channel.
- Employ Median or Sigma-Clip Algorithms: These stacking methods effectively reject cosmic rays, satellite trails, and transient noise, improving overall image fidelity.
- Align and Crop Consistently: Ensure precise star alignment across frames and crop edges uniformly to avoid mismatched or vignetted areas in the final stacks.
Stacking hundreds of narrowband sub-exposures results in deep, high-contrast nebulosity that highlights fine emission structures often invisible in single exposures.
Overcoming Ambient Light Challenges
Even with narrowband filters, ambient light pollution and atmospheric conditions can impact image quality if not properly managed:
- Time Your Sessions: Aim for imaging during astronomical night with the moon below the horizon or at minimal phases to reduce scattered light.
- Use Light Pollution Suppression Techniques: Combine narrowband filters with additional broadband light pollution filters when necessary, or schedule imaging when local lights are at their lowest.
- Shield Your Equipment: Employ light baffles, dew shields, and stray light blockers on your telescope and camera to minimize off-axis light contamination.
- Monitor Weather and Seeing Conditions: Avoid imaging during high humidity, haze, or turbulent skies, which scatter scattered light and decrease contrast.
By applying these best practices in acquisition, you ensure that your narrowband nebula images reach their full potential, showcasing vivid colors, intricate details, and scientific value despite the challenges posed by urban environments and faint cosmic sources.
Image courtesy of Alexandre P. Junior
Image Processing Essentials: Workflow for Preprocessing, Noise Reduction, Channel Mapping, and Combining Narrowband Data
Once you have captured high-quality narrowband data, image processing becomes the critical bridge between raw exposures and stunning, vibrant nebula images. Narrowband imaging workflow involves carefully preprocessing your frames, reducing noise, accurately mapping individual narrowband channels, and skillfully combining them to reveal the rich spectral information hidden in your data. Mastering this process not only brings out faint nebular structures but also enhances color balance and contrast, producing scientifically meaningful as well as visually captivating results.
Preprocessing Workflow: Calibration and Integration
The first stage in narrowband image processing is preprocessing, which ensures your images are clean and free of sensor and optical artifacts. This involves:
- Calibration with Dark, Flat, and Bias Frames: Apply dark frames to remove thermal noise, bias frames to correct electronic readout noise, and flat frames for vignetting and dust motes specific to each narrowband filter. Calibration consistency is crucial since each filter channel can have unique optical characteristics affecting noise and brightness.
- Cosmetic Correction: Use software tools to remove hot pixels and interpolate occasional defects, improving the initial quality before stacking.
- Registration/Alignment: Precisely align sub-exposures within each filter set to ensure stars and nebula features overlap perfectly, accounting for slight field rotation or guiding errors.
- Stacking: Combine your calibrated, aligned frames using algorithms like median, average with sigma clipping, or Winsorized sigma to boost signal-to-noise ratio while rejecting cosmic rays and transient artifacts.
Noise Reduction Strategies for Narrowband Data
Despite the natural noise-reducing properties of narrowband filtering, faint nebular emissions often require additional noise reduction in post-processing to reveal subtle details:
- Multiscale Linear Transforms and Wavelet Denoising: Apply advanced noise reduction techniques that discriminate between fine nebula structures and random noise by working at multiple spatial scales.
- Avoid Aggressive Smoothing: Excessive noise reduction can blur delicate filaments and edges; use conservative settings and prioritize selective noise reduction on background areas rather than nebula features.
- Dark Frame Optimization: Ensure your dark frames match temperature and exposure length precisely to prevent introducing noise artifacts during calibration.
Channel Mapping and Color Compositing
Narrowband datasets usually include at least three channels—Hα, OIII, and SII—that must be combined with thoughtful color mapping:
- Assign Filters to Color Channels: Common practice is the Hubble Palette method, where SII is mapped to red, Hα to green, and OIII to blue, producing visually striking false-color images that also reflect the nebula’s chemical composition. Alternatively, natural RGB-like mapping (Hα = red, OIII = green and blue combined) can yield more familiar colors but may sacrifice some scientific contrast.
- Intensity Scaling and Normalization: Normalize each channel’s intensity curves to balance brightness and contrast. Since emission strengths vary between filters, stretching histograms separately helps bring out faint features without overexposing dominant channels.
- Color Saturation and Balance: Adjust saturation carefully to enhance vibrancy while maintaining a natural look. Subtle desaturation can improve realism, while more saturated palettes emphasize structures for artistic effect.
Combining and Enhancing the Final Narrowband Image
After channel mapping, blending the channels into a cohesive image requires finesse:
- Use Layer Masks and Selective Blending: Apply masks to protect delicate nebular edges and minimize background light pollution residuals while enhancing core structures.
- Sharpening and Contrast Enhancement: Apply targeted sharpening to fine filaments and adjust curves or levels to amplify contrast between nebula and sky background.
- Star Size and Color Correction: Reduce star sizes or desaturate stars to keep focus on nebular details and prevent stars from overwhelming the image.
- Background Neutralization: Remove residual gradients or color casts caused by atmospheric effects or light pollution, ensuring a clean, uniform background.
By following this structured image processing workflow—starting with meticulous calibration, gentle yet effective noise reduction, precise channel mapping, and thoughtful combination—you can unlock the full potential of your narrowband nebula data. This careful approach results in vibrant, high-contrast nebula images that reveal awe-inspiring cosmic structures hidden to broadband photography and urban skies alike.
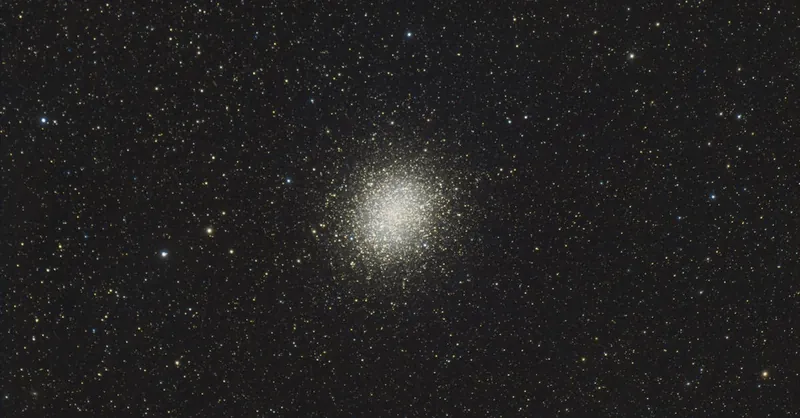
Image courtesy of Adam Krypel
Advanced Processing Tips: Unlocking Fine Nebula Details with Synthetic Color Mapping, Deconvolution, and Contrast Enhancement
Once your narrowband images are calibrated, stacked, and combined, the final frontier to achieving spectacular nebula photos lies in advanced image processing techniques. These methods refine the subtle structures and spectral nuances that initially remain hidden, elevating your astrophotography to professional-quality visualizations cherished both for their beauty and scientific value.
Synthetic Color Mapping with the Hubble Palette
One of the most powerful methods to enhance nebula imagery is synthetic color mapping, particularly the iconic Hubble Palette (SHO mapping). This technique assigns narrowband filter data to non-traditional color channels:
- Sulfur-II (SII) → Red Channel
- Hydrogen-alpha (Hα) → Green Channel
- Oxygen-III (OIII) → Blue Channel
This false-color mapping not only produces striking, vivid imagery but also conveys meaningful astrophysical information about ionization zones and elemental distributions within the nebula. Applying the Hubble Palette enhances contrast between different gas regions, revealing intricate filaments, shock fronts, and bubbles otherwise invisible or muted in standard RGB composites. Experimenting with intensity scaling and blending modes in each channel further refines the balance between scientific accuracy and aesthetic appeal.
Deconvolution: Sharpening Fine Nebula Structures
Deconvolution algorithms are essential for revealing hidden detail blurred by atmospheric turbulence, tracking imperfections, and sensor limitations. By mathematically reversing the effects of the point spread function (PSF) associated with your optical system and imaging conditions, deconvolution:
- Restores sharpness to faint filaments and edges without introducing artificial artifacts.
- Enhances contrast at nebula boundaries and within complex ionization fronts.
- Helps separate overlapping emission regions for cleaner definition.
Professional astrophotography software suites offer various deconvolution tools, such as Richardson-Lucy or Wiener filters. When applied judiciously—typically after noise reduction but before final contrast adjustments—deconvolution dramatically improves the perceived resolution and spatial detail of narrowband images.
Contrast Enhancement: Emphasizing Nebula Depth and Texture
To fully realize the subtle, three-dimensional structures of nebulae, contrast enhancement techniques are indispensable. Effective methods include:
- Curves and Levels Adjustments: Precisely tune midtones and shadows to strengthen faint nebular features while preserving highlight detail.
- Local Contrast Enhancement: Use tools like Local Histogram Equalization or midtone sharpening filters to boost small-scale texture and filamentary structures.
- Masks and Layered Adjustments: Apply selective contrast boosts to specific nebula regions without affecting the background or bright stars, maintaining a natural aesthetic and avoiding posterization.
When paired with noise-reduced and deconvolved data, these contrast adjustments bring out the depth, complexity, and delicate wisps characteristic of emission nebulae, creating images that captivate both casual viewers and expert astronomers alike.
By mastering synthetic color mapping, deconvolution, and sophisticated contrast enhancement, astrophotographers unlock the full potential of their narrowband nebula data. These advanced processing techniques reveal faint, fine details, produce scientifically insightful and visually stunning representations, and firmly establish your images among the best in the world of deep-sky astrophotography.
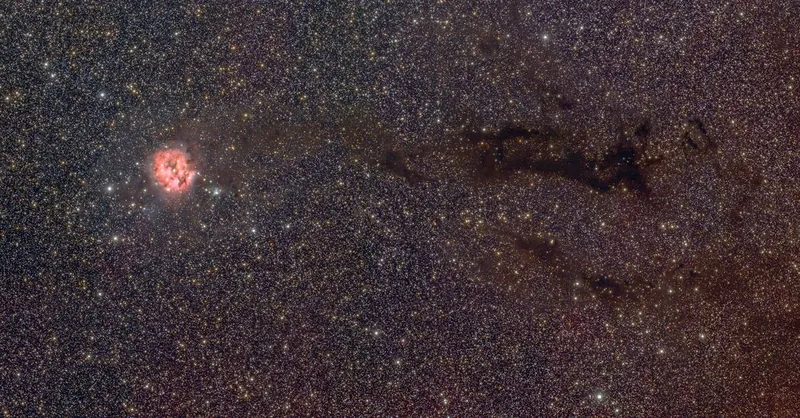
Image courtesy of Scott Lord
Troubleshooting Common Challenges in Narrowband Nebula Photography
Narrowband nebula photography, while powerful, comes with its own set of challenges that can hinder image quality if not properly addressed. Understanding and proactively solving issues such as filter bandpass mismatch, star bloating, vignetting, and difficulties in capturing faint emissions is crucial to producing consistently stunning and scientifically valuable nebula images.
Filter Bandpass Mismatch: Ensuring Spectral Compatibility
One common challenge is the bandpass mismatch between your filters and your camera sensor’s spectral response. Narrowband filters are designed to transmit very specific wavelengths, but factors like filter aging, temperature shifts, or incompatibility with sensor sensitivity can cause reduced transmission or shifted peaks. This results in weaker signal capture and skewed color balance.
Solutions include:
- Research filter specifications: Choose filters whose peak transmission precisely matches the nebula emission lines and your sensor type (monochrome vs. color CMOS/CCD).
- Maintain stable operating temperature: Avoid large temperature swings during imaging sessions to minimize bandpass shifts.
- Match filters from the same manufacturer: To ensure consistent bandpasses across Hα, OIII, and SII filters for balanced narrowband data.
Star Bloating and Halos: Minimizing Artifacts Around Bright Stars
Star bloating—where stars appear larger or surrounded by halos—is a frequent issue caused by filter quality, optical misalignment, or internal reflections. These artifacts detract from nebular detail and color fidelity.
Address star bloating by:
- Using high-quality, multi-coated narrowband filters that minimize reflections and ghosting.
- Checking optical train alignment and collimation to prevent aberrations that enlarge star images.
- Adjusting exposure times to avoid stellar saturation common with bright stars in narrowband channels.
- Applying star reduction techniques during post-processing, such as star shrinking or using masks to selectively desaturate bloated stars.
Vignetting: Correcting Uneven Illumination Across the Field
Vignetting causes the image corners to appear darker than the center, which can be especially pronounced when using narrowband filters combined with certain telescopes or filter wheels. This uneven illumination complicates data calibration and reduces SNR in the edges of your nebula images.
To prevent or correct vignetting:
- Use flat frames captured through each narrowband filter under identical optical conditions to accurately calibrate out illumination falloff.
- Select filters and imaging components with compatible sizes and thicknesses to reduce the risk of mechanical vignetting.
- Optimize backfocus and avoid over-tightening filter wheels or adapters that cause tilt or light path obstruction.
- Consider field flatteners or focal reducers if your telescope design produces natural field curvature contributing to vignetting.
Capturing Faint Emissions: Techniques to Boost Signal
Faint nebular emissions present another challenge due to their low photon flux, often demanding long total integration times and precise system calibration to reveal subtle structures.
Improve your ability to capture faint emissions by:
- Maximizing total exposure time across multiple sub-exposures while ensuring accurate guiding and stable tracking.
- Employing cameras with high quantum efficiency and active cooling to reduce thermal noise and enhance sensitivity.
- Utilizing proper calibration frames (dark, flat, bias) specific to each filter to cleanly remove noise and pixel artifacts.
- Stacking frames with advanced algorithms like sigma clipping to boost faint signals without amplifying noise.
- Choosing targets wisely based on filter response and sky conditions, prioritizing nebulae known for strong emission in your narrowband filters.
By meticulously addressing these common issues through optimized equipment choices, careful setup, and tailored imaging practices, you can significantly improve the quality and consistency of your narrowband nebula images. This proactive troubleshooting approach ensures your astrophotography workflow remains efficient and your images reach their fullest potential, even under challenging urban skies or with modest gear.
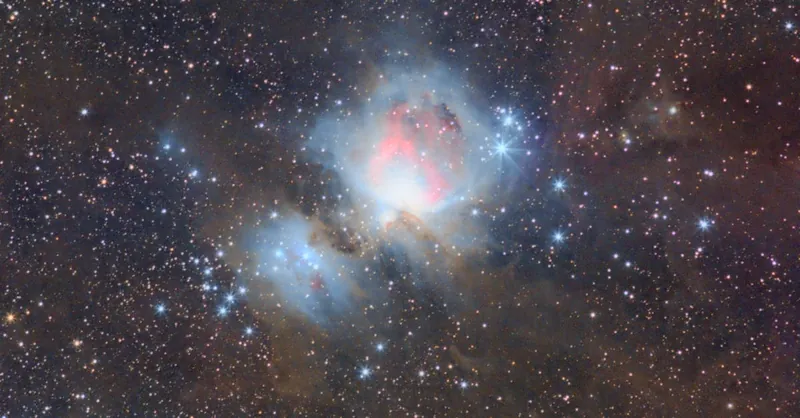
Image courtesy of Daniel Schek
Integrating Narrowband with Broadband Data: How to Blend Narrowband Images with Broadband Captures
For astrophotographers seeking rich, colorful, and balanced nebula renderings, combining narrowband and broadband data unlocks a powerful synergy. While narrowband filters excel at isolating specific ionized gas emissions and enhancing contrast under light-polluted skies, broadband images capture the natural continuum and star colors that narrowband alone sometimes lack. Integrating these datasets allows you to leverage the strengths of both methods—preserving vivid nebula details from narrowband exposures while restoring natural star colors and broader spectral context from broadband captures.
Benefits of Combining Narrowband and Broadband Imaging
- Enhanced Color Fidelity: Broadband RGB channels introduce authentic star colors and subtle nebular hues, complementing the false-color palette often used in narrowband processing.
- Greater Dynamic Range: Broadband images capture a wide range of brightness levels, helping to fill in parts of the nebula emission or background sky that may be clipped or noise-dominated in narrowband data.
- Improved Depth and Realism: The combination adds dimensionality and richness, creating more immersive and visually striking astrophotos that appeal to diverse audiences.
Strategies for Effective Narrowband and Broadband Blending
- Separate Preprocessing and Calibration: Process broadband and narrowband image sets independently using appropriate calibration frames, stacking, and noise reduction tailored to each data type.
- Align Images Precisely: Use accurate star alignment and registration techniques to overlay broadband and narrowband frames, ensuring pixel-perfect matches for smooth channel blending.
- Use Layer Masks and Blend Modes: In image processing software, apply masks to isolate nebula regions where narrowband data excels, blending them with broadband star fields and backgrounds to maintain star colors without overpowering nebular contrast.
- Adjust Color Management: Balance the color saturation and intensity of narrowband signals relative to the broadband data to avoid unnatural hues or overly aggressive false-color dominance.
- Selective Star Enhancement: Reduce star sizes or slightly desaturate stars in narrowband layers to prevent color clashes and star bloating while preserving their natural appearance from the broadband RGB data.
Recommended Software Tools for Integration
- PixInsight: Offers sophisticated blending tools like PixelMath and masks for merging narrowband and broadband data seamlessly.
- Adobe Photoshop: Layer-based editing with blend modes, masks, and adjustment layers enables fine control over color and luminance integration.
- DeepSkyStacker & AstroPixelProcessor: Useful for initial calibration and stacking before blending images in advanced editors.
By thoughtfully integrating narrowband captures with broadband images, you achieve balanced, vibrant, and scientifically rich nebula photographs that combine the best of both worlds—showcasing both dazzling star fields and intricately detailed ionized gas structures. This fusion approach elevates your astrophotography portfolio and maximizes the visual impact of your deep-sky imaging sessions.

Image courtesy of Alex Andrews
Future Trends in Nebula Narrowband Imaging
The field of nebula narrowband astrophotography is rapidly evolving, driven by continuous innovations in filter technology, sensor design, and processing software. These advancements are set to revolutionize how amateur and professional astronomers capture and analyze the intricate details of emission nebulae, delivering unprecedented image quality even under challenging observing conditions.
Emerging Filter Technologies
New developments in narrowband filter materials and manufacturing are producing filters with narrower bandpasses and higher peak transmission rates. Such improvements increase the signal-to-noise ratio (SNR) by allowing a greater proportion of the target emission line light to reach the sensor while further suppressing unwanted wavelengths, including artificial light pollution. Future filters also incorporate adaptive coatings resistant to temperature-induced bandpass shifts, offering consistent spectral performance throughout varying outdoor conditions. Additionally, advances in multi-narrowband filter stacks allow simultaneous acquisition of multiple emission lines without sacrificing throughput, streamlining the imaging workflow and reducing total exposure times.
Advanced Sensor Innovations
The latest generation of scientific CMOS (sCMOS) and back-illuminated CCD sensors feature significantly enhanced quantum efficiency specifically designed for narrowband imaging. These sensors are capable of capturing fainter nebular details with lower read noise and improved dynamic range, enabling astrophotographers to extend their reach to dimmer, more elusive nebulae. Furthermore, innovations like on-chip filter integration and multi-spectral imaging sensors promise to simplify narrowband imaging by bypassing the need for external filters and filter wheels, potentially allowing simultaneous capture of Hα, OIII, and SII channels.
Software and Processing Enhancements
Cutting-edge software tools optimized for narrowband data are transforming astrophotography post-processing. Artificial intelligence (AI) and machine learning algorithms are increasingly being applied for:
- Automated noise reduction that differentiates between nebular structures and background noise with high precision.
- Dynamic calibration adjustment that compensates for environmental variations such as temperature changes affecting filter bandpasses.
- Real-time guiding and focusing improvements during image acquisition, enhancing tracking accuracy and filter-specific focus adjustments.
- Advanced color mapping protocols that preserve scientific authenticity while enabling creative, aesthetically pleasing composites.
Software integration with telescope control systems is also becoming more sophisticated, allowing fully automated narrowband imaging sessions that adjust exposure, filter selection, and focus in response to live sky conditions.
Impact on the Future of Nebula Astrophotography
Together, these technological advances herald a future where narrowband nebula imaging is not only more accessible to amateurs but also more scientifically valuable. Enhanced filters and sensors will enable deeper, sharper captures of nebular emission lines, while smarter software will streamline workflows and reduce post-processing time. This convergence will empower astrophotographers to produce higher-resolution, more color-accurate, and noise-free nebula images that reveal new astrophysical insights and push the boundaries of backyard astronomy.
Embracing these future trends will be key for anyone serious about narrowband nebula photography—offering a pathway toward richer discoveries, improved imaging efficiency, and captivating cosmic visuals that continue to inspire the astronomy community worldwide.
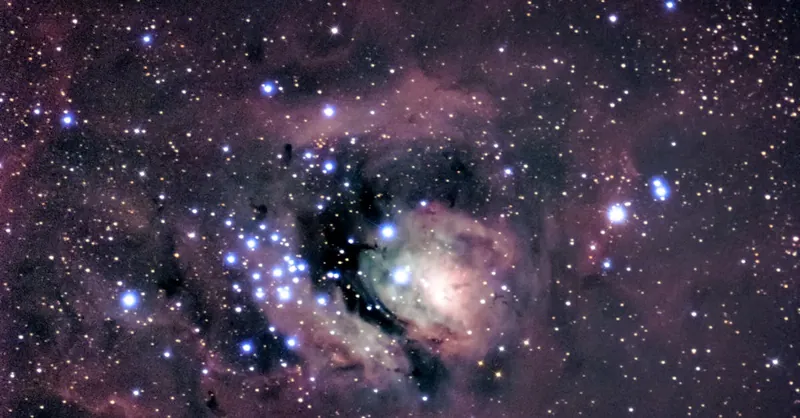
Image courtesy of Jeremy Müller