Top Tips for Night Sky Photography in Urban Areas
Category: Astrophotography
Mastering Night Sky Photography Amid City Lights
Capturing the night sky from an urban environment poses unique challenges and exciting opportunities for astronomy enthusiasts and astrophotographers alike. If you find yourself frustrated by city light pollution washing out stars and celestial wonders, you’re not alone. Whether you're an amateur astronomer looking to document planets, nebulae, or constellations, or a space engineering hobbyist interested in astrophotography techniques, this guide addresses those exact pain points. Many urban stargazers struggle with noise, reduced star visibility, and interference from artificial lighting, making night sky photography feel out of reach. This post distills the best strategies based on expert advice and actionable tips tailored specifically for urban settings. Unlike general guides, it focuses on practical solutions to overcome light pollution, optimize camera settings, and select the best equipment, ensuring you capture stunning celestial images from within city limits. Dive in to transform your urban night sky photos, understanding each step's scientific and technical foundation while honing your skills in this specialized branch of astrophotography.
- Mastering Night Sky Photography Amid City Lights
- Understanding Light Pollution in Urban Settings: Types, Sources, and How They Affect Night Sky Photography
- Choosing the Right Location and Timing Within the City to Maximize Star Visibility
- Camera and Lens Selection: Best Equipment for Urban Night Sky Shots
- Optimizing Camera Settings: ISO, Exposure Time, Aperture, and Focus Techniques for City Conditions
- Using Filters and Accessories to Reduce Light Pollution and Enhance Celestial Details
- Post-Processing Tips: Enhancing Urban Astrophotography Images to Reveal Hidden Stars and Nebulae
- Advanced Techniques: Stacking, Tracking Mounts, and Remote Shooting to Improve Image Quality
- Safety and Practical Tips for Night Photography in Urban Environments
- Combining Astrophotography with Planetology and Space Engineering Interests: Creative Project Ideas
- Troubleshooting Common Issues Faced When Shooting the Night Sky in Urban Areas
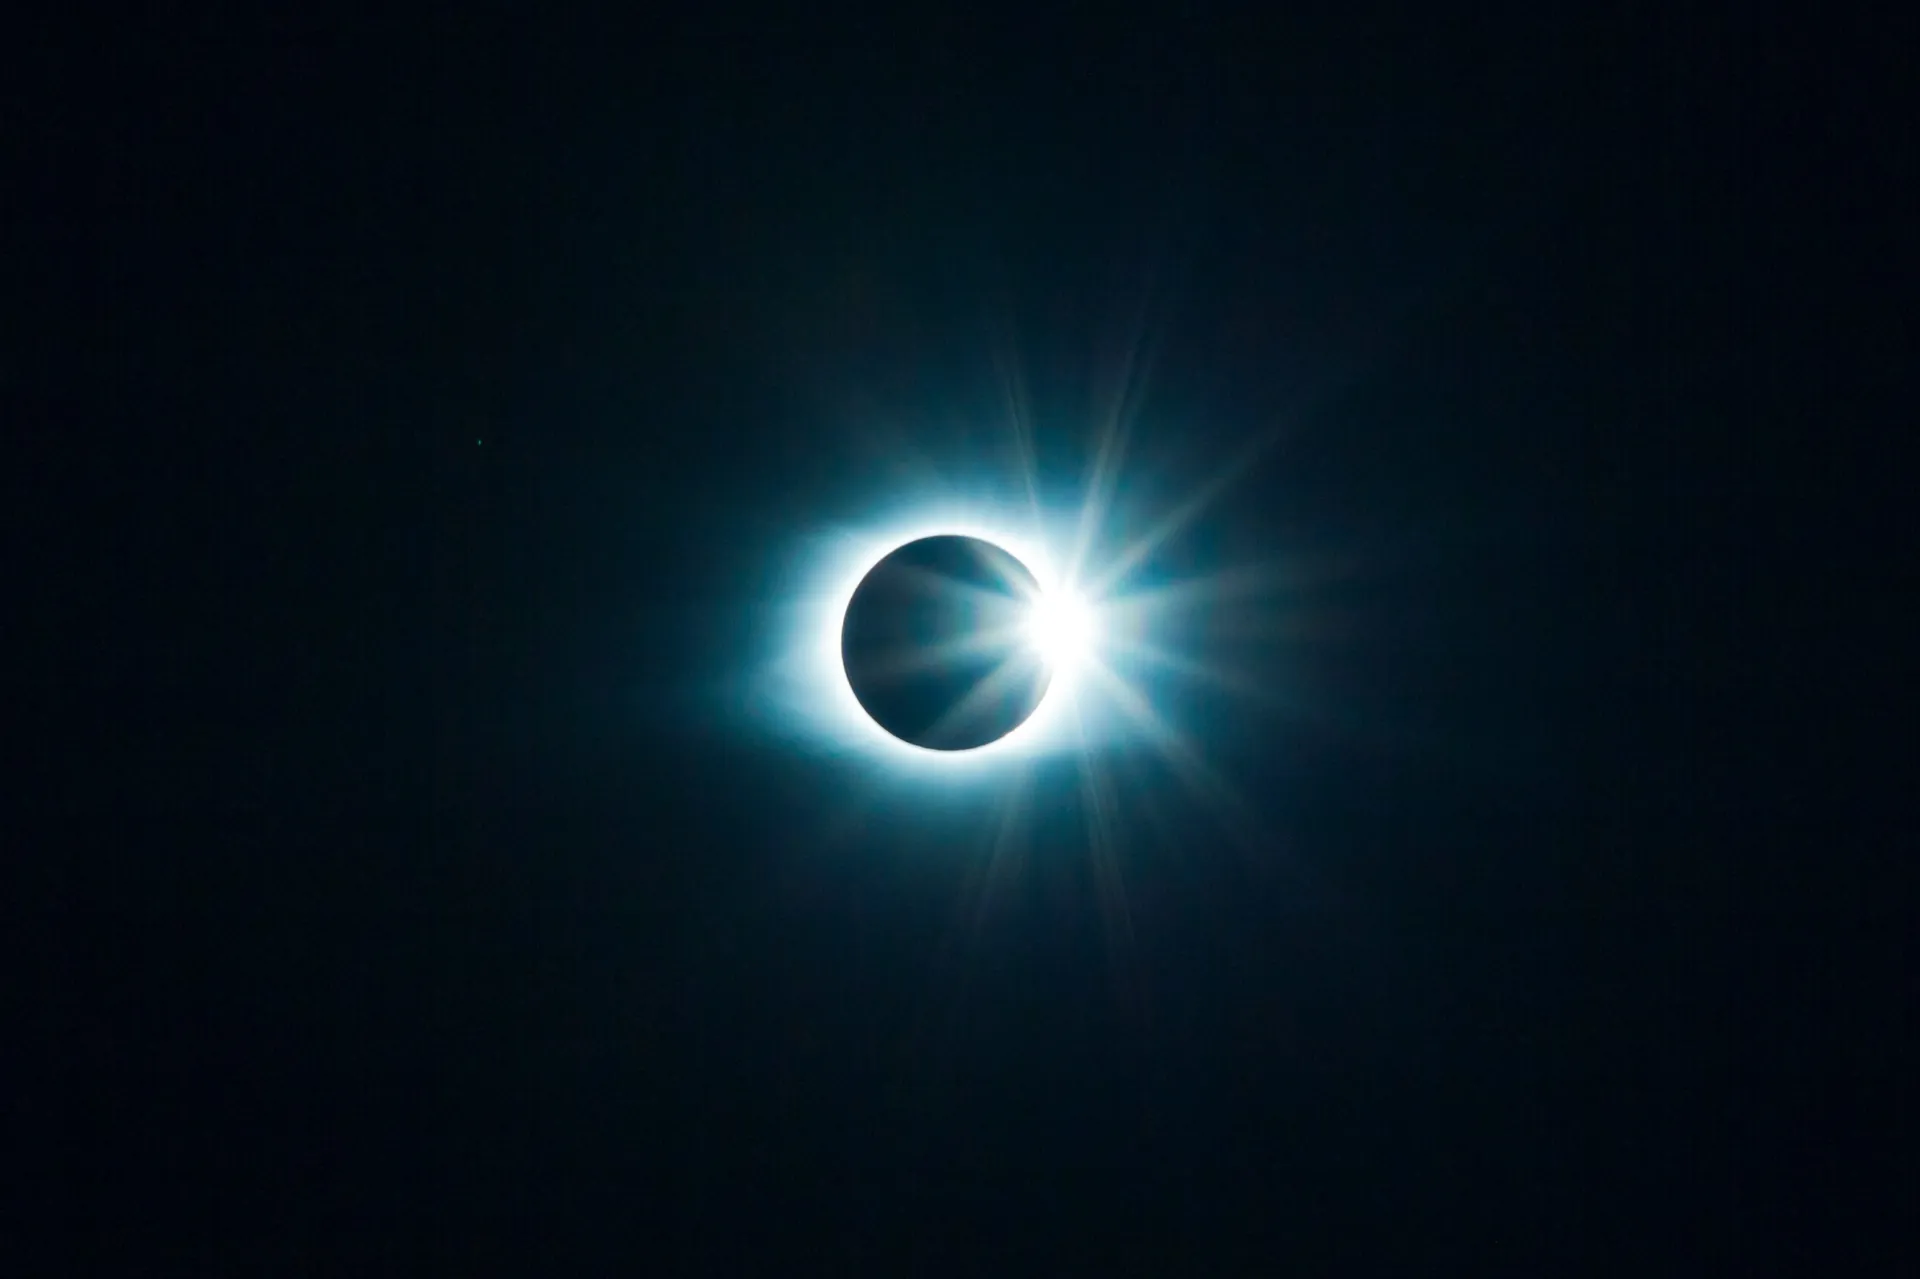
Understanding Light Pollution in Urban Settings: Types, Sources, and How They Affect Night Sky Photography
One of the biggest obstacles in urban night sky photography is light pollution, which significantly diminishes the visibility of stars, planets, and deep-sky objects. Light pollution originates from various sources, primarily excessive or misdirected artificial lighting common in city environments. To effectively counteract its impact, understanding the types of light pollution and their mechanisms is crucial.
Types of Light Pollution Impacting Urban Astrophotography
-
Skyglow: This is the brightening of the night sky caused by city lights scattering in the atmosphere. Skyglow creates a luminous dome above urban areas, washing out faint stars and nebulae, thereby reducing contrast and detail in night sky images.
-
Glare: Intense, direct light from street lamps, billboards, and vehicle headlights causes glare, which can interfere with your camera’s focus and contribute to lens flare artifacts that degrade photo quality.
-
Light Trespass: Unwanted lighting spilling into your shooting location, such as nearby floodlights or illuminated windows, can add unwanted brightness to your frame, making it harder to capture dark sky backgrounds.
Common Urban Light Pollution Sources
- Street and Security Lighting: High-intensity sodium vapor or LED streetlights scatter light upward and sideways.
- Commercial Signage and Billboards: Bright, colorful advertisement displays contribute to localized light spikes.
- Vehicle Headlights: Moving light sources add dynamic and unpredictable illumination, complicating exposure settings.
- Residential Lighting: Exterior home lighting and early night indoor illumination can also leak into your shooting environment.
How Light Pollution Affects Night Sky Photography
- Reduced Star Visibility: The contrast between stars and the sky background diminishes, causing stars to appear faint or disappear entirely. This impacts capturing detailed star fields, constellations, or the Milky Way.
- Noise and Haze in Images: Light pollution adds a color cast and atmospheric haze that forces longer exposure adjustments, leading to increased sensor noise.
- Limited Dynamic Range: Bright urban lighting saturates image pixels, reducing the dynamic range and obscuring low-light celestial features like faint nebulae or distant galaxies.
By recognizing these types and sources of light pollution, astrophotographers in urban areas can better strategize magnetic shooting locations, tailor camera settings, and employ light pollution filters. This foundational knowledge enables greater control over external light interference, setting the stage for more advanced techniques to capture the cosmos above even the brightest cities.
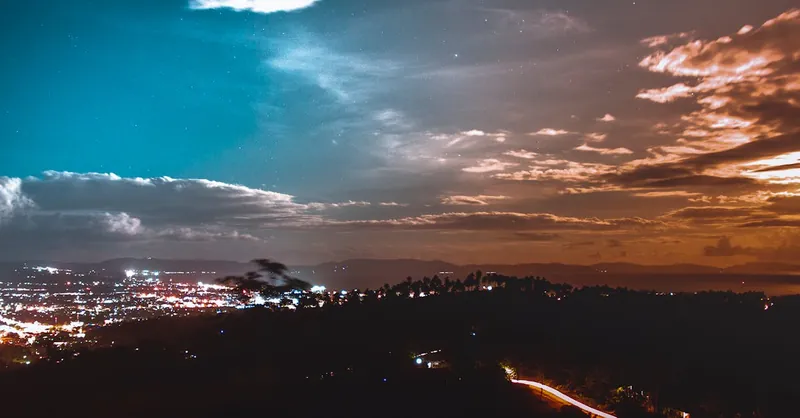
Image courtesy of Abet Llacer
Choosing the Right Location and Timing Within the City to Maximize Star Visibility
Navigating the complexities of urban light pollution requires more than just camera adjustments—it demands strategic selection of both location and timing to optimize star visibility for night sky photography. Even within densely lit cities, pockets of reduced light scattering exist, making it possible to capture clearer astronomical images without leaving urban boundaries.
Selecting Optimal Locations in the Urban Environment
-
Seek Out Darker Urban Pockets: Identify city parks, waterfronts, or elevated areas such as rooftops and hills where ambient light is naturally less intense. These spaces often have fewer direct light sources and reduced light trespass, enabling better contrast between stars and the sky background.
-
Distance from Intense Light Sources: Position your setup away from bright street lamps, commercial signage, and reflective surfaces. The further you are from brightly lit zones, the lower the skyglow interference, yielding sharper, cleaner star images.
-
Use Shielded or Directional Light-Friendly Spots: Locations shielded by buildings or natural barriers can block unwanted glare. Urban canyons with limited sky view can be detrimental, so opt for areas with a clear horizon or minimal obstruction.
Timing Your Urban Astrophotography Sessions for Maximum Effect
-
Shoot During Late Night to Early Morning Hours: Between midnight and 4 a.m., most city lights are dimmed or turned off, and human activity subsides, reducing overall light pollution. This window provides the darkest skies available in urban settings.
-
Plan Sessions Around Moon Phases: Avoid shooting during full moon or bright moon phases, as moonlight significantly increases sky brightness and obscures faint stars—especially in light-polluted areas. New moon nights or crescent moons offer the best contrast.
-
Check Weather Conditions: Clear, dry nights with low humidity and minimal atmospheric pollution enhance star visibility. Clouds and haze amplify light scattering, worsening skyglow effects.
By carefully choosing locations with minimized artificial light interference and scheduling your shoots during optimal nighttime windows, you can significantly enhance the quality and depth of urban night sky photographs. These practical steps empower astrophotographers to transcend typical urban constraints, revealing vibrant star fields and celestial phenomena against the city backdrop.
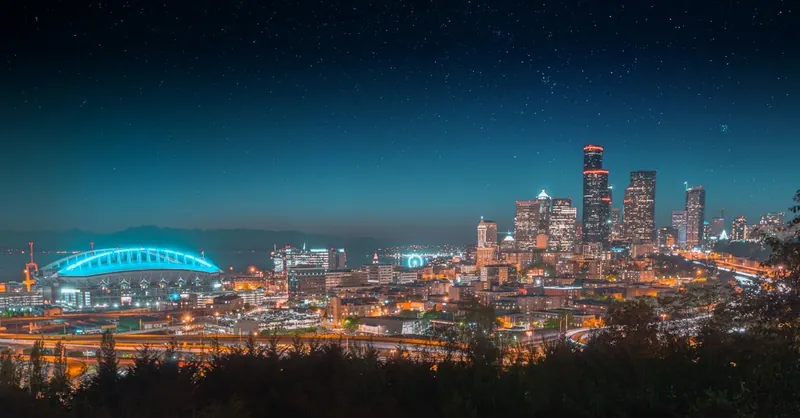
Image courtesy of Rick Han
Camera and Lens Selection: Best Equipment for Urban Night Sky Shots
Choosing the right camera and lens combination is pivotal for overcoming urban light pollution and capturing compelling night sky photographs. In city environments where artificial light compromises contrast and visibility, the equipment must maximize light-gathering capability while minimizing noise and lens flare.
Camera Features Ideal for Urban Astrophotography
-
Large Sensor Size: Full-frame or APS-C sensors perform better in low-light conditions due to larger pixel size, which reduces noise and enhances image quality when shooting at high ISO values. Mirrorless and DSLR cameras with these sensors are highly recommended for urban night sky photography.
-
High ISO Performance: Select a camera with excellent high ISO capabilities to allow shorter exposure times that limit star trailing and reduce the impact of moving light sources like car headlights.
-
Manual Mode and Long Exposure Support: Essential for controlling aperture, shutter speed, and ISO independently, manual mode enables precise adjustments to capture faint celestial objects despite light pollution. The ability to shoot long exposures (20 seconds or more) is particularly beneficial.
-
In-Camera Noise Reduction: Cameras featuring effective long-exposure noise reduction help maintain cleaner images by minimizing sensor noise, a common issue exacerbated by urban skyglow.
Lens Characteristics to Consider for Urban Night Skies
-
Wide Aperture (f/2.8 or Faster): A fast lens with a large maximum aperture lets in more light, essential for capturing dim stars and nebulae amid city glow.
-
Wide-Angle Focal Length: Lenses in the 14mm to 35mm range are ideal for capturing extensive star fields, constellations, and the Milky Way over cityscapes, providing expansive views and minimizing the appearance of star trailing.
-
Low Distortion and Good Coatings: Choose lenses with minimal optical distortion and high-quality multi-coatings to reduce lens flare and ghosting caused by urban light sources.
Recommended Equipment Setup Summary
| Equipment Feature | Recommendation | Benefit for Urban Astrophotography |
|---|---|---|
| Sensor Size | Full-frame or APS-C | Improved low-light sensitivity, less noise |
| ISO Range | High ISO (up to 3200 or more) | Better performance in illuminated urban skies |
| Aperture | f/2.8 or wider (e.g., f/1.8 or f/1.4) | Maximum light intake to offset light pollution effects |
| Focal Length | 14-35mm wide-angle | Captures broad night sky vistas with minimal star trails |
| Lens Coatings | Multi-coated anti-reflective lenses | Reduces flare from nearby urban lights |
By prioritizing cameras with excellent low-light capabilities and pairing them with fast, wide-angle lenses specifically designed to suppress flare and distortion, urban astrophotographers can effectively counteract the challenges posed by city lights. This strategic equipment selection lays a critical foundation for higher-quality astrophotography within urban environments, enabling clearer, sharper, and more vibrant night sky images without necessitating long-distance travel to dark sky sites.
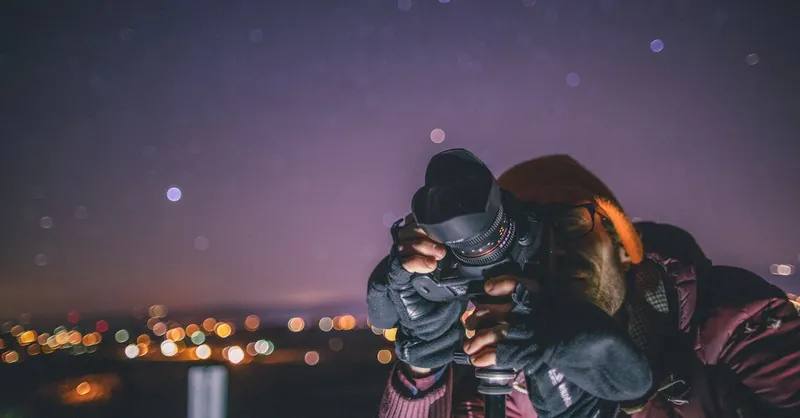
Image courtesy of Kelly
Optimizing Camera Settings: ISO, Exposure Time, Aperture, and Focus Techniques for City Conditions
When photographing the night sky in urban areas, optimizing your camera settings is crucial to overcoming the challenges posed by light pollution and achieving sharp, detailed celestial images. Mastering the interplay between ISO, exposure time, aperture, and focus helps maximize star visibility while minimizing noise and unwanted glare.
ISO Settings for Urban Night Sky Photography
In city environments, higher ISO values are often necessary to compensate for dim stars obscured by skyglow. However, excessively high ISO may introduce digital noise, which degrades image clarity. Aim for a balance by:
- Starting with ISO 800 to 1600: This range allows increased sensor sensitivity without overwhelming noise, beneficial for capturing faint stars amid urban light pollution.
- Testing ISO increments up to 3200 or 6400: Depending on your camera’s noise performance, pushing ISO higher can reveal additional stars, but be prepared for more post-processing noise reduction.
- Utilizing in-camera long exposure noise reduction: This feature helps refine image quality when shooting at elevated ISO and long exposures.
Exposure Time: Balancing Star Sharpness and Light Pollution
Exposure duration critically affects star sharpness and sky brightness, especially under artificial light interference:
- Limit exposures to 15-25 seconds: Longer exposures increase skyglow brightness and can cause star trailing due to Earth's rotation, particularly with wide-angle lenses.
- Apply the 500 Rule as a guide: Divide 500 by your lens focal length (full-frame equivalent) to calculate the maximum exposure time in seconds before star trails become noticeable. For example, a 20mm lens allows about 25 seconds.
- Experiment with multiple shorter exposures: Combine several shorter exposures using stacking software to reduce noise and enhance detail without the drawbacks of a single long exposure.
Aperture Settings: Maximizing Light Intake and Sharpness
Using the widest aperture your lens permits is generally beneficial under urban skies to gather the most light possible. However, consider the following:
- Set aperture between f/1.4 and f/2.8: Fast apertures help capture faint stars quickly, reducing the need for very high ISO or long exposures.
- Check for optical sharpness: Some lenses have soft edges or aberrations at their widest aperture, so stopping down slightly (to f/2 or f/2.8) may improve overall image quality while still allowing substantial light.
- Beware of lens flare: Wide apertures let in more stray light from urban sources, so utilize lens hoods and position yourself thoughtfully to minimize flare artifacts.
Focus Techniques for Crisp Celestial Images in City Settings
Achieving precise focus in the dark can be challenging, but sharp stars are indispensable for quality astrophotography:
- Manual Focus is Essential: Rely on your lens’s manual focus ring since autofocus systems often fail under low-light and chaotic city lighting conditions.
- Use Live View with Maximum Magnification: Zoom in digitally on a bright star or distant light source in your camera’s live view to fine-tune focus until stars appear as pinpoint dots.
- Employ Infinity Focus Marks Carefully: Many lenses designate an infinity focus mark, but temperature and mechanical variations may require slight adjustments beyond this point.
- Consider Focusing Aid Tools: Devices like Bahtinov masks or smartphone apps that highlight star focus can significantly streamline precise focusing even in urban environments.
By thoughtfully configuring ISO, exposure time, aperture, and focus, urban astrophotographers can mitigate the detrimental effects of city lights. This optimization allows capturing stunning star fields, planets, and even brighter nebulae despite heavy light pollution, bringing the wonders of the night sky into sharp relief directly from the heart of urban landscapes.
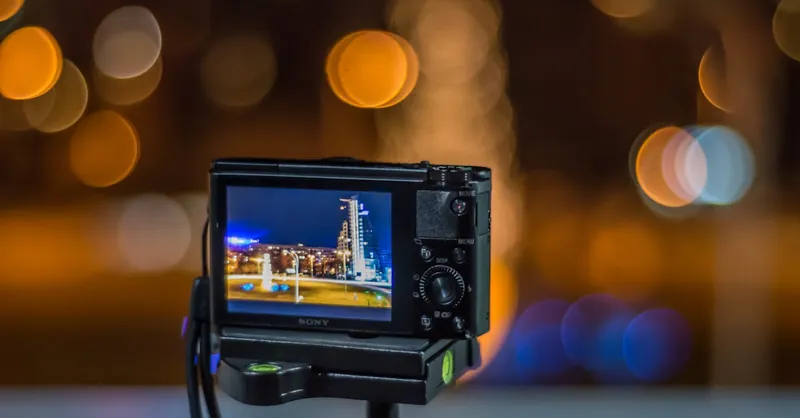
Image courtesy of Pixabay
Using Filters and Accessories to Reduce Light Pollution and Enhance Celestial Details
Effectively combating urban light pollution requires not only strategic location and optimized camera settings but also the use of specialized filters and accessories designed to suppress unwanted artificial light and enhance the visibility of stars, planets, and deep-sky objects. Utilizing the right optical tools can dramatically improve contrast and bring out faint celestial details otherwise lost in city glow.
Light Pollution Filters: Types and Benefits
-
Broadband Light Pollution Filters: These filters selectively block common wavelengths emitted by streetlights, such as sodium vapor and mercury vapor lamps, while allowing most starlight wavelengths to pass through. By reducing skyglow, broadband filters improve image contrast and deepen dark sky backgrounds in urban environments. They are ideal for capturing star fields and brighter nebulae with minimal color distortion.
-
Narrowband Filters: Narrowband filters transmit very specific wavelengths associated with emission nebulae (e.g., H-alpha, OIII, SII lines) while blocking nearly all other light pollution wavelengths. Although more commonly used in telescopic astrophotography, these filters can also enhance urban night sky photos focused on nebulae by isolating their distinct emissions and suppressing city lighting effects.
-
UV/IR Cut Filters: Many digital camera sensors are sensitive to ultraviolet and infrared light, which can introduce haze or reduce sharpness. Attaching UV/IR cut filters helps in achieving clearer, crisper images by eliminating these unwanted wavelengths that can be intensified by urban haze and artificial lighting.
Essential Accessories to Complement Filters
-
Lens Hoods: Prevent lens flare and glare from nearby street lamps or building lights by physically blocking stray light entering the lens. A quality lens hood reduces ghosting artifacts and preserves image contrast in light-polluted settings.
-
Anti-Reflection Coatings: While typically applied to lenses, some step-up or step-down rings and filter holders with these coatings minimize internal reflections between camera components and filters, reducing flare and improving overall image clarity under artificial lights.
-
Portable Light Shields and Baffles: Simple DIY or commercial shields can block direct light from nearby lamps or windows, enabling better control over your shooting environment even within a cityscape.
By integrating light pollution filters tailored for your astrophotography goals with carefully selected accessories like lens hoods and light shields, you create a powerful defense against urban lighting challenges. This approach enhances the signal-to-noise ratio in your images, allowing more pronounced celestial features to emerge despite the bright backdrop of city lights. Furthermore, understanding the scientific basis of filter functionality and employing them appropriately elevates your night sky photography—turning urban skies into canvases showcasing stars, nebulae, and planets with remarkable clarity.
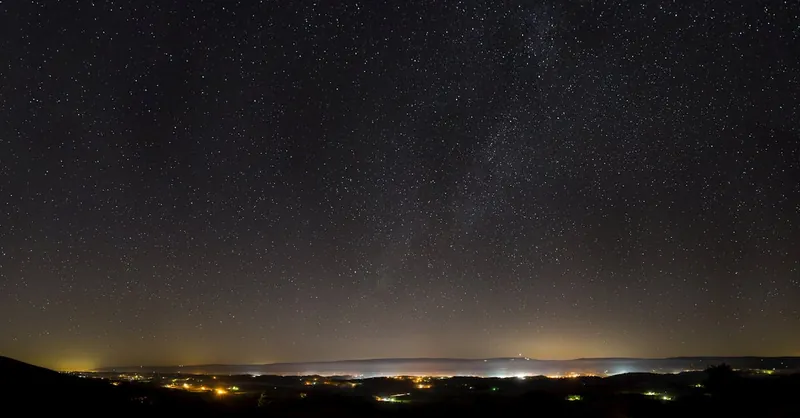
Image courtesy of Kelly
Post-Processing Tips: Enhancing Urban Astrophotography Images to Reveal Hidden Stars and Nebulae
Capturing striking night sky images in urban environments is only the first step—post-processing plays a crucial role in unveiling the subtle celestial details often masked by city light pollution. By applying targeted editing techniques, astrophotographers can significantly enhance star visibility, boost contrast, and reveal faint nebulae that are otherwise lost in the bright urban sky glow.
Key Post-Processing Techniques for Urban Astrophotography
-
Noise Reduction: Urban night sky photos typically suffer from elevated noise due to high ISO settings and long exposures required to combat light pollution. Use dedicated noise reduction tools in software such as Adobe Lightroom, Photoshop, or specialized astrophotography programs (e.g., PixInsight) to suppress grain while preserving star sharpness and fine nebular structures.
-
Contrast and Levels Adjustment: Carefully increasing contrast and adjusting levels or curves boosts the distinction between stars and the sky background. Raising the blacks and lowering the highlights helps deepen dark areas without clipping star data, effectively countering the washed-out effects of urban skyglow.
-
Selective Color Enhancement: Urban light pollution often creates unnatural color casts, such as orange or yellow hues from sodium vapor lamps. Utilize white balance corrections and selective color adjustments to neutralize these tints. Enhancing blues and purples can restore the natural appearance of the night sky, while selectively boosting reds and greens can make emission nebulae stand out more vividly.
-
Star Masking and Deconvolution: Creating star masks allows precise control over enhancement effects, preventing stars from becoming overly bright or bloated during contrast adjustments. Deconvolution algorithms, available in advanced processing software, refine star shapes and improve overall image sharpness, mitigating slight blurring introduced by atmospheric turbulence or lens aberrations amplified in urban settings.
-
Stacking Multiple Exposures: Combining several shorter exposures through stacking software like DeepSkyStacker or Sequator reduces noise and increases signal-to-noise ratio (SNR). This technique is especially effective in urban astrophotography, where exposure times are limited by light pollution and star trailing concerns.
Leveraging Software Tools to Maximize Urban Night Sky Image Quality
- Adobe Lightroom: Excellent for noise reduction, color correction, and global contrast enhancement tailored to urban skies.
- Photoshop: Offers extensive layering, masking, and advanced retouching capabilities perfect for fine detail work and removing light pollution gradients.
- DeepSkyStacker/Sequator: Specialized stacking tools that combine exposures to improve faint detail visibility and reduce noise effectively.
- PixInsight: Powerful astrophotography software that provides deep control over image calibration, stacking, deconvolution, and selective enhancements ideal for revealing hidden stars and nebulae in light-polluted urban environments.
By integrating thoughtful post-processing workflows focused on noise management, contrast enhancement, color correction, and exposure stacking, astrophotographers can dramatically improve the quality of urban night sky images. This meticulous editing reveals the often-hidden splendor of stars, planets, and nebulae above cityscapes—transforming light-polluted skies into vibrant cosmic scenes that truly capture the majesty of the universe even within urban limits.
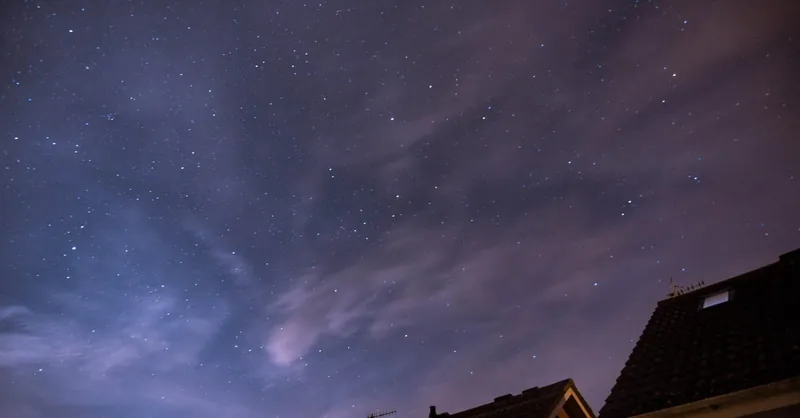
Image courtesy of Stuart Pritchards
Advanced Techniques: Stacking, Tracking Mounts, and Remote Shooting to Improve Image Quality
To significantly elevate your urban night sky photography, integrating advanced techniques such as image stacking, the use of tracking mounts, and remote shooting can drastically improve image clarity, reduce noise, and capture finer astronomical details—even amidst pervasive city light pollution. These methods leverage both hardware and software innovations to overcome the limitations imposed by urban settings and bring stunning celestial imagery within practical reach.
Image Stacking: Enhancing Signal-to-Noise Ratio in Light-Polluted Skies
Image stacking involves capturing multiple shorter exposures and combining them into a single composite image. This technique is especially valuable in urban astrophotography due to these benefits:
- Noise Reduction: Stacking averages out random sensor noise that is amplified by high ISO and extended exposures needed to combat skyglow.
- Improved Detail and Dynamic Range: The cumulative signal from faint stars and nebulae strengthens, revealing subtle features often lost in single exposures.
- Mitigating Star Trails: Shorter individual exposures minimize star trailing, while stacking software aligns and integrates the images, producing pinpoint stars despite Earth's rotation.
Popular stacking software like DeepSkyStacker and Sequator provide user-friendly interfaces for urban astrophotographers, allowing you to combine dozens or even hundreds of frames to maximize image quality.
Tracking Mounts: Compensating for Earth’s Rotation in Urban Astrophotography
Using a tracking mount is a game-changer in urban night sky photography. These motorized mounts rotate your camera or telescope in sync with Earth's rotation, keeping stars fixed in the frame during long exposures. Key advantages include:
- Longer Exposure Times Without Star Trails: Extending exposure duration enables the sensor to collect more light from faint celestial objects, crucial for overcoming urban skyglow.
- Sharper, Brighter Images: Tracking allows for greater detail in deep-sky objects like nebulae and galaxies that are otherwise difficult to capture in city environments.
- Enhanced Versatility: Many mounts support both equatorial and alt-azimuth alignments, accommodating varied setups and skill levels.
For urban astrophotography, compact portable mounts such as star trackers (e.g., Sky-Watcher Star Adventurer or iOptron SkyGuider) balance precision with mobility, allowing city photographers to set up easily on rooftops or parks.
Remote Shooting: Minimizing Vibrations and Enabling Timelapse Compositions
Reducing camera shake and expanding control capabilities are vital to optimizing night sky imagery in urban conditions. Remote shooting techniques offer these critical benefits:
- Eliminating Physical Contact: Using wireless remotes, intervalometers, or smartphone apps to trigger the shutter prevents vibration that can blur stars and reduce sharpness.
- Timed Exposure Sequences: Automating shot intervals enables seamless astrophotography sessions for stacking or creating captivating night sky timelapses against cityscapes.
- Enhanced Workflow Convenience: Remote operation allows for on-the-fly adjustments and monitoring without disturbing delicate camera alignments or leaving the shooting position.
Combining remote shutter control with image stacking and tracking mounts results in a comprehensive approach that maximizes image quality while minimizing urban light pollution challenges.
Incorporating stacking techniques, precise tracking mounts, and remote shooting controls empowers urban astrophotographers to transcend the inherent limitations of city light pollution, achieving crystal-clear, richly detailed night sky images. These advanced methods blend technical innovation with practical workflow enhancements, perfectly complementing foundational strategies to unlock the beauty of the cosmos from the heart of urban environments.
Image courtesy of Frank Cone
Safety and Practical Tips for Night Photography in Urban Environments
When photographing the night sky in bustling urban areas, prioritizing safety and practical planning is just as important as mastering technical skills. Urban astrophotographers face unique environmental and logistical challenges that, if unaddressed, can compromise both the quality of your images and personal well-being. By incorporating essential safety measures and practical strategies into your workflow, you ensure a smoother, more enjoyable night sky photography experience right within city limits.
Prioritize Personal Safety During Night Sessions
- Choose Well-Populated but Low-Light Areas: Selecting locations that offer relative darkness but remain frequented by other people helps avoid isolation risks. Parks, public rooftops, and university campuses often provide good balance between security and decreased light pollution.
- Inform Someone of Your Plans: Always let a trusted friend or family member know your shooting location and expected return time, especially when working late hours in urban settings.
- Dress Appropriately and Carry Essentials: Urban nights can be colder than anticipated. Dress in layers, wear comfortable shoes for uneven terrain, and bring water, snacks, and a flashlight or headlamp with a red light mode to preserve night vision.
- Stay Alert and Aware of Your Surroundings: Minimize distractions such as loud music or headphones. Be especially vigilant against potential hazards like traffic, uneven ground, or suspicious activity in the vicinity.
Practical Considerations for Efficient Urban Night Sky Photography
- Use Portable and Quick-Setup Equipment: Compact tripods, lightweight cameras, and versatile lenses streamline setup and teardown, reducing time spent in the potentially exposed shooting spot.
- Scout Locations During Daylight: Familiarize yourself with the urban shooting environment in advance. Identify potential light sources, obstructions, and safest access routes to optimize positioning at night.
- Respect Private Property and Local Regulations: Obtain necessary permissions for rooftop or private lot access and abide by local noise and curfew ordinances to avoid legal complications.
- Plan for Battery and Storage Management: Cold urban nights can rapidly drain camera batteries. Carry extras and manage storage cards efficiently to prevent missed shots during critical moments.
- Leverage Mobile Apps for Navigation and Weather: Real-time weather updates, light pollution maps, and astronomy tools enhance decision-making and maximize chances of capturing quality night sky images.
By integrating comprehensive safety protocols and practical urban shooting preparations, astrophotographers can confidently navigate the challenges of city environments. These best practices not only protect your well-being but also foster the focus and agility needed to seize rare celestial moments amidst urban light pollution. Implementing them strengthens your ability to consistently produce stunning night sky photography without compromising security or comfort.

Image courtesy of Parna Gohil
Combining Astrophotography with Planetology and Space Engineering Interests: Creative Project Ideas
Urban night sky photography offers unique opportunities to integrate planetology and space engineering themes into your astrophotography projects, creating engaging content that appeals to both science enthusiasts and creative hobbyists. By combining these disciplines, you can innovate beyond traditional star and constellation imaging and explore projects that deepen your understanding of planetary atmospheres, orbital mechanics, and spacecraft technologies—all while capturing striking celestial visuals from city environments.
Creative Project Ideas Bridging Astrophotography and Planetology
-
Planetary Surface and Atmosphere Studies via Time-Lapse Imaging: Utilize long-exposure time-lapses focused on planets such as Jupiter, Saturn, or Mars to observe and document atmospheric changes, storm movements, or cloud rotations. Even from well-lit urban areas, modern cameras paired with quality telescopic lenses can reveal dynamic planetary features, enabling amateur contributions to planetology observations.
-
Tracking and Photographing Artificial Satellites and Space Stations: Leverage your astrophotography setup to capture the International Space Station (ISS), Starlink satellites, and other spacecraft passing overhead. This practice not only hones tracking and timing skills but also connects night sky photography with practical aspects of space engineering and orbital dynamics.
-
Simulating Spacecraft Imaging Techniques: Experiment with replicating image-capturing protocols used in space missions, such as multispectral or narrowband imaging through specialized filters to highlight planetary surface compositions or atmospheric phenomena. These techniques provide hands-on experience with the imaging challenges faced by interplanetary probes and telescopes.
Integrating Space Engineering Concepts into Night Sky Photography
-
Design and Build Customized Astrophotography Mounts: Apply space engineering principles by fabricating precise motorized telescope mounts or star trackers optimized for urban use. DIY engineering projects improve your understanding of kinematics, control systems, and environmental factors that affect tracking accuracy under city conditions.
-
Develop Automated Remote-Controlled Observatories: Utilize microcontrollers, sensors, and robotics to create remote astrophotography rigs that can be monitored and operated from a distance—ideal for urban rooftops or restricted-access sites. This integration of space engineering enhances workflow efficiency and increases image capture opportunities by automating exposure sequences and tracking adjustments.
-
Apply Data Analysis Techniques from Planetology: Analyze your astrophotography data using scientific software to extract quantitative information such as rotational periods of planets, atmospheric composition inference from color data, or satellite orbital parameters. These practices bridge amateur astrophotography with formal scientific research methods.
By melding astrophotography with planetology and space engineering interests, urban astronomers can deepen their scientific engagement while producing compelling visual content. These interdisciplinary projects fuel creativity, enrich technical skills, and transform city-based astrophotography from simple stargazing into a multifaceted exploration of our solar system and beyond—maximizing both the educational and aesthetic value of your night sky endeavors.
Image courtesy of Roy
Troubleshooting Common Issues Faced When Shooting the Night Sky in Urban Areas
Night sky photography in urban areas is inherently challenging due to the pervasive influence of light pollution and environmental variables. However, understanding and addressing common issues can significantly improve your results and make urban astrophotography a rewarding experience. Here are some typical problems and practical solutions tailored to city conditions:
1. Excessive Noise and Grain in Images
High ISO settings combined with long exposures often produce digital noise, which obscures faint stars and celestial details. To troubleshoot:
- Use noise reduction techniques both in-camera (long exposure noise reduction) and during post-processing.
- Employ image stacking by combining multiple shorter exposures to reduce noise without sacrificing detail.
- Optimize exposure time and aperture to minimize the need for extremely high ISO values, balancing sensor sensitivity with image clarity.
2. Star Trailing Due to Earth’s Rotation
In the absence of tracking mounts, long exposure times cause stars to move across the frame, resulting in blurs rather than pinpoint points of light. To mitigate:
- Apply the 500 Rule to calculate the maximum exposure length based on your lens focal length.
- Use portable star trackers where possible to enable longer exposures without trails.
- Opt for shorter exposures stacked digitally, preserving sharp star images even within urban light pollution constraints.
3. Lens Flare and Glare From Urban Lighting
Unwanted reflections and glare from nearby streetlights and illuminated structures can cause image artifacts and reduce contrast. Solutions include:
- Utilize high-quality lens hoods to block stray light.
- Employ multi-coated lenses and filters to minimize internal reflections.
- Reorient your framing to avoid direct light sources entering the lens and consider shooting from shielded locations.
4. Difficulty Achieving Precise Focus
Auto-focus systems often fail under low-light, light-polluted conditions, causing blurry stars or misfocused planets. To improve focus:
- Switch to manual focus and use your camera’s live view with maximum magnification on bright stars or distant lights.
- Use focusing aids such as Bahtinov masks or specialized mobile apps that assist in achieving pinpoint sharpness.
- Periodically check and adjust focus during shooting sessions to account for temperature-induced lens shifts.
5. Overexposed Foregrounds and Uneven Lighting
Balancing the exposure between brightly lit urban landscapes and the dim night sky can be tricky. Tips to manage this include:
- Use blending techniques in post-processing, combining separate exposures for the foreground and sky.
- Employ neutral density or graduated filters to balance light levels.
- Choose shooting times when urban lighting is dimmed, such as late night or early morning hours.
By proactively addressing these common challenges in urban night sky photography, you enhance your ability to capture stunning astronomical images directly within city limits. Troubleshooting with informed technical adjustments and creative strategies transforms urban light-polluted skies into uniquely expressive and detailed astrophotography masterpieces.

Image courtesy of Rick Han