
Tracking Satellites with Amateur Equipment: A Complete Guide
Category: Astrophotography
Master the Art of Tracking Satellites with Amateur Gear
Are you an astronomy enthusiast eager to catch a glimpse of orbiting satellites but unsure where to start? Maybe you've got a basic telescope, a radio receiver, or just a laptop, and you want to elevate your hobby to actively track and identify satellites in real time. This post is crafted precisely for you — amateur astronomers, budding astrophotographers, and space engineering hobbyists seeking practical, hands-on guidance to confidently track satellites without needing expensive, professional-grade devices.
Many of us get fascinated by the fast-moving dots crossing the night sky, but find ourselves overwhelmed by the technical jargon and complexity of satellite tracking. You might have tried some apps or websites but want to understand the foundational principles and best equipment choices for amateur setups. This article stands apart by breaking down satellite tracking step-by-step, highlighting accessible gear, software tools, and techniques that suit beginners through intermediate hobbyists.
Dive in to uncover how affordable antennas, open-source tracking software, and your existing telescope or camera gear can turn satellite spotting from a hit-or-miss endeavor into a rewarding, scheduled experience. From understanding orbital mechanics basics to building your own tracking antennas and capturing satellite flares in astrophotography, we’ll address the challenges and show you how to overcome them. Keep reading to turn your night sky observations into a structured, educational, and thrilling spacewatch journey.
- Master the Art of Tracking Satellites with Amateur Gear
- Understanding Satellite Orbits: Fundamentals for Amateur Trackers
- Essential Equipment for Tracking Satellites with Amateur Gear
- Software Tools and Apps for Satellite Tracking
- Building Your Own Antenna for Improved Satellite Signal Reception
- Techniques for Visual Satellite Tracking and Identification
- Capturing Satellites with Astrophotography Gear
- Decoding Satellite Signals: Using Software-Defined Radios (SDR)
- Analyzing Satellite Data and Common Challenges
- Integrating Satellite Tracking with Space Engineering Projects
- Safety and Ethical Considerations in Satellite Tracking
Understanding Satellite Orbits: Fundamentals for Amateur Trackers
To effectively track satellites with amateur equipment, it's essential to grasp the basics of satellite orbits. Different orbits dictate how and when satellites appear in the sky, influencing their visibility, speed, and tracking complexity. By understanding the key orbital types—Low Earth Orbit (LEO), Geostationary Orbit, and Polar Orbit—you can optimize your observation sessions and choose the right equipment and software settings.
Low Earth Orbit (LEO)
Satellites in LEO circle the Earth at altitudes between approximately 160 to 2,000 kilometers. These include many communication, weather, and Earth observation satellites such as the International Space Station (ISS). Because these satellites are so close to Earth, they travel fast across the sky, often visible for just a few minutes at a time. Their rapid movement requires tracking tools that offer real-time position updates and the ability to adjust antenna or telescope orientation quickly.
Key characteristics of LEO satellites: - Orbit period: About 90 to 120 minutes. - Visibility: Brief passes shortly after sunset or before sunrise when sunlight reflects off their surfaces. - Tracking challenge: Fast angular velocity, demanding agile tracking hardware or motorized mounts.
Geostationary Orbit
Satellites in Geostationary Orbit maintain an altitude near 35,786 kilometers, matching Earth's rotation. This keeps them fixed over one longitude, appearing stationary relative to an observer on the ground. These orbits are primarily used for telecommunications and weather satellites.
Implications for amateur trackers: - Visibility: Constant position in the sky, usually near the equator. - Tracking challenge: Unlike LEO satellites, these don’t require continual tracking adjustments, making them ideal for static antenna setups. - Signal observation: Long-duration monitoring of specific satellites is possible due to their fixed location.
Polar Orbits
Satellites in Polar Orbits pass over the Earth’s poles, completing an orbit roughly every 100 minutes. This orbit type allows a satellite to cover the entire Earth over several days, making it valuable for mapping and environmental monitoring satellites.
Tracking notes for Polar Orbits: - Passes: Visible from most locations on Earth as the satellite travels from pole to pole. - Timing: Passes occur at different times of day, providing observing opportunities throughout the day and night. - Tracking complexity: Moderate; passes are fairly predictable, but the satellite speed changes depending on geographic latitude.
Impact on Visibility and Tracking Strategies
By recognizing these orbit characteristics, amateur satellite trackers can better predict when and where satellites will appear:
- LEO satellites demand quick-response tracking gear due to rapid sky movement.
- Geostationary satellites can be monitored continuously from fixed positions, simplifying setup requirements.
- Polar orbiters offer frequent, globally visible passes that diversify observation times and opportunities.
Mastering these fundamental orbit concepts will improve your satellite spotting success and enable you to tailor your amateur setup for optimal results. In the following sections, we’ll explore how to apply this understanding in selecting tracking software and hardware configurations suitable for each orbital type.
Image courtesy of SpaceX
Essential Equipment for Tracking Satellites with Amateur Gear
Getting started with satellite tracking doesn't require breaking the bank. By selecting the right affordable telescopes, antennas, and radios, beginner enthusiasts can build an effective setup that balances performance, convenience, and cost. Here’s an overview of essential equipment tailored for amateur satellite tracking:
Affordable Telescopes for Visual Tracking and Astrophotography
While many satellites can be spotted with the naked eye or binoculars, a modest telescope can enhance your experience by providing clearer views and aiding in astrophotography of satellites and their flares. When choosing a telescope for satellite observation, consider:
- Refractor telescopes (70mm to 90mm aperture) are lightweight, require minimal maintenance, and offer crisp images suitable for beginners.
- Dobsonian reflectors provide larger apertures at low cost, excellent for tracking faint satellite trails across the sky.
- Motorized or GoTo mounts become valuable as you progress, enabling you to follow fast-moving satellites smoothly.
A mid-range telescope combined with a smartphone adapter or DSLR camera mount enables capturing astonishing satellite passes and flares, especially during the International Space Station (ISS) sightings or Iridium flare events.
Essential Antennas: Yagi and Helical Antennas for Signal Reception
Amateur satellite tracking often involves listening to satellite transmissions using radio frequencies or capturing telemetry data. The choice of antenna is crucial for reliable signal reception:
- Yagi Antenna
- Highly directional with significant gain, ideal for tracking specific satellites in Low Earth Orbit (LEO).
- Typically features 3 to 5 elements, balancing portability and performance.
-
Popular for VHF and UHF bands, frequently used to receive signals from weather satellites and amateur radio satellites.
-
Helical Antenna
- Offers circular polarization, which is beneficial for communicating with satellites transmitting circularly polarized signals.
- Compact and relatively easy to construct, it suits enthusiasts interested in decoding telemetry or amateur radio satellite communications.
- Works well for both LEO and some Geostationary satellite frequencies.
These antennas can often be purchased pre-assembled or built from affordable kits, making them accessible for beginners who want hands-on experience without significant expense.
Radios and Receivers Suitable for Beginners
To decode satellite signals or enjoy live audio from orbiting spacecraft, you’ll need a receiver or radio capable of tuning into satellite frequency bands. Consider the following beginner-friendly options:
- Software Defined Radios (SDRs) such as the RTL-SDR are budget-friendly and highly versatile, covering a wide frequency range from VHF to UHF. The SDR ecosystem boasts numerous open-source software packages for decoding satellite telemetry and tracking frequencies in real time.
- Handheld scanners or simple VHF/UHF receivers can work as entry-level equipment but may lack the flexibility and wide coverage of SDRs.
- Radios integrated with tracking software, like Orbitron or GPredict, allow for synchronized antenna control and automated scanning of predicted satellite passes.
Additional Accessories to Enhance Tracking Success
- Rotators and motorized mounts: For antennas or telescopes requiring precise tracking of fast-moving satellites, these mechanisms enable smooth, automated positioning aligned with satellite orbits.
- Low-loss coaxial cables and connectors: Essential for preserving signal integrity between your antenna and receiver setup.
- Power supplies and batteries: Portable power solutions make field tracking possible, adding flexibility to your observation locations.
By combining these affordable and readily available equipment components, amateur astronomers can build a capable satellite tracking station. This foundational setup will empower you to capture satellite passes, receive telemetry data, and deepen your understanding of the dynamic space environment overhead. In the next section, we will explore the best open-source and commercial software tools to complement and maximize the performance of your amateur tracking gear.
Image courtesy of Pixabay
Software Tools and Apps for Satellite Tracking
Selecting the right software tools and mobile apps is critical for effective satellite tracking with amateur equipment. These applications provide real-time satellite position updates, visibility predictions, and integrate with hardware like motorized mounts or Software Defined Radios (SDRs) to streamline your tracking experience. Familiarity with popular software enables hobbyists to precisely plan observation sessions, identify satellites by name, and decode telemetry data, elevating amateur satellite tracking from guesswork to science.
Heavens-Above: Real-Time Pass Predictions and Visualizations
Heavens-Above is a widely-used web service and mobile app offering comprehensive satellite tracking and celestial event predictions. It specializes in delivering accurate pass predictions for Low Earth Orbit (LEO) satellites, including the International Space Station (ISS), Starlink, and Iridium flares. Heavens-Above excels in providing:
- Detailed pass charts and visibility windows, customized by your geographic location.
- Interactive sky maps that help visually locate satellites in real-time.
- Prediction alerts via email or notifications to catch ephemeral satellite flares.
- Data on other celestial bodies like planets and comets, enabling all-round amateur astronomy engagement.
Its user-friendly interface makes it ideal for beginners and intermediate hobbyists, helping them plan observation sessions down to the exact minute a satellite will cross the night sky.
Orbitron: Advanced Satellite Tracking with Hardware Control
Orbitron is a free, Windows-based satellite tracking program favored by serious amateur satellite enthusiasts. It offers robust features tailored for real-time satellite orbit calculation and automated control of rotator systems and radio equipment. Key advantages of Orbitron include:
- Accurate Two Line Element (TLE) data integration to predict satellite positions with high precision.
- Support for controlling antenna rotators and frequency tracking radios, essential for maintaining communication links with fast-moving LEO satellites.
- Customizable pass schedules and notifications to optimize observation time.
- Compatibility with external devices, enhancing hands-on engagement with hardware tracking rigs.
Orbitron’s detailed interface and high configurability make it a powerful tool for users ready to advance beyond basic visual spotting into signal reception and data decoding.
SDR# (SDRSharp): Unlocking Satellite Signals with Software Defined Radio
For enthusiasts interested in receiving and decoding satellite transmissions, SDR# (SDRSharp) is a leading free software for managing Software Defined Radios (SDRs) such as the RTL-SDR dongle. It provides a graphical spectrum analyzer and wide-ranging control over frequencies, making it indispensable for satellite telemetry, amateur radio, and signal intelligence. SDR# features that empower amateur satellite tracking include:
- Real-time spectrum visualization for identifying satellite signal bands.
- Compatibility with various SDR hardware supporting VHF/UHF bands commonly used by satellites.
- Plugins and integrations to decode telemetry, APRS packets, and other data transmissions from satellites.
- Flexibility to combine with other tracking software like Orbitron for synchronized frequency and antenna control.
By integrating SDR# into your setup, you transform a basic radio receiver into a sophisticated satellite signal exploration system, unveiling the invisible radio universe beyond the naked eye.
Leveraging these software solutions—Heavens-Above for scheduling and visualization, Orbitron for tracking and hardware control, and SDR# for signal reception and decoding—amateur astronomers can significantly enhance their satellite tracking accuracy and enjoyment. These tools complement the affordable telescopes, antennas, and radios previously discussed, creating a comprehensive amateur satellite tracking suite. In the next section, we will guide you through combining these technologies effectively to build your own personalized satellite tracking workflow.
Image courtesy of Airam Dato-on
Building Your Own Antenna for Improved Satellite Signal Reception
Enhancing your satellite tracking capabilities significantly depends on the quality of your antenna setup. While commercial antennas are available, building your own DIY antenna using commonly available materials offers an affordable and rewarding way to boost signal reception and tailor performance to specific satellite frequency bands. Constructing a custom antenna not only sharpens your technical skills but also improves your ability to receive clearer signals from satellites, especially those in Low Earth Orbit (LEO) and Geostationary orbits.
Step-by-Step Guide to Building a Simple Yagi Antenna
The Yagi antenna is one of the most popular types among amateur satellite operators due to its directional gain and relative ease of construction. Here’s a streamlined guide to building your own Yagi antenna optimized for satellite frequencies in the VHF/UHF range (typically 137 MHz or 435 MHz, depending on the satellite you target):
- Gather Materials:
- Aluminum or copper rods/wires (for elements)
- A sturdy boom (wooden or PVC pipe to mount the elements)
- Element mounts or clamps
- Coaxial cable (preferably low-loss RG-58 or better)
- Connector compatible with your radio or SDR device (SMA or BNC)
- Measuring tools (tape measure, ruler, calipers)
- Soldering iron and solder
-
Drill and screws for assembly
-
Calculate Element Lengths:
- Determine the wavelength (λ) for your target frequency using the formula:
[ \lambda = \frac{300}{f_{MHz}} \quad \text{meters} ] - The reflector is typically about 5% longer than λ/2.
- The driven element is approximately λ/2.
- The directors are shorter, roughly 5% shorter than λ/2.
-
For example, at 137 MHz (typical NOAA weather satellites), λ ≈ 2.19 meters.
-
Assemble the Elements on the Boom:
- Position the reflector at one end of the boom.
- Mount the driven element in the middle with insulated mounts to avoid short circuits.
- Space directors in front of the driven element at calculated distances (commonly 0.15λ).
-
Secure all elements firmly.
-
Attach the Feedline:
- Connect the coaxial cable to the driven element using soldered connections to ensure good conductivity.
-
Use a balun (1:1) if possible, to reduce signal loss and balance feedline currents.
-
Check and Tune the Antenna:
- Use an SWR (Standing Wave Ratio) meter or antenna analyzer to measure antenna resonance.
- Adjust element lengths slightly to optimize SWR and maximize signal reception on your target frequency band.
Tips for Constructing Other DIY Antennas
Apart from Yagi antennas, helical antennas and turnstile antennas are excellent for certain satellite signals, especially where circular polarization is required. These designs can be constructed using similar tools and materials but may need precise winding and spacing of wires.
- Helical antennas are great for 3D circular polarization, improving reception quality from satellites transmitting right-hand or left-hand circular polarization (RHCP or LHCP).
- Turnstile antennas offer wide-angle reception without steering, suitable for stationary or wide-area satellite tracking setups.
Advantages of Building Your Own Antenna
- Cost-effective: Utilize common materials and salvage parts for a fraction of commercial antenna prices.
- Customizable: Design antennas targeting specific satellites or frequency bands, optimizing gain and directivity.
- Educational: Gain deeper understanding of radio frequency principles, wave propagation, and antenna design crucial in space engineering.
- Portable: Build lightweight and compact antennas suitable for fieldwork and mobile satellite tracking sessions.
By integrating a DIY antenna into your satellite tracking gear, you’ll experience stronger, clearer satellite signals, enabling improved data reception, telemetry decoding, and overall richer satellite observation. This hands-on approach perfectly complements the affordable radios and software tools discussed earlier, providing an enhanced amateur satellite tracking system tailored to your astronomy interests.
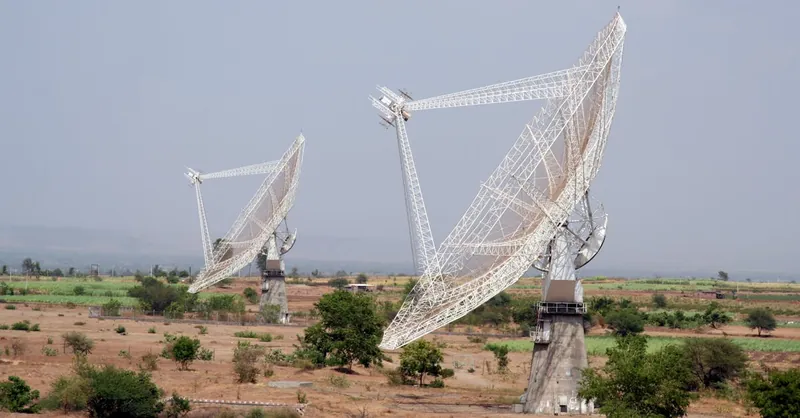
Image courtesy of Sachin Kumar Wadhwa
Techniques for Visual Satellite Tracking and Identification
Spotting and identifying satellites visually with amateur equipment like binoculars or telescopes is a rewarding skill that enhances your astronomy experience. To successfully track satellites by eye and differentiate between various types, you need practical tips on timing, observation techniques, and identification cues.
Practical Tips for Spotting Satellites
-
Choose the Right Time and Conditions
Satellites are most visible shortly after sunset or before sunrise when the sky is dark, yet satellites are still illuminated by the Sun. Aim to observe during these twilight windows for the best chance to see satellites reflecting sunlight against a dark backdrop. -
Use Binoculars or a Low-Power Telescope
While many brighter satellites like the International Space Station (ISS) are visible to the naked eye, binoculars (7x50 or 10x50) help reveal smaller, fainter satellites and provide a wider field of view than telescopes. For detailed tracking or astrophotography, a telescope with a motorized or manual tracking mount can follow fast-moving satellites more precisely. -
Scan the Correct Sky Regions
Use satellite tracking apps or websites to know exact azimuth and elevation angles for upcoming passes. Start scanning the sky along the predicted trajectory, as satellites typically appear as steady, bright points moving linearly at a consistent speed across the sky—unlike airplanes or meteors.
How to Identify Satellites Visually
- Steady Motion Without Flickering: Satellites move smoothly and steadily; they do not blink or change brightness abruptly like airplanes or helicopters.
- Speed and Path:
- LEO satellites such as the ISS soar rapidly, crossing the sky in 3 to 5 minutes, following a straight path.
- Geostationary satellites appear fixed in one spot and are generally too faint or small to see, but their signal transmissions can be detected with equipment.
- Brightness Variations (Satellite Flares): Some satellites, especially those with reflective surfaces like solar panels, can produce sudden bright flares (e.g., Iridium flares), which are predictable and highly visible.
Timing Satellite Passes Accurately
To time satellite passes optimally:
- Consult reliable tracking sources such as Heavens-Above or Celestrak to get precise pass start and end times, trajectory azimuths, and elevation angles.
- Arrive a few minutes early to establish your viewing position and equipment alignment.
- Use a stopwatch or timing app to record pass durations, which helps in confirming satellite identities by matching observed times with predicted passes.
- Maintain steady tracking by following the satellite's predicted path using reference stars or landmarks.
Mastering these visual tracking techniques will allow you to distinguish satellites from other sky phenomena confidently and schedule your observation sessions for maximum success. Combined with your affordable binoculars, telescopes, and tracking software, these practical tips transform casual satellite spotting into a systematic, engaging astronomy practice that anyone with basic amateur equipment can enjoy.

Image courtesy of Francesco Ungaro
Capturing Satellites with Astrophotography Gear
Photographing satellites adds a dynamic dimension to your astronomy hobby, allowing you to capture stunning satellite trails and spectacular satellite flares with amateur astrophotography equipment. To achieve crisp, well-defined images of these fast-moving objects, it’s crucial to fine-tune your camera settings, utilize appropriate tracking mounts, and understand the timing and conditions for capturing satellite events effectively.
Best Camera Settings for Satellite Photography
Capturing satellites requires balancing exposure time, ISO, and focus to accommodate their speed and brightness:
- Shutter Speed:
- For satellites in Low Earth Orbit (LEO) moving quickly across the sky, use short exposure times (typically 1 to 10 seconds) to avoid overly blurred trails, unless you want to capture elongated trails deliberately.
-
For static geostationary satellites or when photographing satellite flares, longer exposures may be used (up to 30 seconds) with manual tracking.
-
ISO Sensitivity:
- Set ISO between 800 and 3200 to ensure sufficient sensor sensitivity under dark-sky conditions without introducing too much noise.
-
Adjust ISO dynamically depending on ambient light conditions and satellite brightness.
-
Aperture:
-
Use a wide aperture (f/2.8 to f/5.6) to gather maximum light quickly, essential for short exposure times.
-
Focus:
-
Focus manually to infinity and verify sharpness using bright stars before the satellite pass.
-
Lens Choice:
- Wide-angle lenses (14mm to 35mm) are excellent for capturing satellite trails spanning large portions of the sky, while telephoto lenses (70mm and above) are suited for detailed shots of bright satellites, such as the ISS or bright Iridium flares.
Tracking Mounts for Smooth Satellite Photography
A motorized equatorial mount or alt-azimuth tracking mount is vital for following satellites as they traverse the sky, especially for longer exposures where motion blur could otherwise ruin your images. Key considerations include:
- Motor Speed and Responsiveness: The mount should be capable of adjusting quickly to the rapid angular motion of LEO satellites, which can move at several degrees per second.
- Compatibility with Software: Integration with satellite tracking software like Orbitron or Gpredict allows your mount to receive real-time position data, enabling automatic, precise tracking.
- Payload Capacity: Ensure your mount supports the weight of your camera and lens, balancing stability with portability.
For beginners, fixed tripod setups paired with short exposures can still yield impressive satellite trail photographs, especially during predictable pass events.
Effectively Capturing Satellite Flares and Trails
Satellite flares, such as those produced by Iridium satellites, are sudden bursts of reflected sunlight lasting a few seconds and can appear brighter than most stars or planets. To effectively capture these rare but spectacular events:
- Use prediction tools like Heavens-Above to know the exact time, azimuth, and elevation of upcoming flares.
- Pre-focus your camera on the predicted region of the sky before the flare occurs.
- Set your camera on continuous shooting mode or use an intervalometer to maximize capture chances during the brief flare window.
- Opt for short exposures of 1-5 seconds to prevent overexposure of the flare and minimize background noise.
When photographing satellite trails, extend exposure times up to 30 seconds or more depending on the speed of the satellite and your creative intent. Longer exposures beautifully illustrate the satellite’s path as a glowing streak against star fields, emphasizing motion and the dynamic nature of objects orbiting Earth.
Mastering these astrophotography techniques complements your satellite tracking skills by transforming fleeting satellite appearances into lasting, shareable images. Optimal camera settings combined with reliable tracking mounts ensure you never miss capturing those cosmic travelers blazing across the night sky, enriching both your astronomy portfolio and your connection to satellite observation.

Image courtesy of William Carvalho
Decoding Satellite Signals: Using Software-Defined Radios (SDR)
Unlocking the rich stream of data transmitted by satellites is now within reach of amateur astronomers thanks to the rise of Software-Defined Radios (SDRs). SDRs are versatile radio receivers whose functionality is largely defined by software rather than fixed hardware components. This flexibility enables hobbyists to receive, decode, and analyze a wide array of satellite telemetry signals—including weather data, amateur radio transmissions, and even satellite health information—using affordable, compact equipment.
What Is Software-Defined Radio?
At its core, a Software-Defined Radio replaces traditional radio hardware components with software algorithms running on a computer or embedded system. This means a single SDR device can tune across a broad frequency spectrum, demodulate multiple signal types (FM, AM, SSB, digital modes), and support custom decoding protocols through open-source or proprietary software. This adaptability is a game-changer for amateur satellite tracking because it allows:
- Wideband spectrum access: SDRs can cover VHF (Very High Frequency) and UHF (Ultra High Frequency) bands where many satellites transmit.
- Signal demodulation flexibility: Different satellites use diverse modulation schemes; SDRs can switch modes effortlessly.
- Digital signal processing: Advanced filtering, noise reduction, and decoding can be performed in software, enhancing signal clarity.
How SDR Empowers Amateur Satellite Reception and Decoding
By pairing an SDR with a suitable antenna (such as a DIY Yagi or helical antenna), amateurs can intercept live satellite transmissions and decode telemetry packets—data relayed by satellites about their status, location, and onboard sensors. Popular SDR models like the RTL-SDR dongle are particularly favored for their low cost and community support, making them ideal entry points for beginners.
Here’s how SDR technology transforms satellite tracking for amateur enthusiasts:
- Real-Time Spectrum Monitoring: SDR software provides visual spectrograms and waterfall displays, enabling users to identify active satellite signals within crowded frequency ranges.
- Telemetry Decoding: Specialized software plugins decode digital telemetry protocols (e.g., AX.25 for amateur satellite communications or NOAA APT signals for weather satellites), converting raw RF signals into readable data like images or status updates.
- Flexible Frequency Coverage: SDRs cover multiple frequency bands, allowing reception from LEO satellites transmitting in the VHF/UHF spectrum as well as geostationary satellites with appropriate antennas.
- Integration with Tracking Software: When combined with satellite tracking applications (e.g., Orbitron or Gpredict), SDR receivers can automatically tune to satellites during their passes, enabling seamless monitoring and data capture.
Getting Started with SDR for Satellite Signal Decoding
Setting up an SDR for satellite reception involves a few essentials:
- Hardware: A popular RTL-SDR USB dongle or other SDR devices like Airspy or HackRF.
- Antenna: Directional antennas tuned for satellite frequencies improve signal strength and reduce interference.
- Software: SDR# (SDRSharp), GQRX, SDR Console, and decoding tools such as WXtoImg (for weather satellites) or Digital Modes software for amateur radio satellites.
- Tracking Data: Up-to-date Two-Line Element (TLE) sets provide accurate satellite orbits enabling predictive frequency tuning and antenna positioning.
Embracing SDR technology opens a rich dimension to amateur satellite tracking, turning your computer and modest radio gear into a powerful space communications receiver. This hands-on approach not only enhances your satellite observation toolkit but also deepens your understanding of signal processing, radio frequency engineering, and space telemetry—key skills in planetology, astrophysics, and space engineering domains.
Image courtesy of Pixabay
Analyzing Satellite Data and Common Challenges
Interpreting satellite signal data and managing interference are pivotal skills for amateur satellite trackers aiming to extract meaningful information from their observations. When receiving satellite transmissions—whether telemetry data, voice communication, or beacon signals—understanding the nuances of signal decoding and troubleshooting common reception problems can significantly improve your tracking success and data quality.
Interpreting Signal Data: Key Considerations
Satellite signals often come in diverse formats, including analog voice, digital telemetry, and various modulation schemes such as FM, AM, SSB, or digital modes like BPSK and QPSK. To analyze these signals effectively:
- Identify the modulation type and frequency band to configure your SDR or radio receiver appropriately. Matching your hardware settings to the satellite’s transmission parameters is essential for clean signal capture.
- Use specialized software decoders tailored to satellite signal protocols. For example, NOAA weather satellites transmit analog APT signals decodable into weather images, while amateur radio satellites may use AX.25 packet radio formats needing corresponding software.
- Monitor signal strength and quality indicators (e.g., SNR—Signal-to-Noise Ratio) to assess reception health and adjust antenna orientation or filtering accordingly.
- Document data timestamps and satellite orbital parameters during data acquisition to correlate signal content with satellite position and behavior.
Managing Interference and Noise
Interference poses a major obstacle in amateur satellite tracking due to the crowded RF spectrum and ubiquitous local noise sources. Common interference issues include:
- Terrestrial sources such as Wi-Fi routers, mobile phones, and broadcast stations overlapping satellite frequencies.
- Multipath reflections causing signal fading or distortion, especially in urban or obstructed environments.
- Cross-band interference when multiple satellites or terrestrial signals transmit close in frequency.
Mitigation strategies consist of:
- Using directional antennas (Yagi, helical) with good front-to-back ratios to attenuate off-axis noise.
- Employing bandpass filters and low-noise preamplifiers to boost desired signals and suppress out-of-band interference.
- Selecting observation sites away from heavy RF pollution, ideally elevated and with clear horizons.
- Coordinating tracking schedules around quieter spectrum periods when possible.
Troubleshooting Common Issues Faced by Amateurs
Amateur satellite trackers often encounter problems that can hinder effective signal reception and data analysis. Key troubleshooting tips include:
- Weak or no signal reception:
- Verify antenna connections and polarity.
- Check that tracking software is updated with current TLE data for accurate satellite positioning.
-
Ensure the antenna is correctly polarized (linear or circular) matching the satellite’s transmission mode.
-
Frequent signal dropouts or distortion:
- Investigate local interference sources and try repositioning or reorienting antennas.
- Test different coaxial cables or connectors to rule out hardware faults.
-
Adjust SDR gain settings to avoid signal clipping or excessive noise amplification.
-
Inconsistent decoding or garbled data:
- Confirm software decoder settings match modulation parameters precisely.
- Update or switch to alternative decoding software compatible with your target satellite’s protocol.
- Resynchronize frequency tuning based on live satellite Doppler shifts during overhead passes.
By mastering these data analysis techniques, embracing interference management best practices, and applying practical troubleshooting measures, amateur satellite enthusiasts can optimize their reception setups. This leads to higher quality data capture, more reliable satellite identification, and a richer amateur space observation experience—transforming raw RF signals into valuable insights about the orbiting objects above.
Image courtesy of Pixabay
Integrating Satellite Tracking with Space Engineering Projects
Amateur satellite tracking offers more than just observational enjoyment—it serves as a powerful foundation for personal space engineering experiments and collaborative projects. By leveraging real-time satellite tracking data alongside affordable hardware and software, hobbyists can design, test, and validate space-related engineering concepts, contributing meaningfully to the broader space community.
Using Tracking Data for Personal Space Engineering Experiments
With access to precise satellite orbital parameters and signal telemetry, amateurs can:
-
Experiment with Signal Propagation and Antenna Design
Analyze how different antenna configurations affect signal reception quality during satellite passes, leading to iterative improvements in antenna gain, polarization, and directivity. This practical feedback loop deepens your understanding of electromagnetic wave behavior in real-world conditions. -
Develop Autonomous Tracking Systems
Combine tracking software outputs with microcontrollers (like Arduino or Raspberry Pi) to create automated antenna rotators that dynamically follow satellites across the sky. This hands-on integration of hardware and software solidifies skills in robotics, control systems, and embedded programming—key areas in space engineering. -
Validate Orbital Predictions and Tracking Accuracy
Use your tracking observations to compare actual satellite positions against published Two-Line Element (TLE) datasets. Detecting discrepancies sharpens knowledge of orbital mechanics and exposes you to concepts such as orbital decay, perturbations, and atmospheric drag affecting satellite trajectories. -
Test Satellite Communication Protocols
By decoding real telemetry and amateur radio satellite signals, you can experiment with data packet transmission, error correction techniques, and modulation schemes. This practical engagement aligns closely with space communication engineering and protocol design challenges.
Opportunities for Collaborative Space Engineering
Engaging with the amateur satellite tracking community unlocks access to DIY CubeSat projects, citizen science initiatives, and open-source space engineering collaborations. Here’s how you can integrate your tracking capabilities:
-
Contribute to CubeSat Telemetry Monitoring
Many educational and research CubeSat projects broadcast telemetry openly. Your tracking and decoding setup can collect valuable data supporting mission operations, anomaly detection, and science experiments. -
Participate in Distributed Ground Station Networks
By networking with other amateurs worldwide, you can form a global tracking and data collection web that increases temporal coverage of satellite passes, enhancing data quality and availability for space research. -
Collaborate on Antenna and Receiver Design Innovations
Sharing performance data from your DIY antennas and SDR setups fuels community-driven improvements, propelling affordable technology development crucial to emerging space enterprises. -
Engage in Space Environmental Monitoring
Track space debris or monitor satellite flares and radio frequency interference, contributing to crowd-sourced datasets that inform space traffic management and orbital safety efforts.
By integrating amateur satellite tracking into your personal or group space engineering projects, you transform your hobby into a practical engineering discipline. This fusion not only refines your technical skills across systems engineering, radio communications, and orbital mechanics but also positions you as an active participant in the evolving ecosystem of space exploration and technology development.
Image courtesy of Chris Lyo
Safety and Ethical Considerations in Satellite Tracking
While satellite tracking with amateur equipment opens exciting opportunities, it is essential to understand and respect legal boundaries, privacy issues, and responsible tracking practices. Adhering to safety and ethical guidelines not only protects you from potential legal trouble but also fosters a respectful, sustainable community of space enthusiasts.
Legal Boundaries and Compliance
Satellite signals typically originate from government, commercial, or private spacecraft, each subject to national and international regulations. When tracking or decoding satellite transmissions:
- Avoid unauthorized interception or distribution of encrypted or classified signals. Many satellite communications are protected by law, and unauthorized access may violate regulations such as the Communications Act or similar legislation in your country.
- Confirm that the frequencies you intend to monitor are within the permissible bands for amateur reception. Using equipment to transmit on unauthorized frequencies or interfering with official communication channels is illegal and can lead to penalties.
- Stay updated on licensing requirements. Some countries require amateur radio licenses or permits for operating certain tracking or receiving equipment.
Respecting these legal frameworks ensures your satellite tracking activities remain legitimate and support broader spectrum management efforts.
Privacy and Ethical Tracking Practices
Satellites may carry sensitive data, including Earth observation imagery or communications that could impact individual or organizational privacy. Ethical satellite tracking involves:
- Focusing on publicly available telemetry and signals designed for open reception. Avoid attempts to intercept private communications or proprietary data.
- Using tracking data responsibly, without exploiting information to harm or unduly surveil individuals or private interests.
- Respecting geographic and political sensitivities. Be aware of local laws concerning satellite data in your region and any restrictions on disseminating certain types of imagery or telemetry.
By practicing transparency and discretion, amateur trackers contribute positively to the space observation community’s reputation.
Promoting Responsible Practices in Amateur Satellite Tracking
To cultivate a safe and ethical satellite tracking hobby, consider these best practices:
- Educate yourself continuously on legal updates, frequency allocations, and data privacy standards relevant to satellite tracking.
- Participate in community forums and organizations that emphasize responsible use and share best practices.
- Use equipment within designated parameters and avoid modifications that could increase transmission power or unintended emissions.
- Report any observed anomalies or potential security concerns through appropriate channels without publicizing sensitive information.
- Encourage dialogue and cooperation among trackers, space agencies, and regulatory bodies to advance knowledge while respecting legal and ethical boundaries.
Adhering to these principles not only safeguards your amateur satellite tracking pursuits but also helps foster a respectful, law-abiding community dedicated to the peaceful exploration and study of space. This responsible approach aligns with the broader interest in space sustainability and the ethical stewardship of our shared orbital environment.
Image courtesy of Pixabay